
The Simple Router template provides an easy framework for the creation of a routing bot.
Included items
Dialogs
- Welcome
- Presents the multiple choice interaction to the customer. Each multiple choice response represents a skill.
- Reprompt
- The multiple choice interaction responses can be clicked or the customer can also type an answer. In the event that the bot does not understand the customer's response, this dialog will reprompt the welcome dialog.
- No Agents Available
- In the event that the customer could not be transferred to a skill, this dialog will trigger.
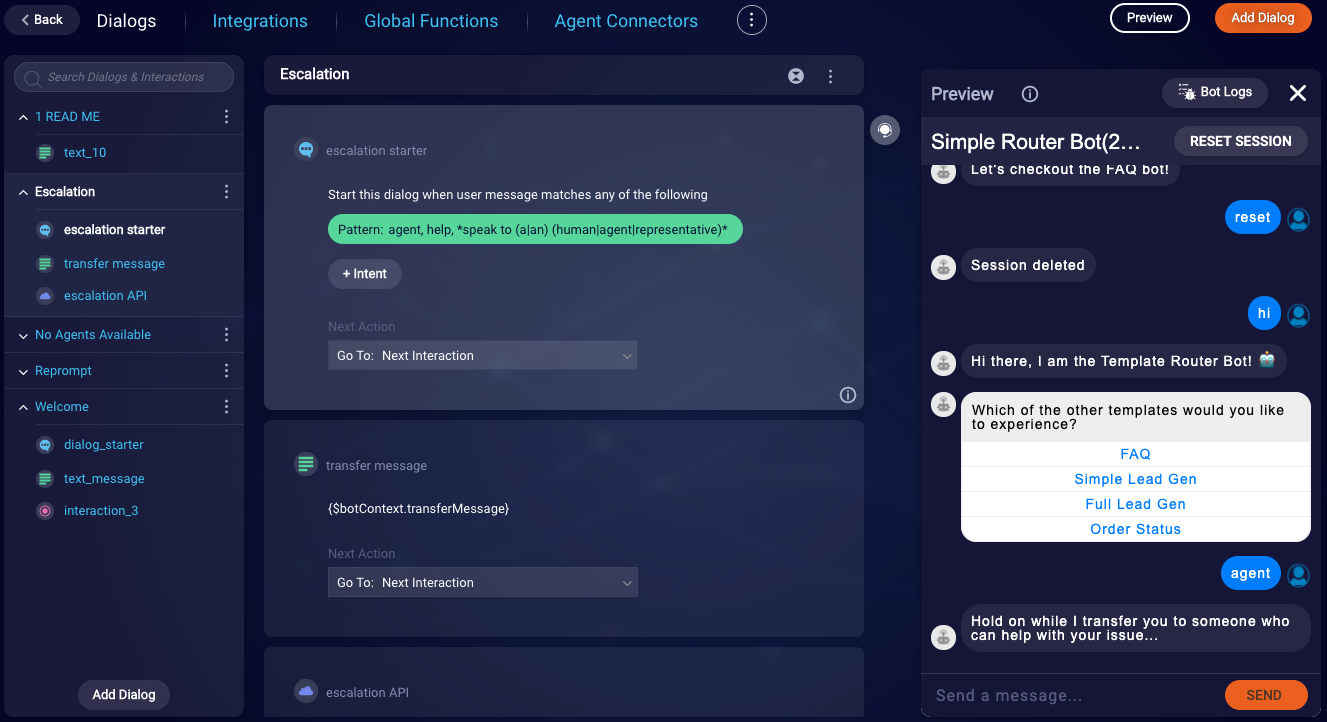
- Escalation
- When a user answers the Welcome dialog's multiple choice, this dialog will trigger and begin the transfer process.
Integrations
- Escalation
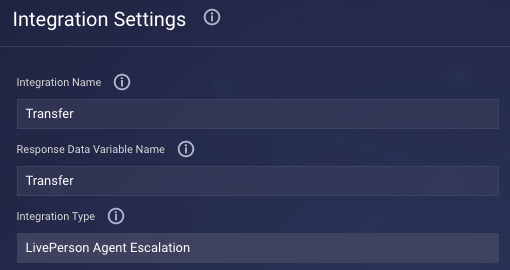
- This integration posts a configuration payload to a LivePerson hosted service that will route the customer to a different skill.
-
In the Integrations area, there should be a pre-configured integration named “Transfer” and “LivePerson Agent Escalation” should be selected in the Integration Type menu.
-
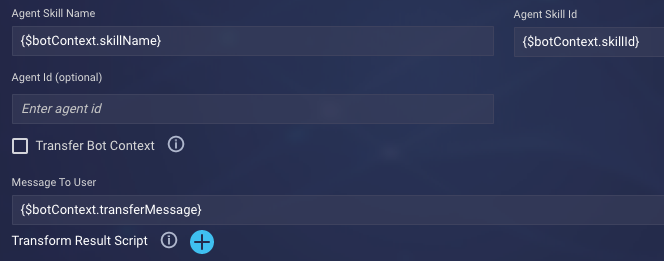
The “skillName”, “skillId” and “transferMessage” variables will be populated via our Global Function. You do not need to change anything here.
Configuration needed
To customize this template, you will need to do the following.
Welcome dialog
In the Welcome dialog, in the Dialog Starter interaction, click the defined "hi" patterns. In the Interaction Settings, edit the patterns.
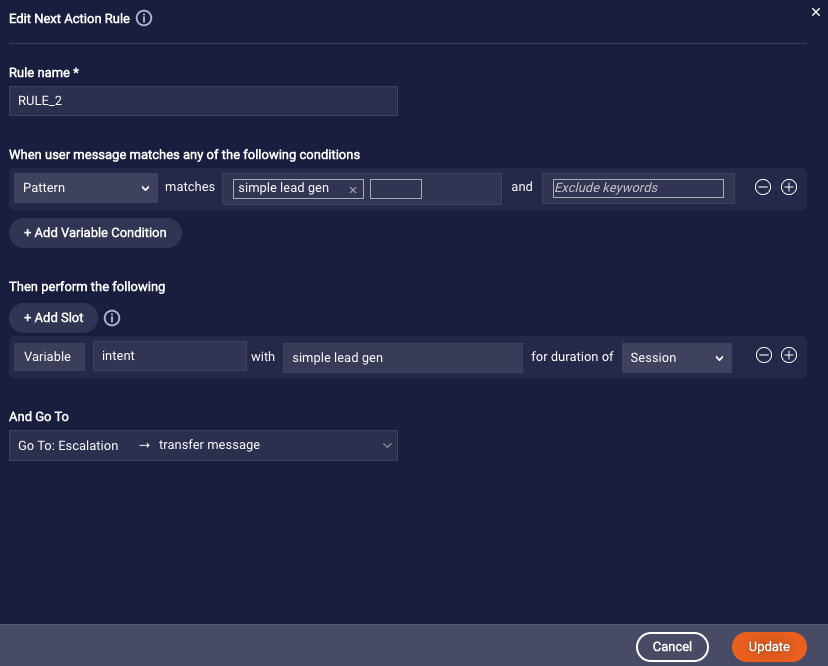
In the Multiple Choice interaction, edit each option text for your skills. Then edit the custom rules for the new skills. You will need to edit the Conditions patterns and and intent variable value for each. Of course, you should add or remove rules depending on how many skills you plan to route to.
Reprompt dialog
Customize the text response to match your brand voice.
No Agents Available dialog
Customize the text response to match your brand voice.
Global Functions
The last thing to do is customize some important variables in the Global Functions.
When you click Global Functions at the top of LivePerson Conversation Builder, you should see a block of code. Within this block of code, there is a switch statement:
switch(intent){
    case "faq":
      transferMessage = "Let's checkout the FAQ bot!";
      skillId = '1678104230';
      skillName = intent;
      break;
    case "simple lead gen":
      transferMessage = "Let's checkout the Simple Lead Gen bot!";
      skillId = '1678105630';
      skillName = intent;
      break;
    case "full lead gen":
      transferMessage = "Let's checkout the Full Lead Gen bot!";
      skillId = '1678104930';
      skillName = intent;
      break;
      case "order status":
      transferMessage = "Let's checkout the Order Status bot!";
      skillId = '1678107030';
      skillName = intent;
      break;
    default:
      transferMessage = "Hold on while I transfer you to someone who can help with your issue…";
      skillId = '1680373730';
      skillName = 'help';
      break;
  }
For each of your skill options:
-
Edit the
caseto match the intent variable values of your skill names. -
Edit the
transferMessageto match the name of your skills. -
Edit the
skillIdto match that of your skills. The skill ID is displayed in the URL in Conversational Cloud when you click on an individual skill. -
The
skillNameis being set to the name of the intent, but if you want to customize it you can.
You might add or remove case branches as needed for the number of your skills.
Deploy Your Bot
To connect your bot to Conversational Cloud, follow the instructions. You can also try the Deploy the Bot tutorial.
Now you can test your routing bot and see how it routes to your skills.