
This section describes how to register an OAuth 2.0 grant type Client Credentials application and how to generate an access token. This is the preferred way to authorize machine-to-machine communication.
For bots login applications with client_credentials, please follow the Bot Applications with oAuth2 client_credentials guide.
Step 1: Generate client_id and client_secret
There are two ways to install a client_credentials application.
Self Service UI
-
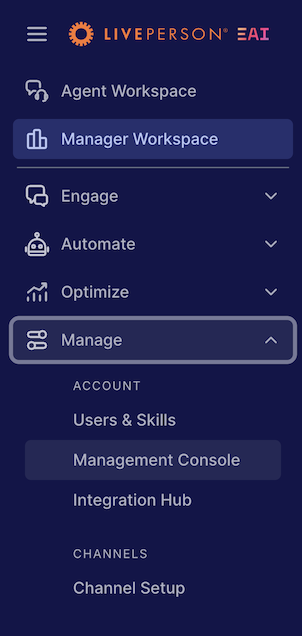
Log into Conversational Cloud with Administrator permissions and open the Manage area, Manage > Management Console.
-
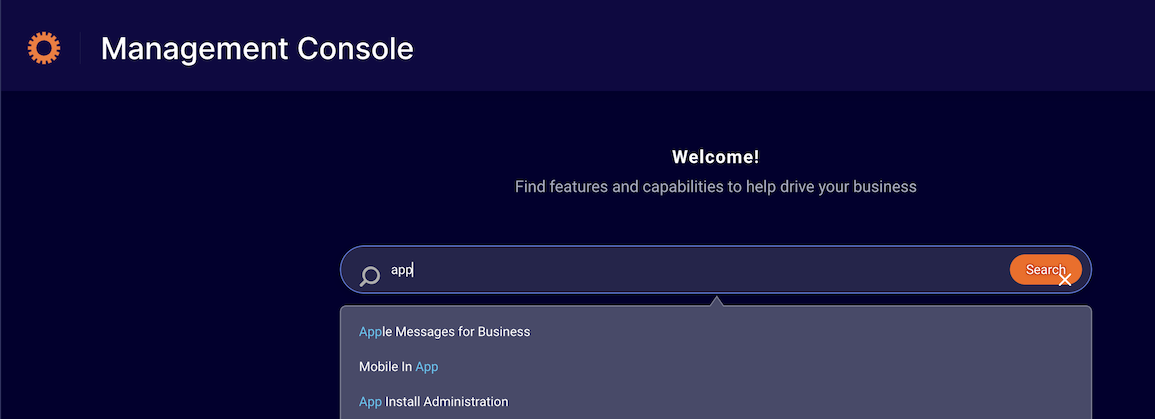
Type "Application Install" in the search bar & select the item in the results, then click "Proceed to Configure"
-
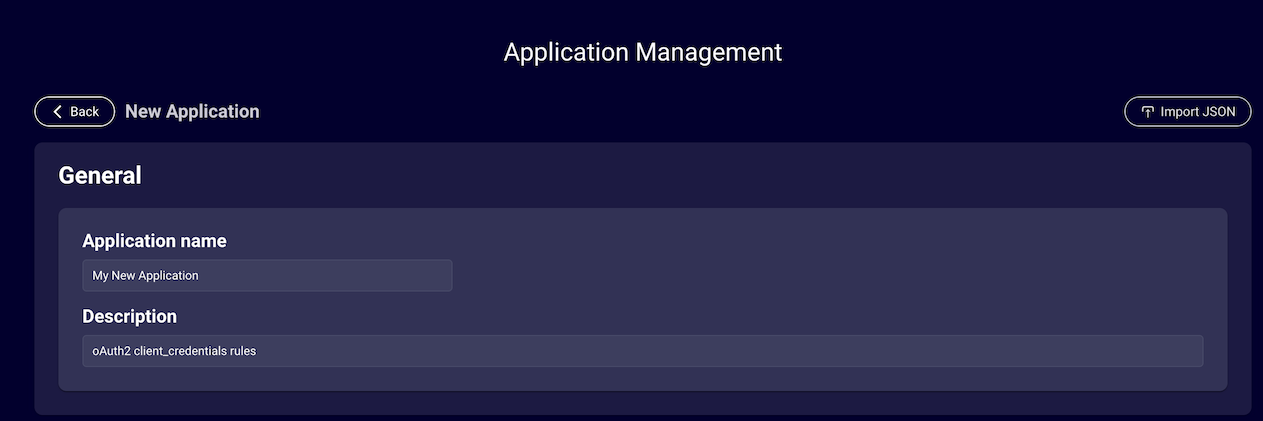
Click on the "Create Application" button to begin configuring your client_credentials application.
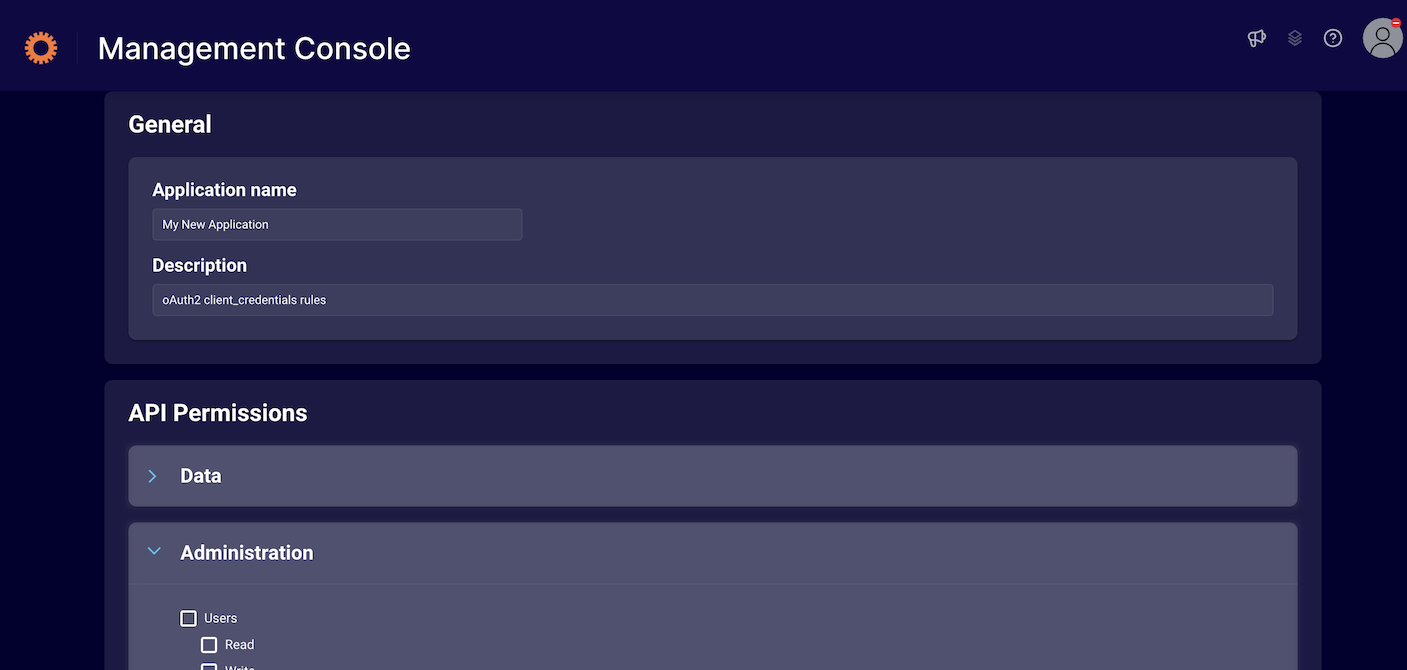
{: .attn-note} Some APIs are not ready for consumption of oAuth2 client_credentials. They are shown as grayed out and will be available to configure in the future.
- Click save when you are finished, you will be redirected back to the application list.

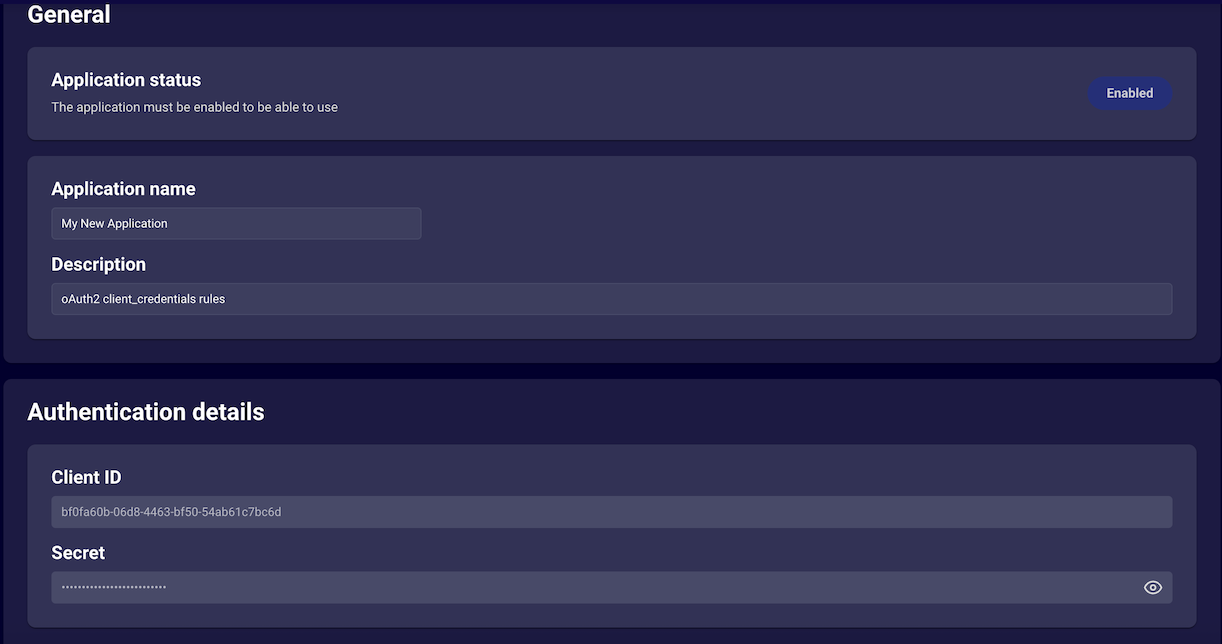
- You can retrieve your newly created applications client_id & client_sercret by selecting "edit" on the application from the list.
Application Schema Upload via Self Service
- Execute the App Installation process in order to generate a
client_idandclient_secretfor the OAuth 2.0 flow. This can be either be done via Self Service using the "upload" button or by your LivePerson account team, so you should contact them for more assistance (you can also see this guide for more detailed information). You can use this JSON as a base template for requesting an App Installation:
{
  "client_name": "My First App",
  "description": "This is my first App",
  "grant_types": [
    "client_credentials"
  ],
  "response_types": ["token"],
  "scope": "<API Scopes>"
}
The client_id and client_secret will be given to you after application registration.
Step 2: Retrieve the domain of the authorization server
You will need to pass your client_id and client_secret to one of our authorization servers for authentication. Depending on your account, you can use the following servers (the base domain is: sentinel):
-
APAC: sy.sentinel.liveperson.net
-
EMEA: lo.sentinel.liveperson.net
-
US: va.sentinel.liveperson.net
However, instead of hardcoding the authorization server, it is recommended to use the LivePerson Domain API to retrieve this information by providing the service name sentinel and retrieving the host address dynamically.
Step 3: Generate OAuth 2.0 access token
Together with the retrieved domain of the authorization server and the client_id + client_secret, you can now generate an access-token.
"Sentinel", the responsible authorization server, generates access tokens for any rightfully authorized client. The access token is a Json Web Token (JWT) encoding information about the granted access and must be attached to any API request.
API Versioning
We currently have two versions for token generation.
API V1 (Can only be used for Connector API) — This API uses a static private signing key.
Please use the following public key for the JWT signature validation:
MIIBIjANBgkqhkiG9w0BAQEFAAOCAQ8AMIIBCgKCAQEAvGQctwBFFZBaSu+LC4LVk/4/XyVQmhcwM5a91lT7BwZug/GtpR+ZGpKkiZSgTehRdBJKSPjv5K6D8/cBm28OV11Mekjn1PJrveSXrRsfUbOqIHgpfVtnkxN3ZaV6GSWQrrZArkpbAm+Kf5o5jxFPhCadB8BdRGCbMI3rFEkYSFqnmptI3olIAtAjmtbLJnwYZyXl2WZXMBmORLXnV9aTMGp4uFZdX+QbK808q55zxSB5HM3N9B8NLUP1TELc6N2dhWk2RwR/C9WvQYH/UAnxqVEwrAXt+rb+YWuu92Dj4NLAmpEYbRQi+S+5Y6t5g6kX/QMQ/ycdFOW/WA3JoptUSQIDAQAB
The following HTTPS request exemplifies how to get the JWT access token with API V1:
POST /sentinel/api/account/{account_id}/app/token?v=1.0 HTTP/1.1
Host: {sentinel_service_domain}
Content-Type: application/x-www-form-urlencoded

client_id={client_id}&client_secret={client_secret}&grant_type=client_credentials
API V2 — uses a dynamic signing key whose corresponding public key can be retrieved from Sentinel's well-known JWKS endpoint:
https://{sentinel_service_domain}/sentinel/well-known/jwks
The following HTTPS request exemplifies how to get the JWT access token with API V2:
POST /sentinel/api/v2/account/{accountId}/app/token HTTP/1.1
Host: {sentinel_service_domain}
Content-Type: application/x-www-form-urlencoded

client_id={client_id}&client_secret={client_secret}&grant_type=client_credentials
The sentinel_service_domain has been retrieved in step #2.
The account_id is your LivePerson site id.
The content type is always application/x-www-form-urlencoded. Sentinel will answer in accordance with OAuth 2.0. For example, a successful response looks as follows:
HTTP/1.1 200 OK
Date: Mon, 04 Nov 2019 16:00:47 GMT
Content-Type: application/json;charset=utf-8

{ "access_token": "eyJraWQiOiJhcHBqd3QtMTMtMDUtMTciLCJ0eXAiOiJKV1QiLCJhbGciOiJSUzI1NiJ9.eyJhdWQiOiJsZTgxODIzMTE4IiwiYXpwIjoiNzU1ODhlMTgtMDIxMy00ZTMzLTgxNzQtODgzYWNhYzdlM2M0Iiwic2NvcGUiOiJtc2cuY29uc3VtZXIiLCJpc3MiOiJTZW50aW5lbCIsImV4cCI6MTUyNDY0NjI3MCwiaWF0IjoxNTI0NjQyNjcwfQ.aC1EbVQDIKJkrMgfoqhDqo5KZVMILTGP5UnK_4lUJQIfpFcrymvQKU9E6zt_WDhWmM2SOOcr1sz4u5xVZ9rMWZciDW_9KofEM2NDgVw1EVBxAIgGYeO0sbE9o--HKjk9DHZvukJkQFhYaHMDnj6ay4BNUqTJpDn6y3XQY7eh7rM", "token_type": "Bearer" }
In the following example, Postman will be used to better illustrate how external applications can authenticate against the authorization server and execute an invocation. Feel free to import this (Postman Collection) to execute the same steps within your local machine:
-
In your request-tab under your function click on Authorization
-
Select type OAuth 2.0
-
Click on Get New Access Token
-
In the appearing dialog fill out the form:
-
Token Name: The name of the token.
-
Grant Type: Select grant type Client Credentials.
-
Access Token URL: The endpoint for the server, which exchanges the authorization code for an access token. For example:
https://{{domain}}/sentinel/api/v2/account/{{accountId}}/app/token -
Client ID: the generated
client_idyou received from the App Installation (provided by your LivePerson account team). -
Client Secret: the generated
client_secretyou received from the App Installation (provided by your LivePerson account team). -
Scope: leave empty.
-
Client Authentication: Select body.
-
Click on Request Token to send the request and retrieve your token.
-
On the following screen you can see your generated Access Token. You'll use this token to perform the invocation. The access-token will be sent with every API invocation.
-
If you click Use Token, the Access Token will be used for your Postman call.