
Step 1 - Retrieve your domain
Use the LivePerson Domain API to retrieve this information by providing the following service name:
* smt
Step 2 — Configure your Conversational Cloud account
On your Conversational Cloud account, make sure the following features are enabled:
- Messaging
- Authenticated chat
- For sources other than Mobile (e.g. Twilio, Facebook etc.) you should also enable the Conversation Sources feature.
Contact your LivePerson representative (other contact options: chat with us on this page, or message Support) in order to enable the features.
In addition, an authentication server should be configured on the Conversational Cloud account. Refer to the Authentication Guide — Configuration section in the Developer Community for further instructions.
Step 3 — Login to your Account
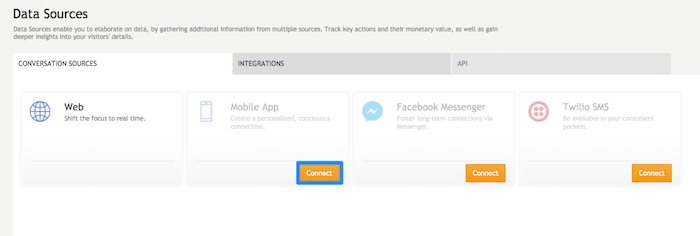
- Login to your account and go to Campaign Builder → data sources → conversation sources tab.
Step 4 — Create a Mobile App in the Conversational Cloud UI or Develop Your Own Private App
In order to utilize the Monitoring API, you will need, among other parameters, an AppInstallationId. In order to do so, you will first need to create an application, either by using the LE UI to create a Mobile App or by developing your own Private App.
Mobile App in the LE UI
- Click on Mobile App → Connect and fill in the details of your application.
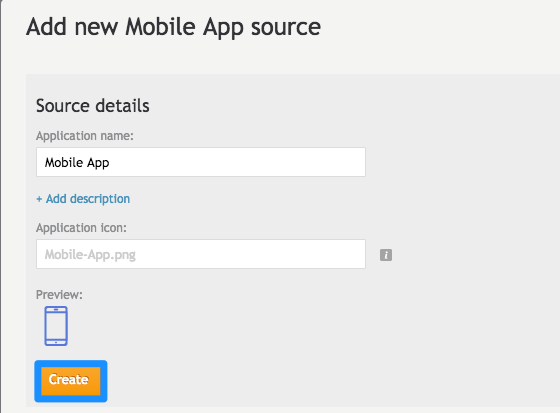
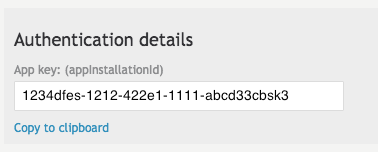
- Click on create and copy the generated app key (AKA
AppInstallationId).
Developing Your Own Private App
Please contact your Account Team to create a Private App and retrieve your AppInstallationId.
You can now create an engagement with the Mobile App or Private App source.
You can now try and get an engagement using the Monitoring API engagement resource
curl -i \
-H "Accept: application/json" \
-H "Content-Type: application/json" \
-X POST -d '{"clientProperties":{"osName": "MAC_OSX","osVersion": "1.2","appVersion": "1.0","deviceFamily": "MOBILE"},"consumerId":"uniqueIdInBrand","engagementAttributes": [{"type": "personal","personal": {"contacts": [{"email":"bbb@test.com","phone":"12345678"},{"email":"aaa@test2.co.il","phone":"98765430"}],"age": {"age":30.0,"year":1985,"month":7,"day":22},"firstname": "test","lastname": "test2","gender": "FEMALE","company": "liveperson"}}]}' \
https://{Monitor-Domain}/api/account/{account-Id}/app/{app-Installation-Id}/engagement?v=1.0
The response will look like this:
{
  "sessionId":"stM0CzMWRye4MZgRBAL4UQ",
  "visitorId":"ZjYWZlYzYzNDE5MTE1OWQ5",
  "pageId":"1674628973",
  "engagementDetails":
    [
      {"campaignId":2695999112,
      "engagementId":2696029112,
      "engagementRevision":3,
      "contextId":"1",
      "connectorId":2696029012,
      "status":"expose"
      }
    ]
}
You could also report on the Impression Display Engagement Attribute once the engagement was displayed by your application with the visitorId and sessionId provided in the response:
curl -i \
    -H "Accept: application/json" \
    -H "X-HTTP-Method-Override: PUT" \
    -H "Content-Type: application/json" \
    -X POST -d '{"clientProperties":{"osName": "MAC_OSX","osVersion": "1.2","appVersion": "1.0","deviceFamily": "MOBILE"},"consumerId":"uniqueIdInBrand","engagementAttributes": [{"type":"impDisplay","campaign":2695999112,"engId":2696029112,"revision":3,"eContext":[{"type":"engagementContext","id":"1"}]}]}' \
    https://{Monitor-Domain}/api/account/{account-Id}/app/{app-Installation-Id}/report?v=1.0&vid=A0ZTA5YTVlYTY5NTI1ODYx&sid=Vo13h4lpShW655STQJi9Jg