
This tutorial explains how to start a Voice or Video Call on consumer side using the Messaging Window API.
Prerequisites
- This guide is for web only. The Messaging Window API must be used in a browser environment and the website must be tagged with lpTag.
- The LivePerson account must have the LiveVoice and/or LiveVideo features enabled. LivePerson Support can help with the enablement.
Important information
The Voice & Video Call feature leverages WebRTC and tries to establish a peer to peer connection between agent and the consumer. To support calls on different devices and networks, additional video relay infrastructure is required to cover scenarios in which a peer to peer connection is not possible. It is recommended to work with the LivePerson Support team to verify that your network infrastructure can support peer to peer connections. On the consumer side, this can not be guaranteed and calls might require an additional relay (TURN) server. For testing purposes, LivePerson will provide such a server using a 3rd party. For production deployments, brands must either set up their own infrastructure or use a 3rd party provider. Your LivePerson representative (other contact options: chat with us on this page, or message Support) can assist you with that step and also outline alternatives to hosting your own infrastructure. LivePerson keeps the right to change the use case of this service at any time in the future.
Step 1 — Set required Feature in Client Properties
In your initConnection request, make sure you add a features property to the clientProperties that contain the CO_BROWSE feature. An example initConnection request that enables the feature would look like this:
{
   "id":"0",
   "type":"InitConnection",
   "headers":[
      {
         "type":".ams.headers.ClientProperties",
         "deviceFamily":"DESKTOP",
         "os":"WINDOWS",
         "features":[
            "CO_BROWSE"
         ]
      },
      {
         "type":".ams.headers.ConsumerAuthentication",
         "jwt":"…"
      }
   ]
}
Step 2 — Start a conversation and trigger a call invitation
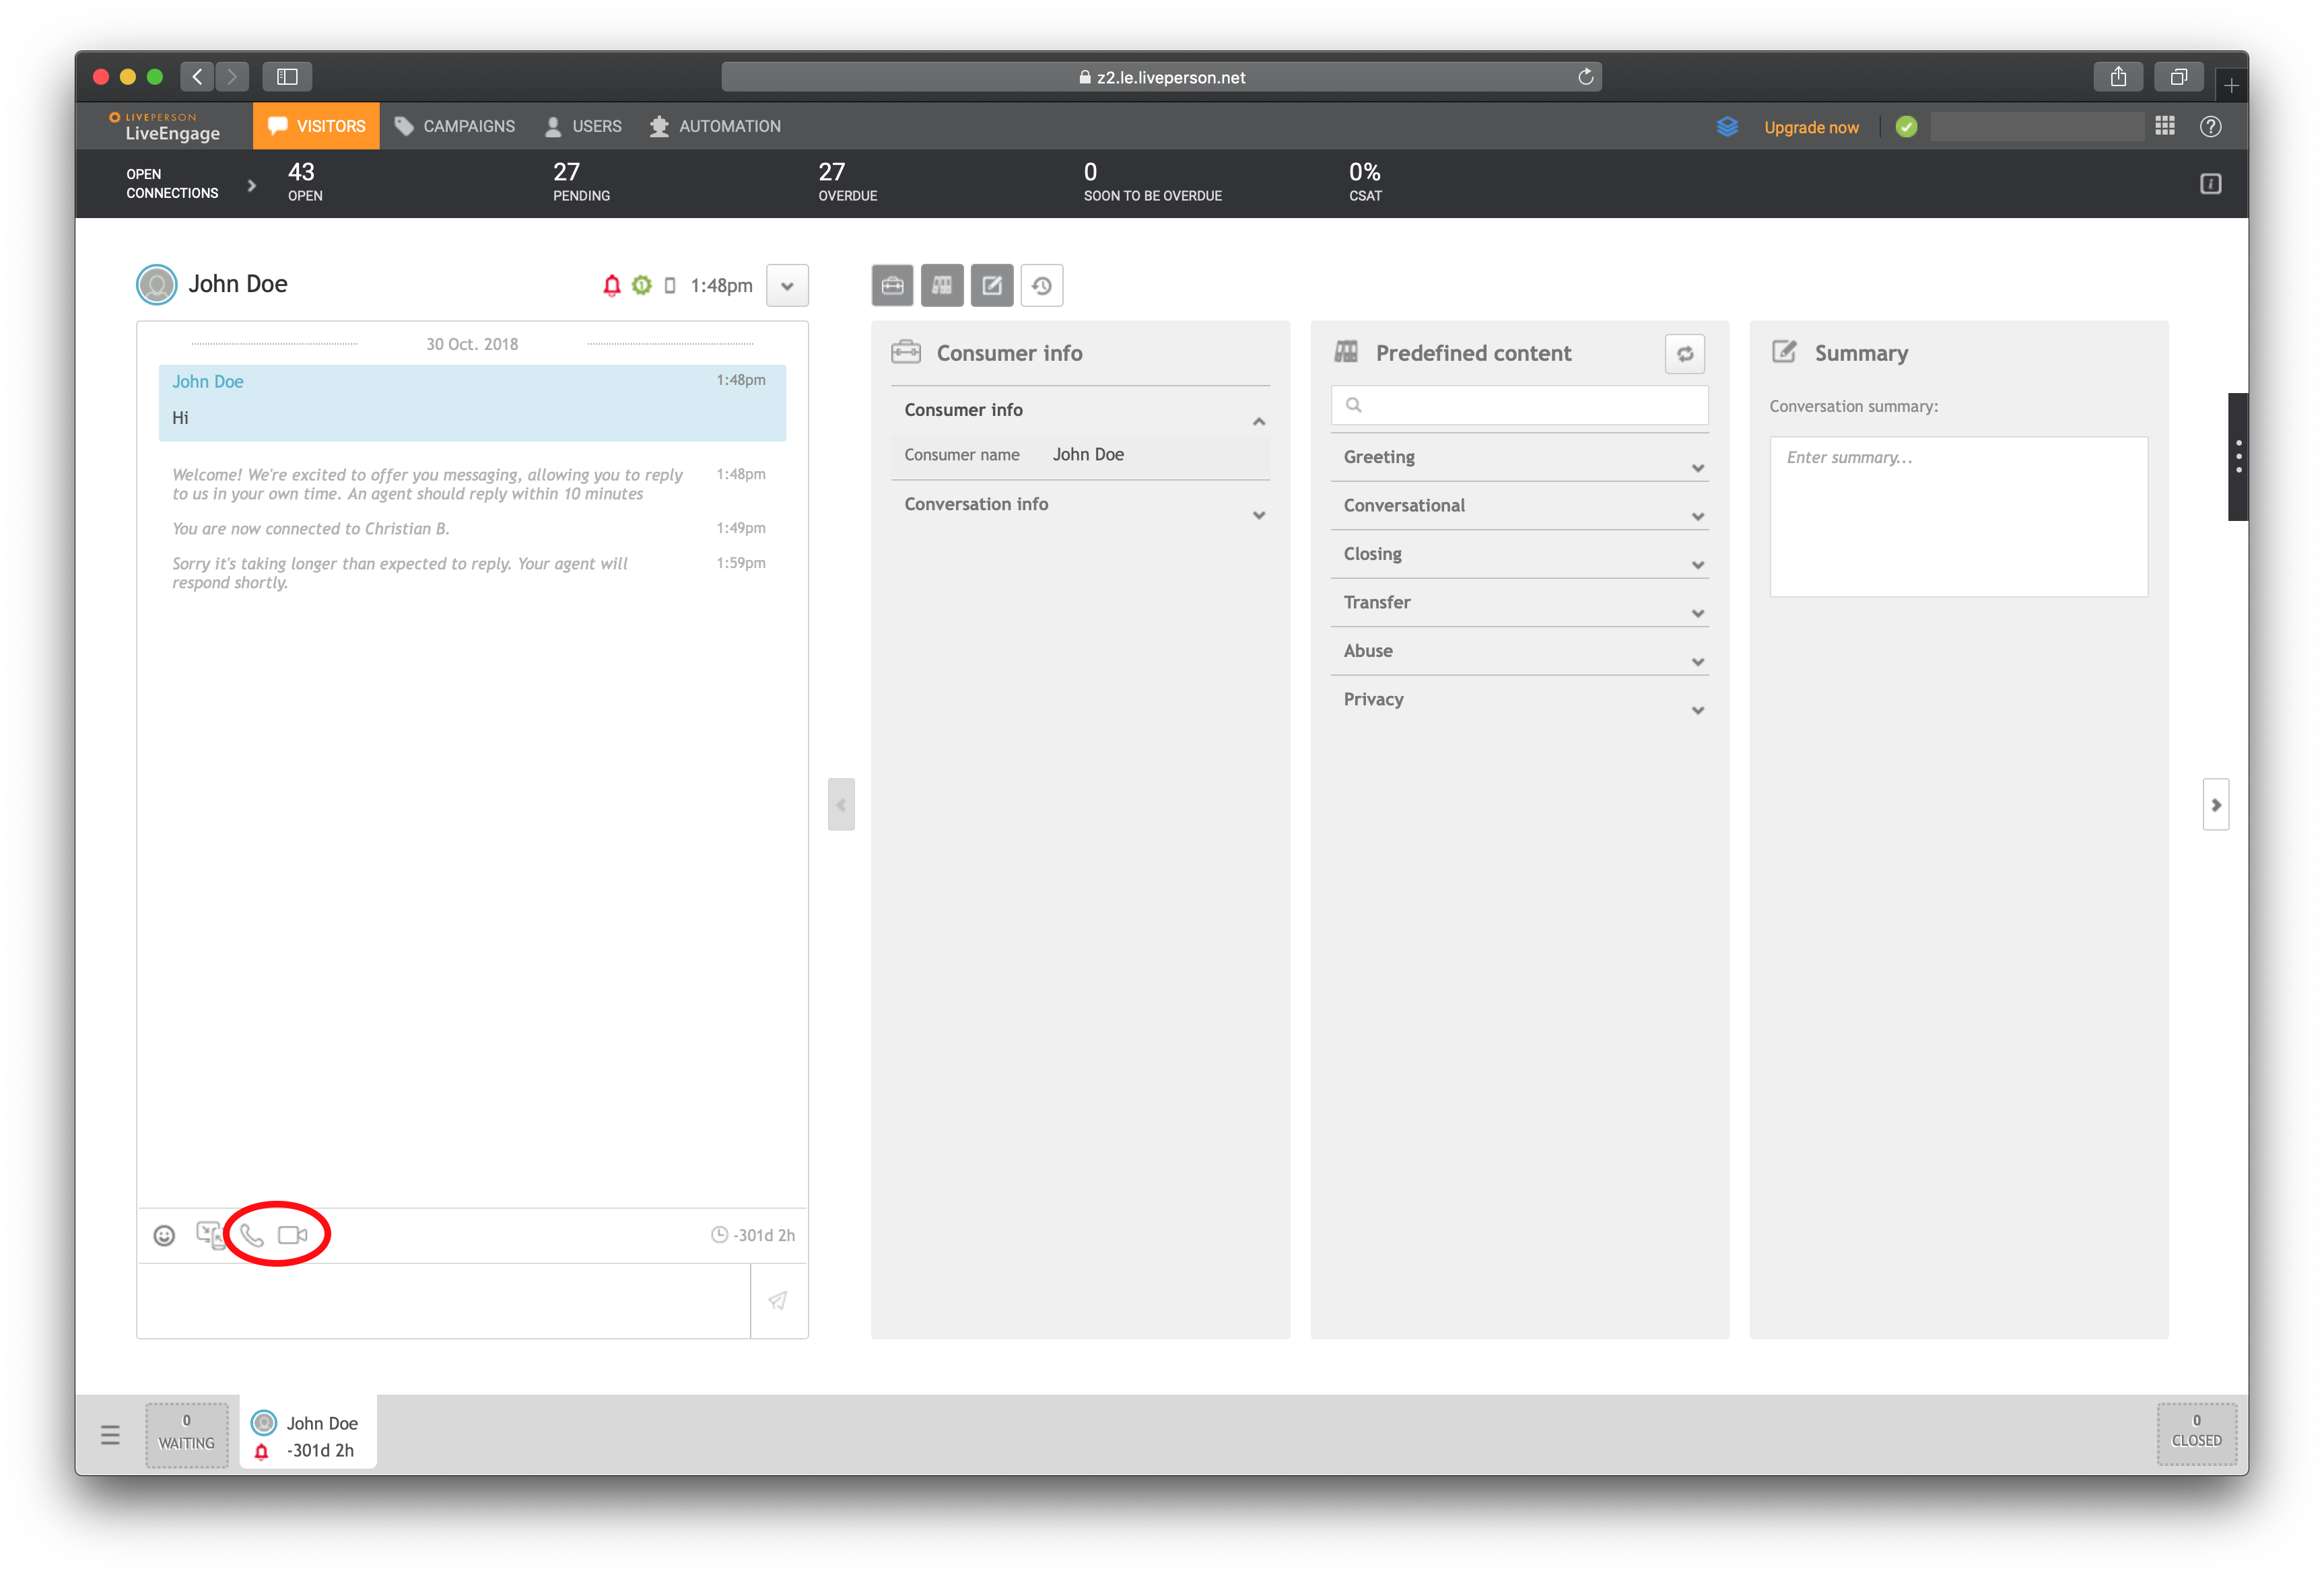
Start a messaging conversation with an agent by following the steps described in the previous tutorials. The important part is to subscribe to Conversation Metadata since the call invitation is sent as part of the metadata. If your account is set up correctly, you should see the following button inside the Agent Workspace that allows you to voice and video calls:
Step 3 — Handle call invitation event on Consumer side
Once the agent sends an invitation, you should see a new event of type cqm.ExConversationChangeNotification. Inside the event, there is a conversationDetails object containing two dialogs. The first one is the existing messaging dialog, the second one is a new dialog with channelType=COBROWSE:
{
    "dialogId": "c26b9d3b-e943-42af-8047-aba830de64ea",
    "participants": [
        "cc05f2b9-916b-496e-89fe-66a46d975ae2",
        "le83624296.356285412"
    ],
    "dialogType": "OTHER",
    "channelType": "COBROWSE",
    "metaData": {
        "serviceId": "cc05f2b9-916b-496e-89fe-66a46d975ae2#7904fffd-fc68-4d93-b611-4dc06ab26bf4",
        "mode": "VIDEO_CALL",
        "expires": 1.502893131855E9,
        "sessionState": "INVITED",
        "dialogId": "c26b9d3b-e943-42af-8047-aba830de64ea"
    },
    "state": "OPEN",
    "creationTs": 1502893041905,
    "metaDataLastUpdateTs": 1502893041905
}
The relevant fields in this dialog are channelType and inside metaData the serviceId, mode and sessionState fields. channelType always equals COBROWSE and can be used to check if the new dialog has the correct type. The serviceId is used to match Consumer and Agent and needs to be passed to the CoBrowse API on the website. mode is equal to the mode that the Agent selected. Possible modes are VOICE_CALL for voice calls and VIDEO_CALL for video calls.
Note you also receive events with different sessionState values in this channel as the dialog session state changes. To ensure the received event is an invitation, you need to check sessionState is equal to "INVITED". This is an important check because the CoBrowse dialog goes through the following changes of state (and sub-state) for internal integrations to work — such as system messages:
-
"ACCEPTED", which is received when the invitation is accepted by the invitee and when the invitee successfully joins the session. Handling this event is not required. -
"CLOSED", see the last section.
After the invitation has been received, trigger the following event on consumer side using the lpTag.events.publish function. In the event, the mandatory fields ssid and svid can have arbitrary non-empty string values, but you can also use the values provided by the monitoring SDK (i.e. lpTag.taglets.lp_monitoringSDK.getSid() and lpTag.taglets.lp_monitoringSDK.getVid()).
lpTag.events.publish("lpCoBrowse", "cobrowseOffered", {
 	serviceId: "<ServiceId from the dialog>",
 	agentId: "<Agent ID>",
 	visitorName: "<Name of the Visitor>",
 	mode: "<Mode from the dialog>",
 	ssid: "<Monitoring Session ID>",
 	svid: "<Monitoring Visitor ID>",
 	//optional parameters:
 	scid: "<Monitoring Context ID>",
 	cid: "<Engagement Context ID>",
 	eid: "<Engagement ID>"
 }
);
Tips for Debugging: lpTag.events.publish can fail if the event contains invalid data. It logs errors in the browser console if you have the debug mode of lpTag enabled (You can enable it when you load your pages with the additional URL parameter lpDebug=2 appended to the URLs). Since the debug logs also contain logs from other irrelevant lpTag components, you can use keywords like event, error or cobrowse in the console filter to narrow them down. An example error you get when you publish an event missing mandatory fields looks like the following: 13:36:38 Events : Error executing cobrowseOffered eventId: evId_5e=win is undefined LEVEL: ERROR
Step 4 — Accept/Reject call
If the consumer decides to accept the call, trigger the following event in order to start the call:
lpTag.events.publish("lpCoBrowse", "cobrowseAccepted", {
 	serviceId: "<ServiceId from the dialog>",
 	agentId: "<Agent ID>",
 	visitorName: "<Name of the Visitor>",
 	mode: "<Mode from the dialog>",
 	ssid: "<Monitoring Session ID>",
 	svid: "<Monitoring Visitor ID>",
 	//optional parameters:
 	scid: "<Monitoring Context ID>",
 	cid: "<Context ID>",
 	eid: "<Engagement ID>"
 }
);
In case the consumer rejects the invitation, trigger the following event to reject the invitation:
lpTag.events.publish("lpCoBrowse", "cobrowseDeclined", {
 	serviceId: "<ServiceId from the dialog>",
 	agentId: "<Agent ID>",
 	visitorName: "<Name of the Visitor>",
 	mode: "<Mode from the dialog>",
 	ssid: "<Monitoring Session ID>",
 	svid: "<Monitoring Visitor ID>",
 	//optional parameters:
 	scid: "<Monitoring Context ID>",
 	cid: "<Context ID>",
 	eid: "<Engagement ID>"
 }
);
Step 5 — Prepare UI
The voice or video call UI will be rendered into a container on the website. The website developer is responsible to create a container, e.g. a <div> element on the website with the classname lp_cobrowse_callscreen_container directly after the invitation has been accepted — at the latest. A loading indicator can be added to the content of the container. All content will be replaced with a call UI once connected.
Resuming calls after reloading the page
The voice and video call application will store information in the browser's storage that allows it to detect and resume active calls after reloading the page or navigating to another tagged page. An event will be triggered when an active call was detected:
lpTag.events.bind({
    appName: "cobrowse",
    eventName: "sessionResume",
    func: onSessionResume
});
Upon receiving this event, the call UI container should be created and the following event sent in response:
lpTag.events.publish("lpCoBrowse", "sliderOpened");
Handling errors
In case there is a problem establishing the connection or the browser is not supported, an error event is triggered. Please use the following code to listen for error events:
lpTag.events.bind({
    appName: "cobrowse",
    eventName: "sessionError",
    func: onError
});
The payload of the sessionError event contains:
-
msgA localized message that describes the problem and can be shown to the user. -
idThe error ID. Please see below possible errors.
Error IDs:
-
UNABLE_TO_CONNECTThere was a problem establishing the WebRTC connection -
BROWSER_NOT_SUPPORTEDThe browser does not support WebRTC based video and voice calls -
NO_CAMERA_ACCESSThe application can't access the user's camera -
AGENT_DISCONNECTEDThe agent got disconnected
Handling hanging-up, cancelled invitation and expiry
The following cqm.ExConversationChangeNotification event is triggered when a call ended, an invitation was cancelled by the Agent or in case the invitation expired after 2 minutes:
{
	"dialogId": "c26b9d3b-e943-42af-8047-aba830de64ea",
	"dialogType": "OTHER",
	"channelType": "COBROWSE",
	"metaData": {
		"sessionState": "CLOSED"
	}
}