
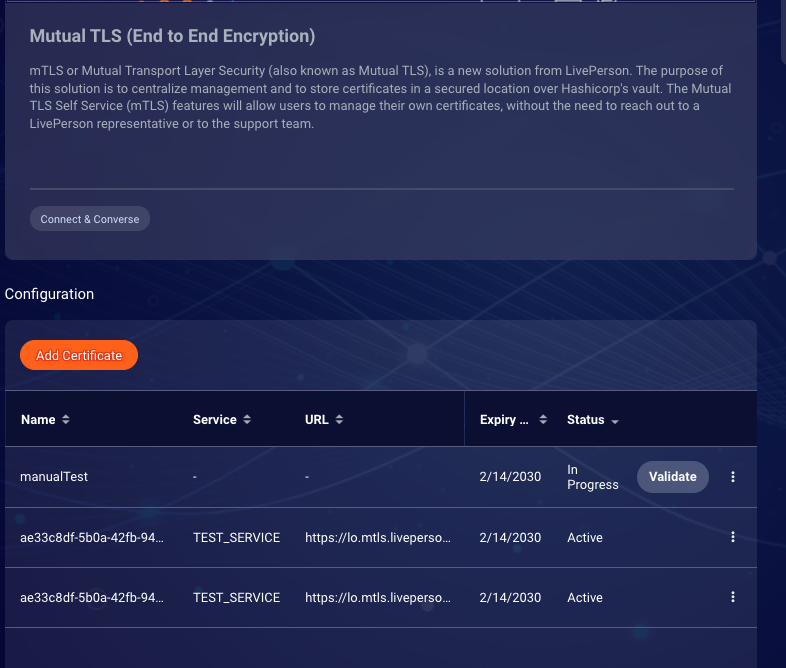
The Mutual TLS Self-Service (mTLS) feature allow clients to manage their certificates, without the need of reaching out to a LivePerson representative or the support team. It will help with below functionalities:
1) Add Certificate
2) Manage URL
3) Reuse Certificate
4) Delete Certificate
5) Download Certificate
Get started
Configuration of certificate and url mapping is self-serviced via mTLS Self service in the Management Console. Make sure you are logged in as either Brand Admin or LPA-User in the Cloud Conversational UI.
For LPA users, by default mTLS permission (Mutual TLS authentication management : 1790) is added to Support Group. If you are on same role then you have the mTLS permission else please contact LP Security Team and request them to give mTLS permission to you.
Prerequisite
Enable below listed mTLS Self-Service feature flags in internal LivePerson configuration (Houston).
1) Common.lp-mtls-ui.MTLS.Self_Service
2) Common.MTLS_enabled
Note: Contact LP representative in case of any assistance.
Navigation to mTLS Self Service
1) Navigate to the Management Console, using search bar and search for "mTLS".
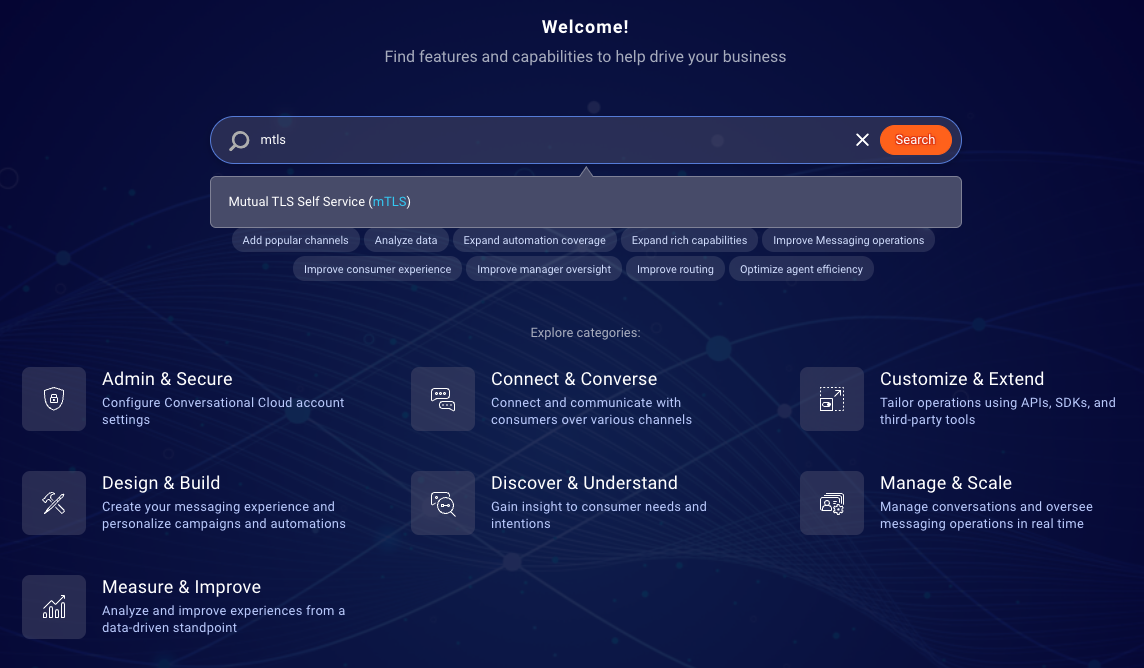
2) Click on Mutual TLS Self Service, it will load home page which lists all currently configured/non-configured certificates.
Use-Cases
1) Configure new client provided certificate and URL: Do following steps
-
1.1) Add New Client Certificate.
-
2.1) Configure New URL.
2) Configure new LP provided certificate and URL: Do following steps
-
1.2) Add New LP Certificate.
-
2.1) Configure New URL.
3) Renew Certificate: Do following steps
-
Create certificate based on your use case. Refer either 1.1) Add New Client Certificate OR 1.2) Add New LP Certificate.
-
2.2) Update URL With New Certificate.
1) Add Certificate
1.1) Add New Client Certificate
Use-Case
Client opted to configure its own certificate instead of using LP provided certificate.
Prerequisite:
You already have client provided certificate in p12 format and want to configure in mTLS. You know the credentials of client certificate. Make sure the client certificate is already uploaded at client server.
Steps to Add New Client Certificate
-
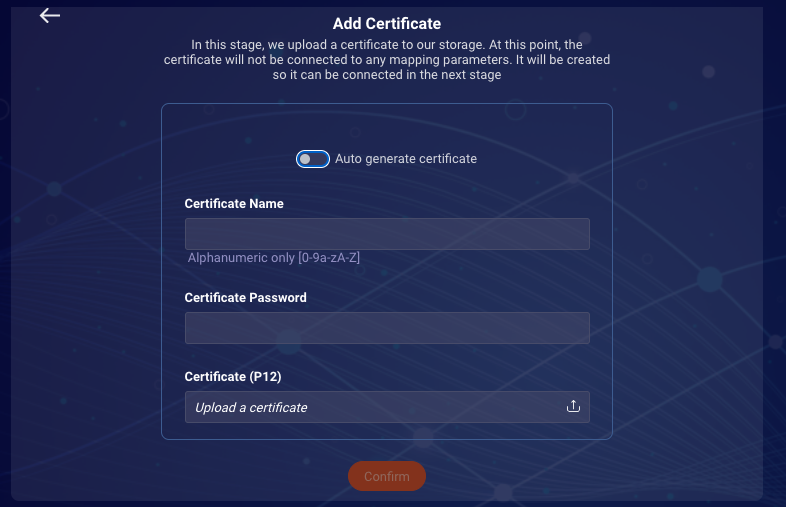
1) Click on Add Certificate button.
-
2) Make sure the "Auto generate certificate" toggle is set to OFF.
-
3) Input the certificate name.
-
4) Input the certificate password in the password field. Use same password which was used to create the p12 file.
-
5) Upload the certificate
-
6) Click confirm button.
Certificate is created in mTLS. Page will refresh automatically and show the newly created certificate.
1.2) Add New LP Certificate
Use-Case
Client opted to configure LP provided certificate.
Steps to Add New LP Certificate
-
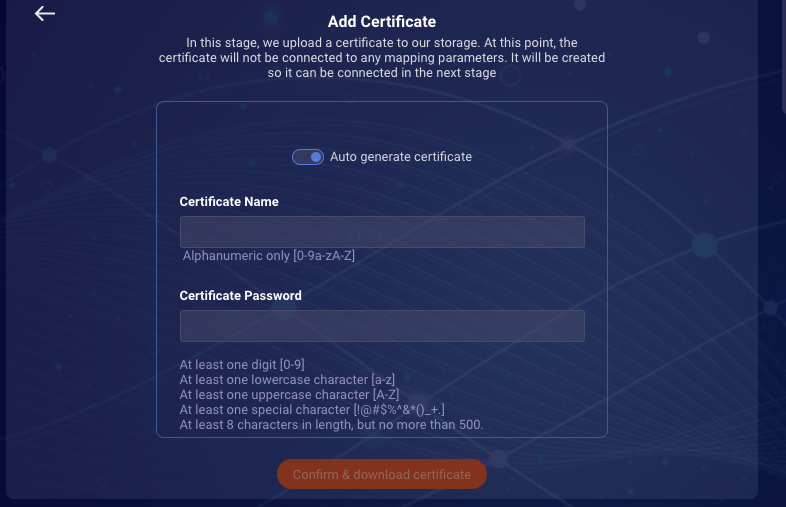
1) Click on Add Certificate button.
-
2) Make sure the "Auto generate certificate" toggle is set to ON.
-
3) Input the certificate name.
-
4) Input the certificate password in the password field. Remember/Save securely this password as this will be required to open the zip file.
-
5) Click confirm & download button. Password protected certificate zip file will be downloaded automatically.
-
6) Open the certificate zip by providing the password you input in step 4.
-
7) Make sure downloaded certificate is uploaded in the client server.
Certificate is created in mTLS. Page will refresh automatically and show the newly created certificate.
2) Manage URL
2.1) Configure New URL
-
1) Click on the Validate button of the newly created certificate to configure the mapping.
-
2) Validate screen will ask for confirmation that client certificate is already uploaded at client server.
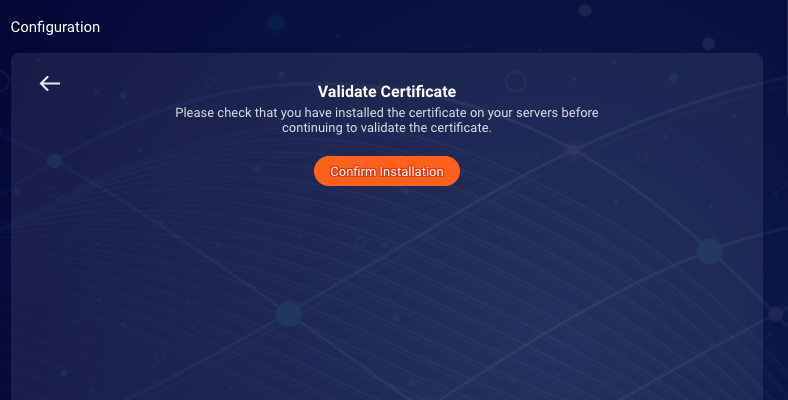
-
3) Click on Confirm Installation.
-
4) On Activate Certificate input service from drop down menu and input the url.
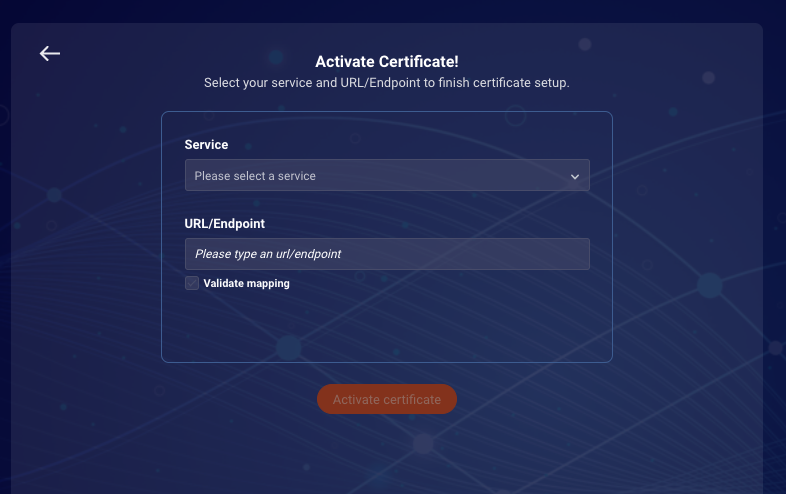
-
5) By default, Validate mapping checkbox is ticked to test url before configuring the mapping. Can be unchecked in case you want to skip testing.
-
6) Click on Activate certificate.
URL mapping is created and status is updated to Active. Page will refresh automatically and show the newly created mapping associated with certificate.
2.2) Update URL With New Certificate
-
1) Click on the Validate button of the newly created certificate to configure the mapping.
-
2) Validate screen will ask for confirmation that client certificate is already uploaded at client server.
-
3) Click on Confirm Installation.
-
4) On Activate Certificate input service from drop down menu and input the url.
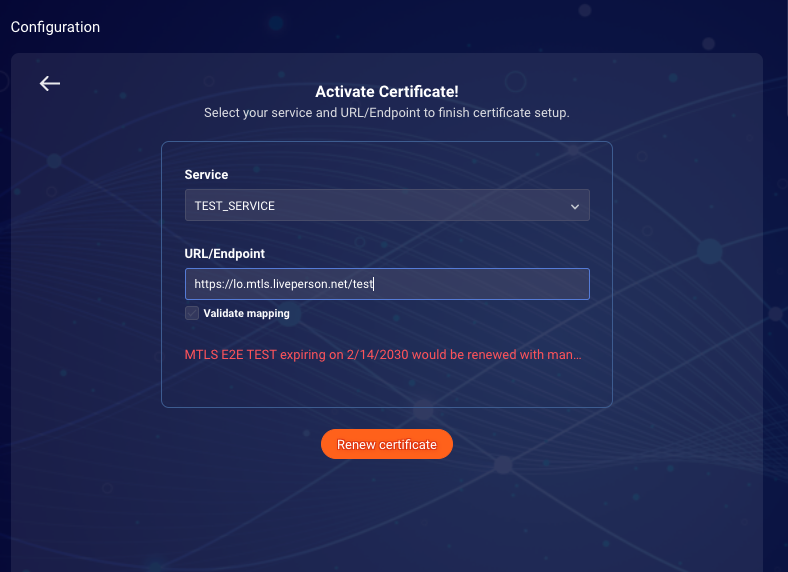
-
5) As Url already exists, it will prompt that you are updating the mapping with new certificate.
-
6) By default, Validate mapping checkbox is ticked to test url before configuring the mapping. Can be unchecked in case you want to skip testing.
-
7) Click on Renew certificate.
URL mapping is created and status is updated to Active. Page will refresh automatically and show the newly created mapping associated with certificate.
3) Reuse Certificate
Use-Case
In case you want to use same certificate for different urls then you can leverage on reuse functionality.
-
1) Navigate to mTLS Self service home page.
-
2) Click on 3 dot options of a particular certificate which you wish to reuse. Certificate has to be in Active status.
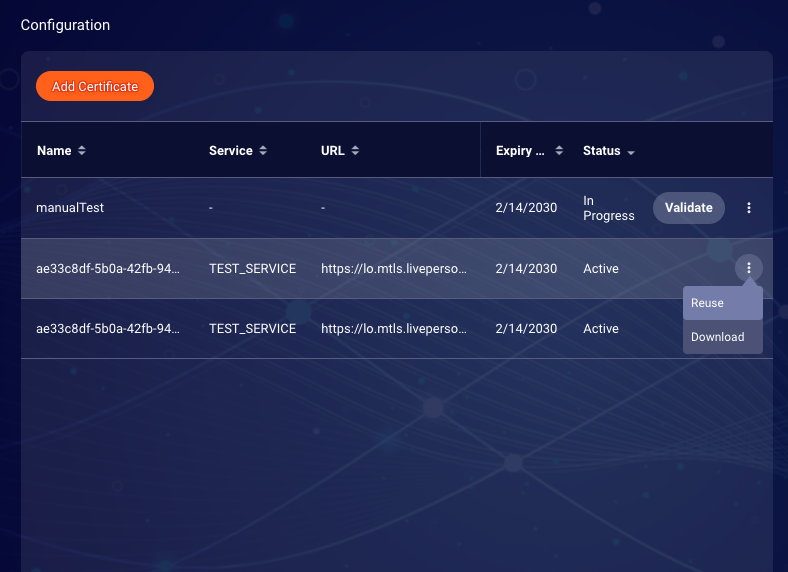
- 3) Click on Reuse. Edit Activation screen will open.
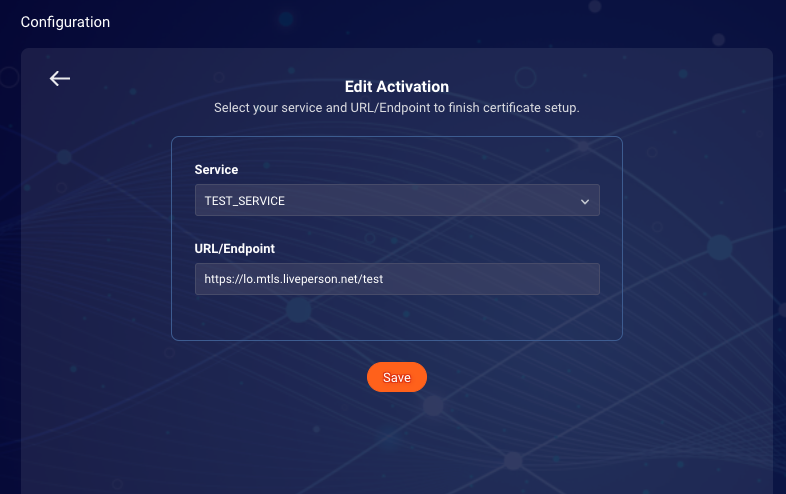
-
4) Input service from drop down menu and input the url.
-
5) Click on save.
URL mapping is created and status is updated to Active. Page will refresh automatically and show the newly created mapping associated with certificate.
4) Delete Certificate
-
1) Navigate to mTLS Self service home page.
-
2) Click on 3 dot options of a particular certificate which you wish to delete.

- 3) Click on delete.
Note: User will not be able to delete any certificate which is mapped to an url and Active.
5) Download Certificate
-
1) Navigate to mTLS Self service home page.
-
2) Click on 3 dot options of a particular certificate which you wish to download.
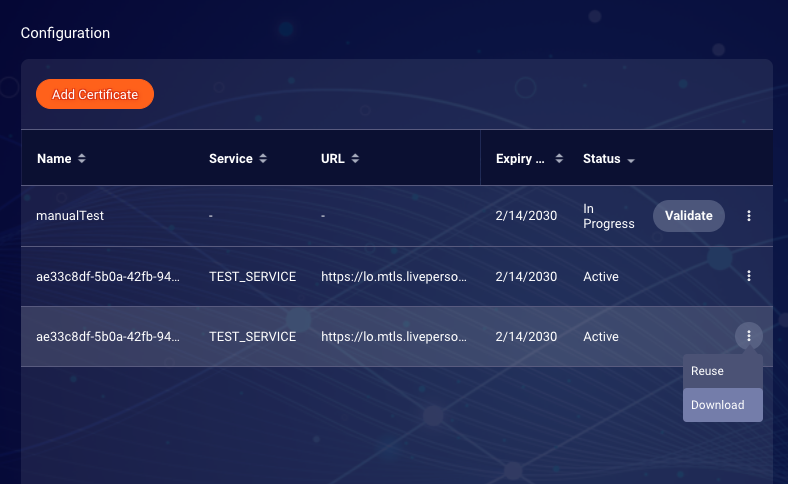
-
3) Click on download. Password-protected zip file will be automatically downloaded into browser.
-
4) Open the zip file with password which was provided at time of certificate creation.