
A dialog is a group or flow of interactions that are triggered based upon consumer intent.
Dialog types
There are several types of dialogs:
-
 Dialog (Standard): Standard dialogs are triggered when the bot recognizes the consumer's message via an intent match or a pattern match.
 -
 Fallback: The fallback dialog is triggered when the bot doesn't recognize the consumer's message.
 -
 Disambiguation: The disambiguation dialog is triggered when the bot recognizes the consumer's input, but it can match it to multiple intents. As a result, clarification from the consumer is needed.
 -
 Auto Escalation: The Auto Escalation dialog frees the consumer from being stuck within a question, which happens when the bot repeatedly doesn’t recognize the consumer’s input. The dialog is triggered automatically after a configurable threshold of failures is reached; it gives the consumer the option to be transferred.
 -
 Survey: Survey dialogs can only be created in post-conversation survey bots. Use a survey dialog to define a survey.
Dialog templates
You can make a dialog available to other bot developers as a dialog template.
Context switching
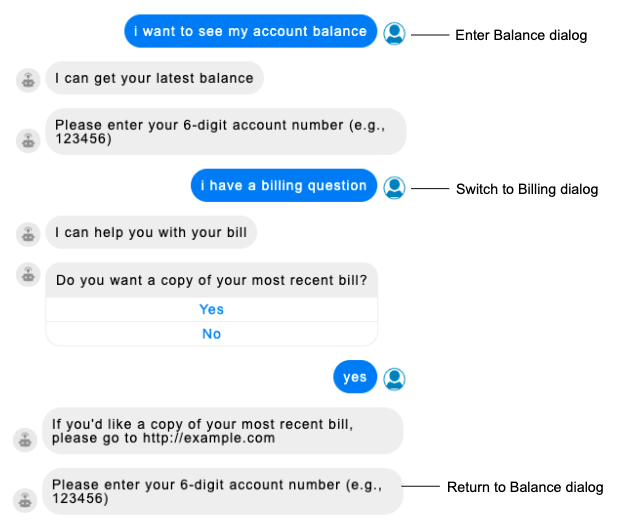
“Context switching” is the term used to describe how LivePerson Conversation Builder navigates the consumer back and forth between dialogs as it matches consumer utterances to intents, in effect, switching the context of the conversation.
Every time a consumer enters a new utterance in a conversation, there’s a chance that the utterance will match a new intent and “jump” the consumer out of one dialog and into another tied to the newly matched intent. When this happens, the new dialog is "pushed" to the top of a virtual, running "stack" of dialogs, and its dialog flow immediately begins. Once the dialog is completed, it is removed from the stack, and the consumer is returned to the dialog immediately underneath it in the stack. That dialog now tops the stack, and the last interaction that was sent by the bot before leaving the dialog is repeated.
You can see this context switching occurring in the following conversation:
Your ability to redirect or restrict context switching depends on whether the consumer is responding to an open-ended statement or a question.
When a bot sends an open-ended statement, such as, "Please type your query below," it simply awaits the consumer's response. As a result, whatever the response is, it is processed by the NLU engine to try and find a matching intent and dialog. And if one is found, that dialog is "pushed" to the top of the dialog stack, and its flow immediately begins.
However, in contrast to open-ended statements, questions can have response conditions applied to the consumer's response, so they can be used to redirect the conversation flow (via the Next Action setting). Depending on the implementation, this can restrict context switching or prevent it from occurring. For example, if a dialog includes an interaction that specifies "end interaction" as its Next Action, this stops the flow within the dialog.
Preventing context switching
If the context switching behavior isn't desirable for your use case, you can disable it by setting the skipPreviousDialog bot variable to "true" with the following code:
botContext.setBotVariable('skipPreviousDialog', 'true', true, false);
This code disables the behavior until the variable is set to "false" once again.
To disable context switching at the conversation start, you can add this code to the Global Functions. To disable it at the point of a specific situation, you can add the code to any interaction.
Keep the consumer in the current dialog
In a bot, at branching points within a dialog, the consumer is asked to answer questions or make choices about how to proceed. Depending on the goal of the bot, you might need to ensure that the consumer's next utterance doesn't jump the consumer out into another dialog due to the NLU matching the utterance to another intent. Sometimes jumping to another dialog is desirable, but other times it isn't. For example, you might need the consumer to answer a specific question, so you need a way to keep the consumer in the current dialog until that's done.
You can help to keep the consumer in the current dialog by offering predefined options in a menu of buttons or predefined choices to a multiple-choice question. However, there's no guarantee that the consumer won't ignore these and type a response of their own. This means you need a way to handle any other response.
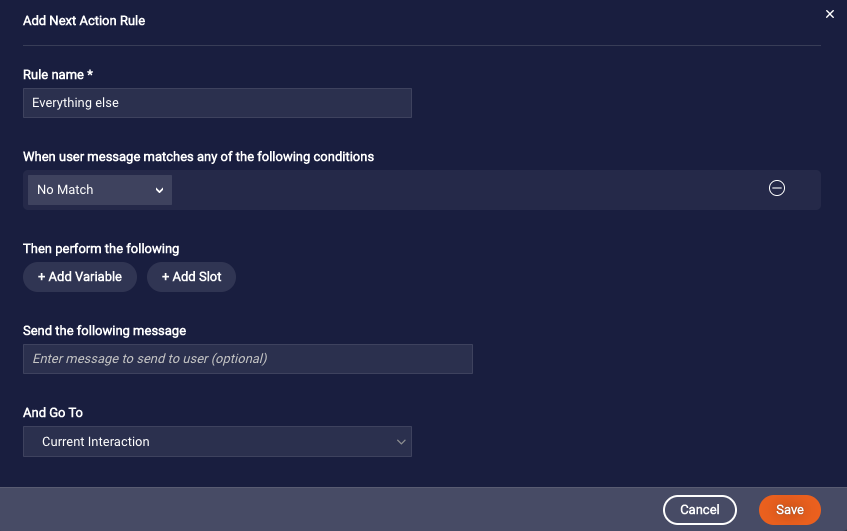
To solve this problem, you can create a rule with a No Match condition that directs the flow as you need, either to repeat the same question or to redirect the flow to somewhere else within the bot.
To implement this solution
- In the interaction, create a final (last) rule.
- In the rule definition, name the rule. Then add a condition that uses the "No Match" match type. A condition that uses this match type catches all utterances that aren't caught by earlier rules. (In the condition, you can optionally specify a message to send to the consumer before the flow continues to the next action.)
- Under And Go To, select the desired next action.
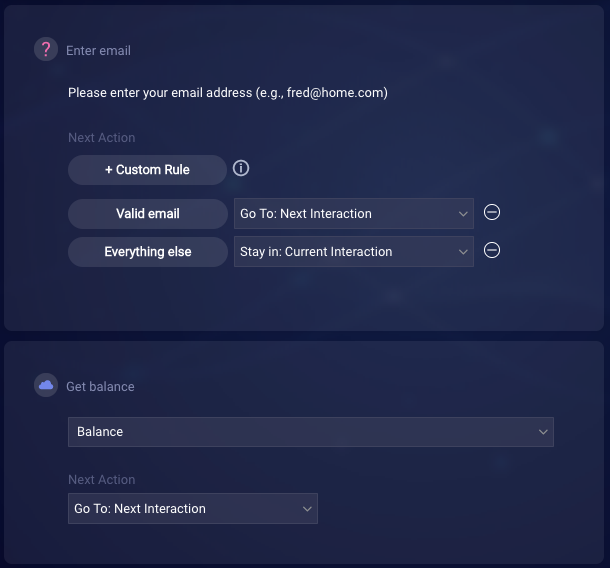
In our example below, the No Match condition directs the flow to the current interaction in order to repeat it. This interaction is a question that asks for the consumer's email address.
Our example dialog flow now looks like this:
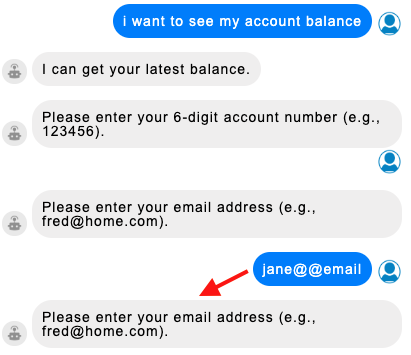
When the user enters anything but a well-formed email address, this yields a conversation that looks like the following, where the email address question is repeated:
For more information on the "No Match" match type and other match types that can be used in conditions, see this section.
Import a dialog
You can import dialogs from one bot to another within your organization. This can be useful when you have a well-defined dialog in one bot that you want to quickly and easily reuse in a different bot. Note the following:
- You can import a maximum of 10 dialogs at a time from multiple bots. If you need to import more, you can repeat the process.
- You can import only dialogs of type Dialog (see Dialog types above).
- You can import dialogs from the bots to which you have access in your organization. For example, you can’t import dialogs from a bot that's owned by another bot developer and isn't public.
- The following is imported:
- All selected dialogs and the interactions therein
- All integrations referenced in the selected dialogs
- The following isn't imported and must be added manually:
- Global functions
- Environment variables (you can export these)
- During the import, the associations of domains, intents, and entities to interactions are maintained.
- If you import a dialog that uses a knowledge base integration, and that knowledge base is owned by another bot developer and isn't public, you can still use the integration in the bot, but you can't view or edit that knowledge base in the KnowledgeAI application.
When you import dialogs, consider and address any dependencies across the dialogs. You might or might not want to import all dependent dialogs.
To import one or more dialogs into a bot
- Open the destination bot.
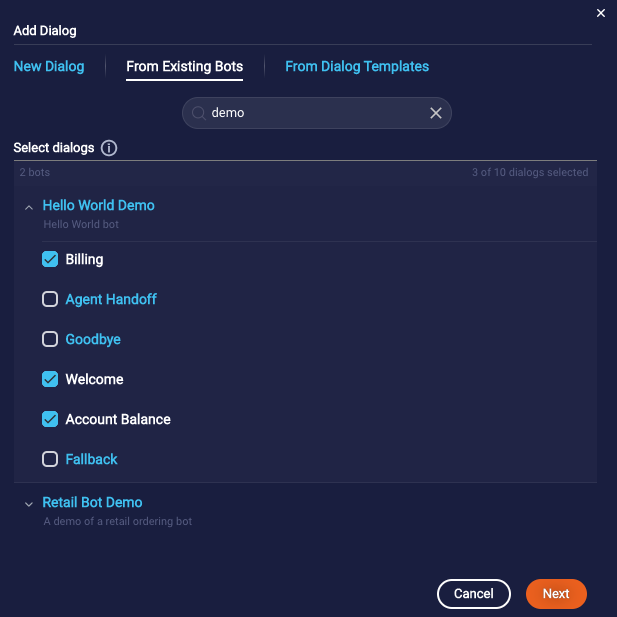
- Click Add Dialog in the lower-left corner.
- In the Add Dialog window, select the From Existing Bots tab.
-
Browse and/or search to find and select the dialogs to import. You can select up to 10 dialogs. You can't select dialogs that are made available as dialog templates; these you must import as a dialog template.
-
Click Next, and then Save.
The selected dialogs are imported.
- You might want to rename the imported dialogs, interactions, and integrations. They are given standard names that include a timestamp.
-
Ensure proper conversation flow by checking (and updating, if necessary) the following in the interactions in the relevant dialogs:
- Next Action values
- JavaScript code
- Environment variables
You might also need to update the credentials in the imported integrations, if any.
Duplicate a dialog
You can duplicate a dialog that is of type Dialog (see Dialog types above). This can be useful when you have a well-defined dialog that you want to quickly and easily reuse in the same bot.
During the operation:
- The associations of domains, intents, and entities to interactions are maintained.
- In the Dialog Starter interaction, the patterns or the intent is duplicated. After the operation, modify or remove these as appropriate so that each dialog starter is unique within the bot.
To duplicate a dialog
- In the dialogs panel on the left, click
 (3-dot icon) beside the dialog's name.
 -
Select Duplicate Dialog.
The dialog is duplicated. At this point, you might want to rename the copy. It is given a standard name based on the element name and bot name.
Create a dialog
- Open the bot.
- Click Add Dialog in the lower-left corner.
- In the Add Dialog window, on the New Dialog tab, specify the following:
- Dialog Name: Enter a descriptive name for the dialog. Use a standard naming convention to make your dialogs more sortable and easier to find.
- Description: (Optional) Enter a brief description of the dialog's purpose. The description is displayed in the user interface for importing dialogs, discussed below, to help bot developers make decisions on which dialogs to select to import.
- Dialog Type: Select the type of dialog; for help with this, see Dialog types farther above on this page.
- Click Save.
- Build out the dialog as per your requirements.
Configure dialog settings
-
In the dialogs panel on the left, click
(3-dot icon) beside the dialog's name.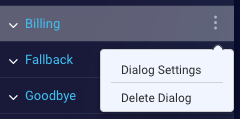
- Select Dialog Settings.
- Click More Settings to display all the settings.
- Configure the settings as needed, and click Save.
Dialog settings include:
- Dialog Name: Enter a name that's concise and clear.
- Description: Optionally enter a meaningful description of the dialog's purpose and capabilities.
- Dialog Type: This is read only.
- Domain: Available in some types of dialogs. Select a domain to associate it with the dialog. Once done, you can associate an intent within the domain to the dialog starter in the dialog.
- Enable Dialog: Turn this off if you don't want the dialog to be used in bot conversations. Otherwise, keep it on. If you disable a dialog, review areas of the bot that depend on it (other interactions, dialogs, JavaScript code, etc.), and adjust them accordingly.
- Make Available as a Dialog Template: Learn about dialog templates.
-
Auto Escalation Threshold: Applicable for Auto Escalation dialogs only. Select the maximum number of consecutive times the fallback message should be sent within a question before triggering the Auto Escalation dialog. Example: You set the threshold to 3. The consumer enters an incorrect answer three times, receiving the fallback response each time. After the fourth incorrect answer, the Auto Escalation dialog is triggered.
LivePerson recommends setting this to "3," but you can set this to a different value based on your confidence that the fallback response will resolve the user's issue.
Disable or enable a dialog
If you disable a dialog, review areas of the bot that depend on it (other interactions, dialogs, JavaScript code, etc.), and adjust them accordingly.
To disable or enable a dialog
- In the dialogs panel on the left, click (3-dot icon) beside the dialog's name.
- Select Dialog Settings.
- Click More Settings to display all the settings.
- For Enable Dialog, click the slider. Enable (turn on) the slider to enable the dialog; disable (turn off) the slider to disable the dialog.
- Click Save.
Close the conversation and trigger a survey
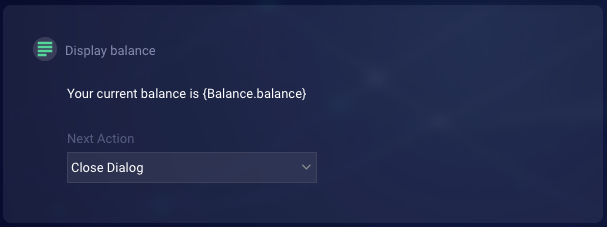
To close the conversation and trigger a post-conversation survey (if one is set up), set the interaction's Next Action to "Close Dialog."
Alternatively, add a Text statement that contains the special string "LP_CLOSEDIALOG." If the statement isn't the last interaction in the dialog, set its Next Action to "End Interaction" (not "Next Interaction").
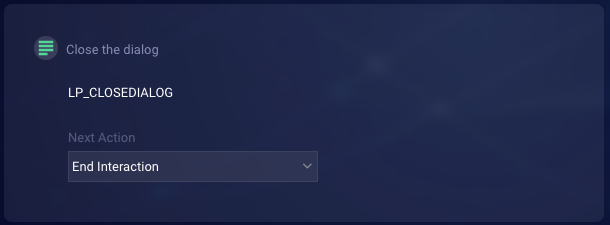
LP_CLOSEDIALOG is a system message; even though it appears in the Preview window, it isn't shown to the consumer when deployed.
Close the conversation without triggering a survey
To close the current conversation without triggering any post-conversation survey, set the interaction's Next Action to "Close Conversation."
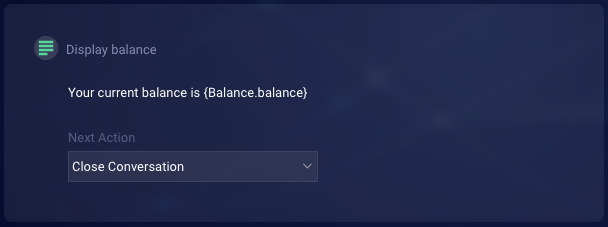
Alternatively, add a Text statement that contains the special string "LP_CLOSECONVERSATION." If the statement isn't the last interaction in the dialog, set its Next Action to "End Interaction" (not "Next Interaction").
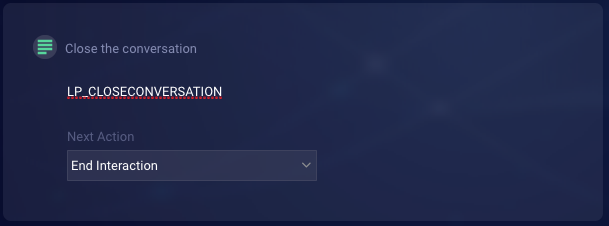
LP_CLOSECONVERSATION is a system message; even though it appears in the Preview window, it isn't shown to the consumer when deployed.
Delete a dialog
Deleting a dialog is a non-recoverable action, so be certain about doing so before taking this action. For example, make sure the dialog isn't referenced by any others within the bot. As an alternative, consider disabling the dialog instead; you can do this in the dialog's settings.
To delete a dialog
- In the dialogs panel on the left, click (3-dot icon) beside the dialog's name.
- Select Delete Dialog.
- In the confirmation dialog, click Yes.