
Overview
The following documentation outlines the configuration for the connector and how to implement functions specifically for Google Dialogflow CX.
Configuration
See the Getting Started guide first to complete pre-requisite steps.
You will be presented with following screen to complete the Vendor Settings in order to add bot connector.
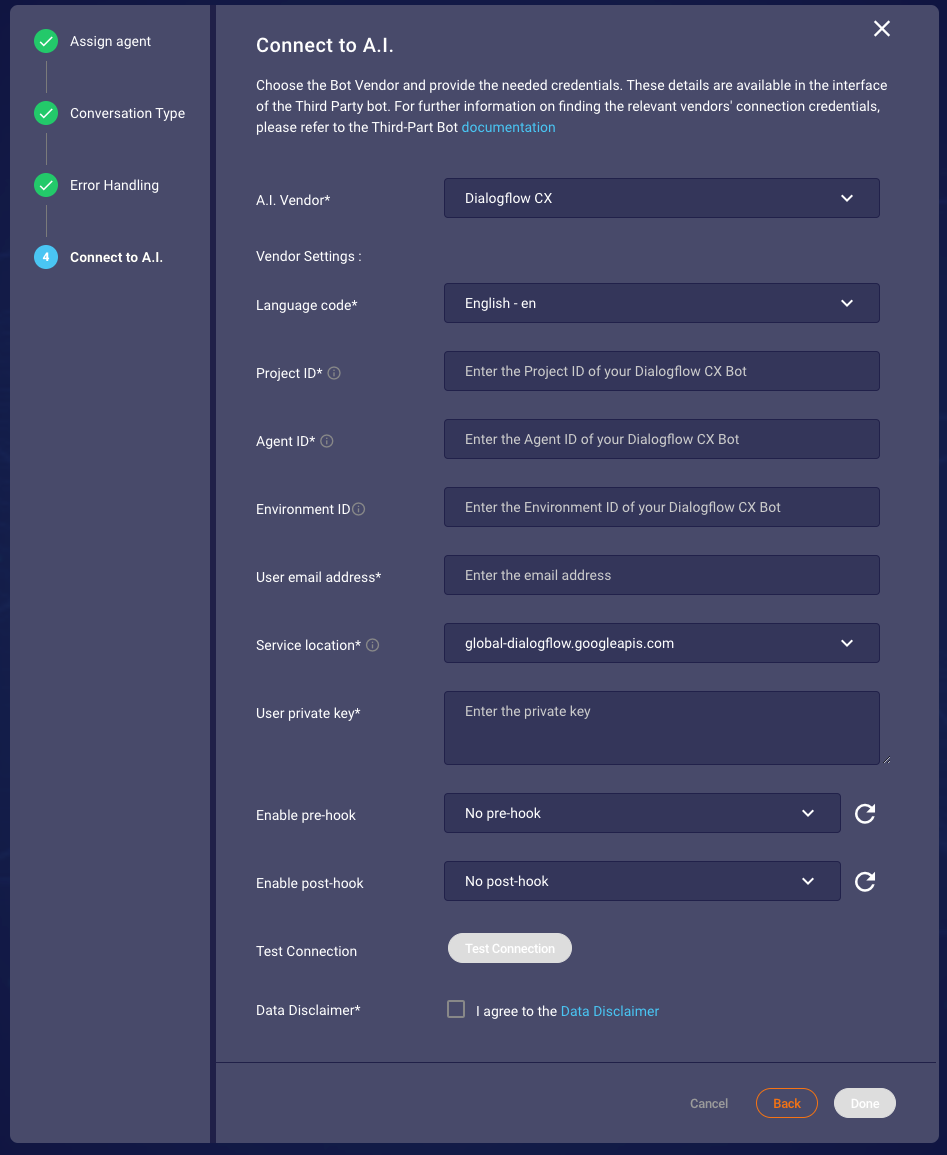
Figure 1.1 Dialogflow CX Vendor Step
The following Dialogflow CX information should be provided to LivePerson:
| Item | Description | Example |
|---|---|---|
| Language code | Language code for Dialogflow | en-US |
| Project ID | Dialogflow project id | bxx-xxxxxxx-xxx-dialogflow-cx |
| Agent ID | Dialogflow CX agent id which can be taken from the URL of Dialogflow CX agent console. Format: projects/<Project ID>/locations/<Location ID>/agents/<Agent ID> | abcderwe-dc8e-4a83-b2f2-369089753c42 |
| Environment ID | Dialogflow CX environment id (optional) | abc4fff1-380c-4c8a-afbb-0289bc4e1234 |
| User email address | Email address of the Google Service account | dialogflow-xxxxxx@bxx-xxxxxxx-xxx-dialogflow-cx.iam.gserviceaccount.com |
| Service location | Location of the Dialogflow API Backend | global-dialogflow.googleapis.com |
| User private key | Private key of the IAM Account, please keep the formatting as provided by Google | -----BEGIN PRIVATE KEY-----
XXXXXXXXXXXXXXXXXXXXXXXXXXXXXXXXXXXXXXXXXXXXXXXXXXXXXXXXXXXXXXXX
BSioVh/nHPX2QX2MKSbue+k= -----END PRIVATE KEY----- |
EnvironmentId is an optional parameter. When it is not provided, the current Draft Flow will be used.
You have to agree to Data Disclaimer from now onward in order to use the services of bot connector. For that you can click on the checkbox "I agree to the Data Disclaimer"
Service Account and Permissions
Dialogflow CX adheres to Google’s oAuth2. Some degree of familiarity with Google IAM policies and IAM console is necessary for setting up a valid Dialogflow CX client. Third-Party Bots requires a service account with Dialogflow agent role of Client (a.k.a. IAM Role: Dialogflow > Dialogflow API Client) permission to make API calls and return the responses. For more information about IAM access roles of Dialogflow API refer to official documentation available here.
If you want to know how to create a service account you can refer to the official documentation here as well.
You can always download the service account credentials as a JSON file at then end of creation via the console. Example of such a JSON file is below:
{
  "type": "service_account",
  "project_id": "[PROJECT-ID]",
  "private_key_id": "[KEY-ID]",
  "private_key": "-----BEGIN PRIVATE KEY-----\n[PRIVATE-KEY]\n-----END PRIVATE KEY-----\n",
  "client_email": "[SERVICE-ACCOUNT-EMAIL]",
  "client_id": "[CLIENT-ID]",
  "auth_uri": "https://accounts.google.com/o/oauth2/auth",
  "token_uri": "https://accounts.google.com/o/oauth2/token",
  "auth_provider_x509_cert_url": "https://www.googleapis.com/oauth2/v1/certs",
  "Client_x509_cert_url": "https://www.googleapis.com/robot/v1/metadata/x509/[SERVICE-ACCOUNT-EMAIL]"
}
Figure 1.2 JSON containing Private key that is generated during the Service Account setup
The config wizard expects each of the pieces of auth data to be copied from the JSON file, without quotes. For the private_key especially, do not modify the string, do not remove any of the newline characters. Just copy and paste directly.
Once you have the service account created you need to make sure that the service account is connected/added to the Dialogflow CX agent. You can add a service account to an agent by going into agent settings. An example can be seen in the Figure 1.3 below
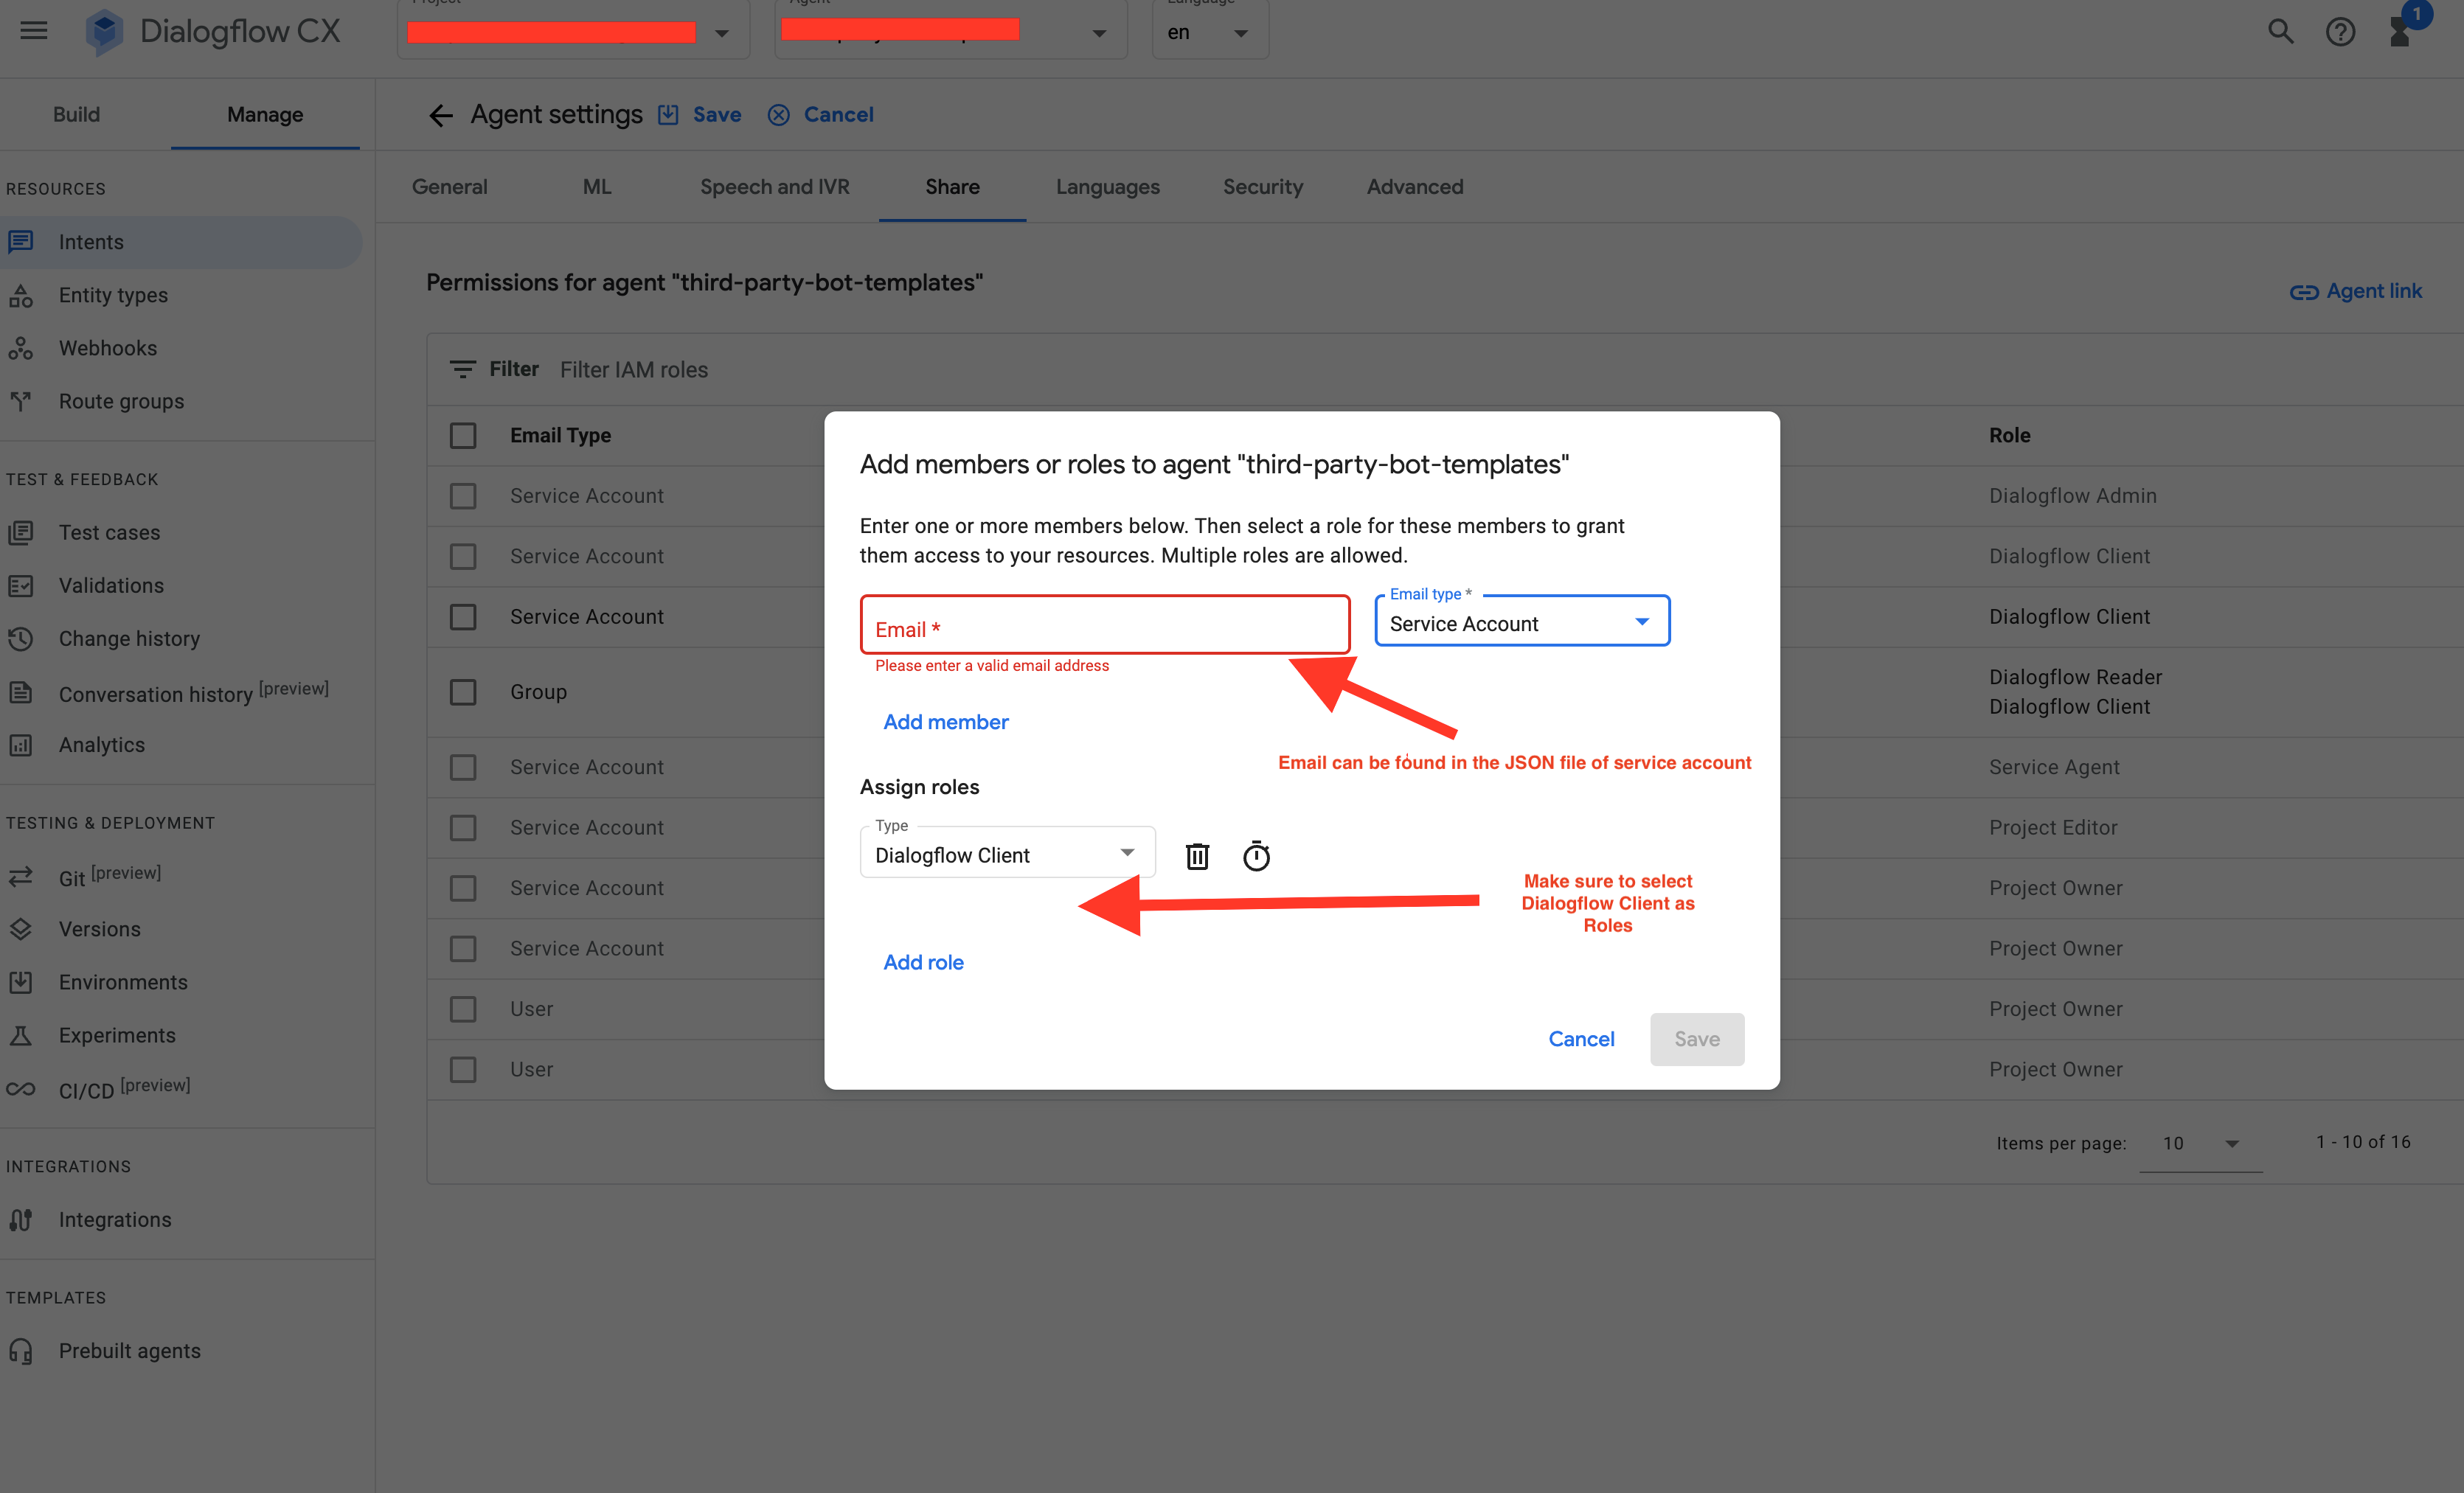
Figure 1.3 Agent settings dialog for adding a service account to a Dialogflow cx agent.
Environments
The Connector supports Dialogflow CX environments.
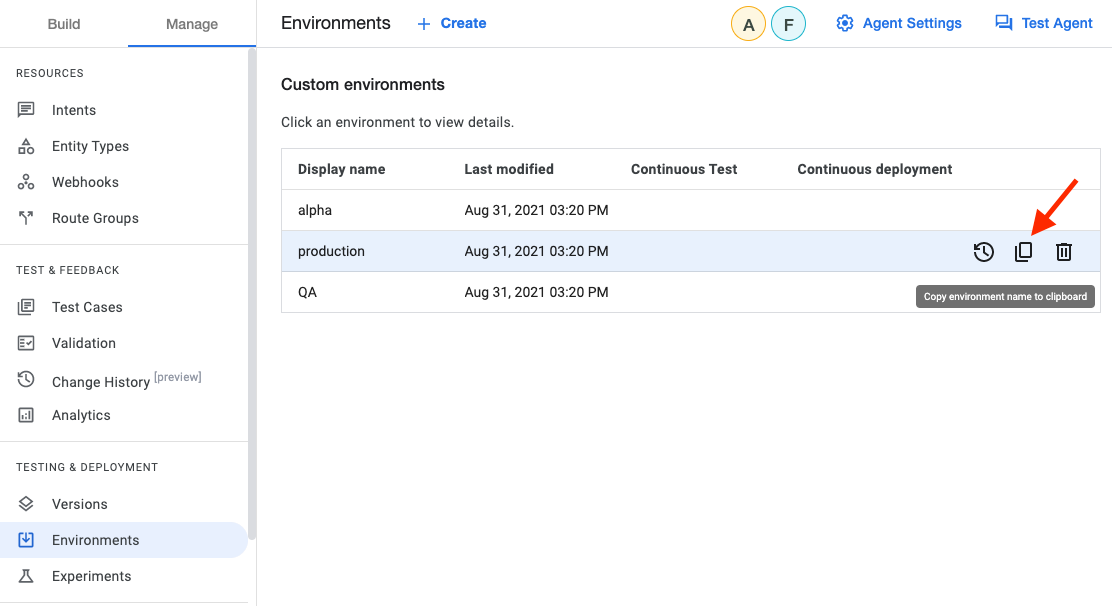
Figure 1.4 Environments in the Dialogflow CX Console
The necessary Environment ID is the last part of the environment URI you can copy in the Dialogflow CX console.
projects/test-project/locations/us-central1/agents/a11a1aa1-aa1a-1a11-a1a1-1111111111a11/environments/53ad121d-5196-41a3-4682-d9de6df94203
Test Connection
For validation of the credentials provided, you can now perform a test connection request to see if everything that you have provided is working and reachable. You can click on the button "Test Connection" to see if the connection succeed or fails. You will be able to save the configuration even if the test fails, but your bot will not be able to start successfully. Please note that your bot should be capable of handling unsupported messages either via fallback intents or as your design pleases. This will ensure the success of the call to the API of Dialogflow CX for testing the connection.
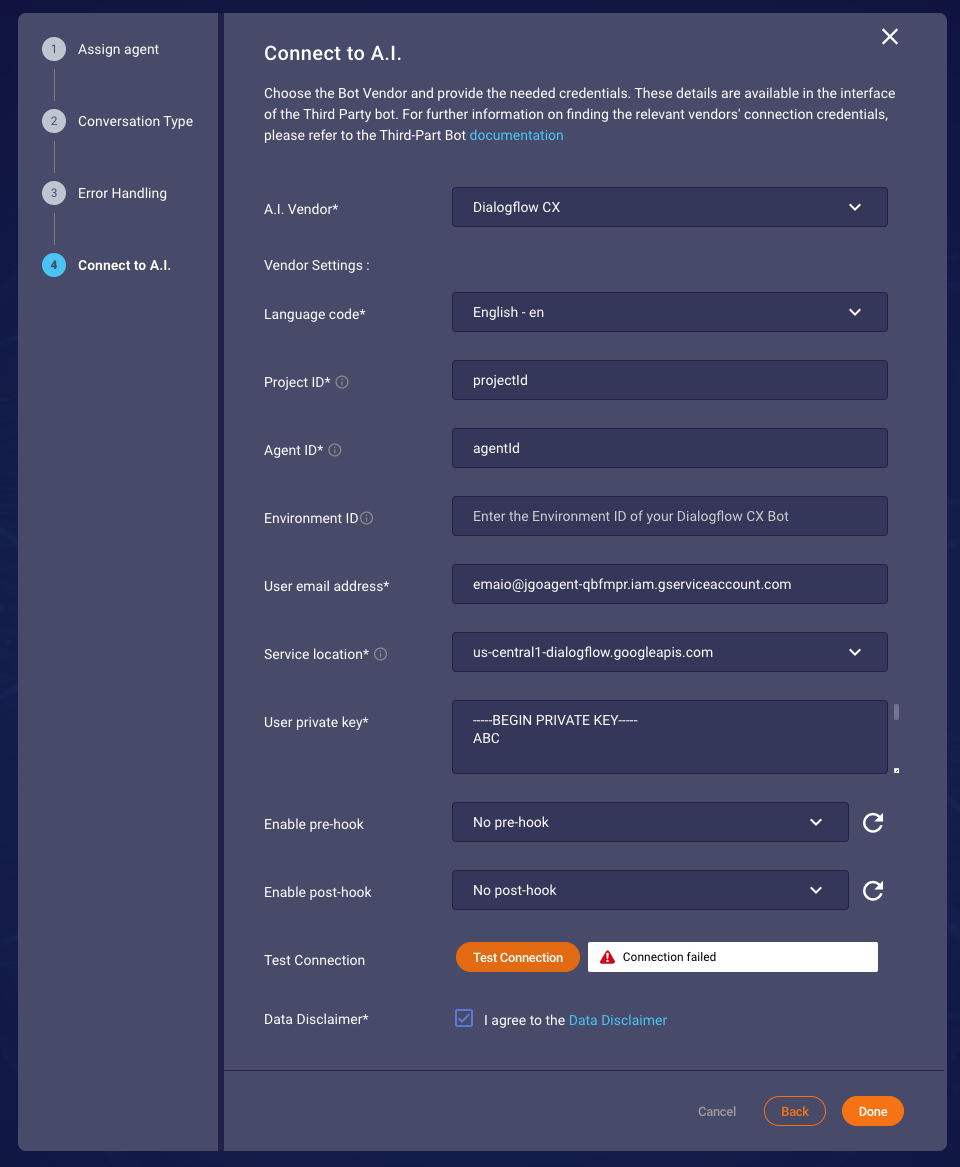
Figure 1.5 Showing the failure case when testing the connection.
Once you are done with providing configuration you can save it by pressing on "Done". Congratulations! You have completed the configuration of the Google DialogFlow CX bot.
Following guide is going to introduce how to implement functions specifically for Dialogflow CX using Dialogflow console. Continue if you are familiar and have access to Dialogflow console.
Limitations
Query length Limit
The Dialogflow CX service has a limitation on the length of the query property. Any query longer than 255 characters will invoke a custom event in Dialogflow. To handle this gracefully, we recommend building a simple intent that handles a DIALOGFLOW_CHAR_LIMIT event.
-
Create an intent with an event using the string:
DIALOGFLOW_CHAR_LIMIT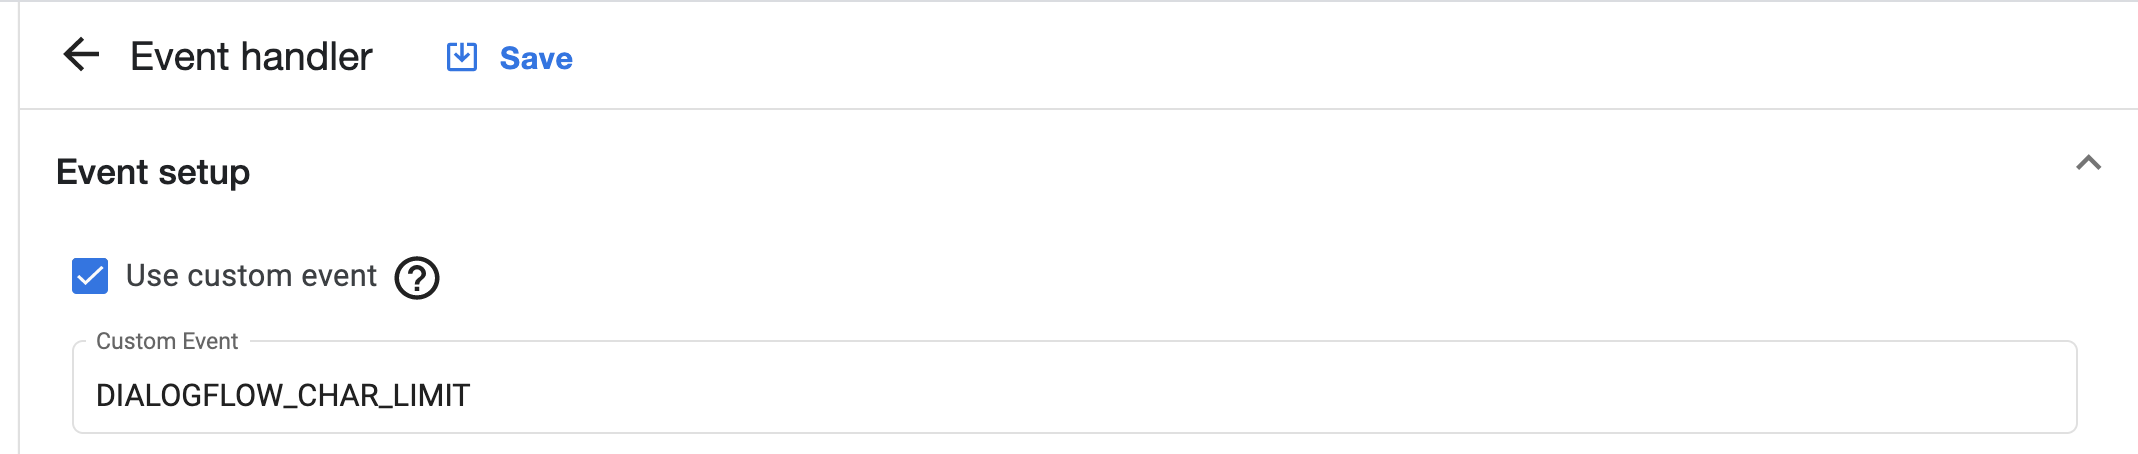
Figure 1.6
-
Do not forget to add a custom response in the Text response section.
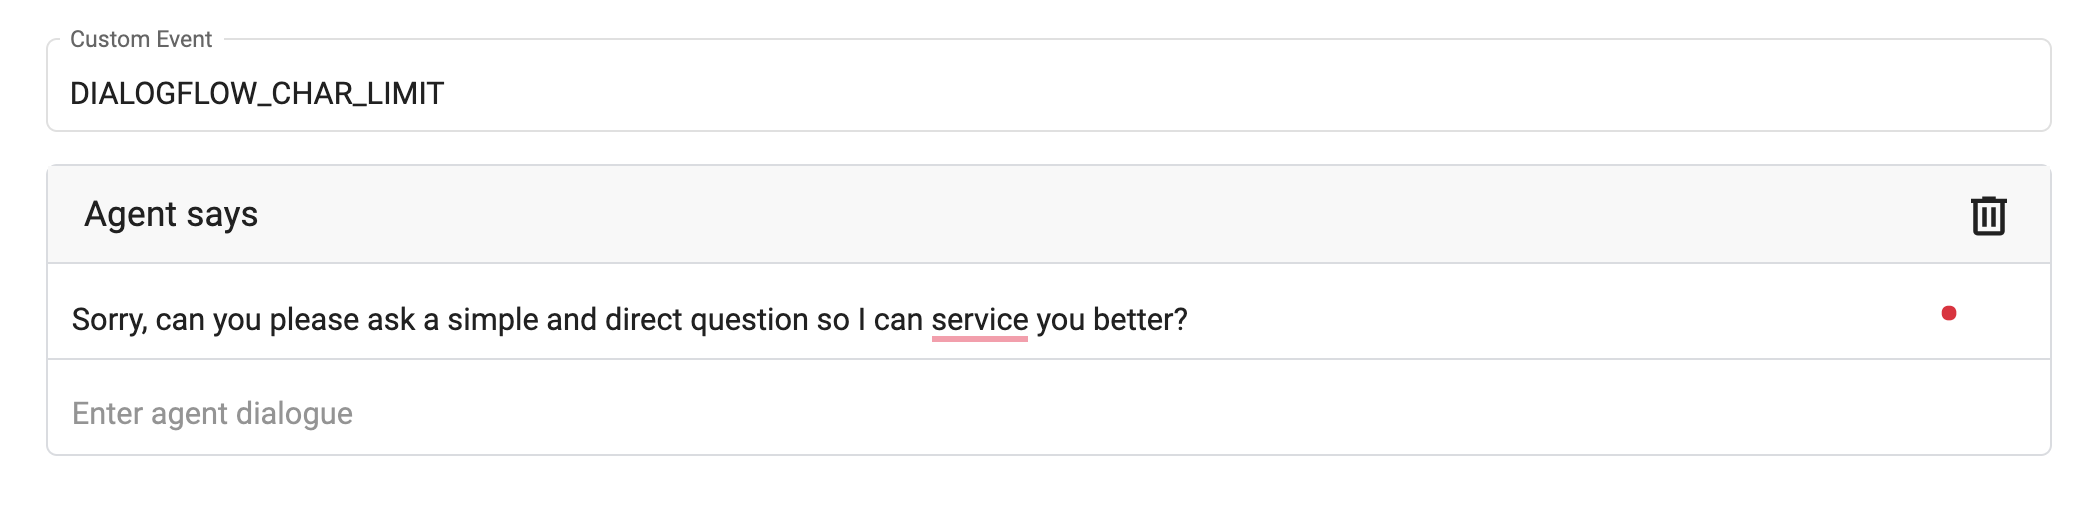
Figure 1.7