
If this is the first time you visit the LivePerson Function platform, you are greeted by the User Agreement Window. In the background, the provisioning of the account is automatically performed. In this small walk-through, you will create a function that takes a name as input and use it to greet the caller.
When you use the LivePerson Functions platform for the first time please make sure that you are using a Conversational Cloud Admin account to ensure that the provisioning of the account succeeds.
As this is a quick guide, we will not go into details on all the available options for this. Please refer to the configure page or the deep dive UI.
Before start
Functions implementation can be complex. Before starting your implementation, we strongly recommend following our best practices that can help you ensure a successful implementation.
If your function calls the secret store and if the secrets are not modified and, therefore, are static, it is required to implement a secret store cache mechanism as described in the best practices. Further, if you use the LpClient, please consider reading how to declare the LpCLient properly.
Create
Let's start setting up your very first function and deploying it to the LivePerson Functions platform.
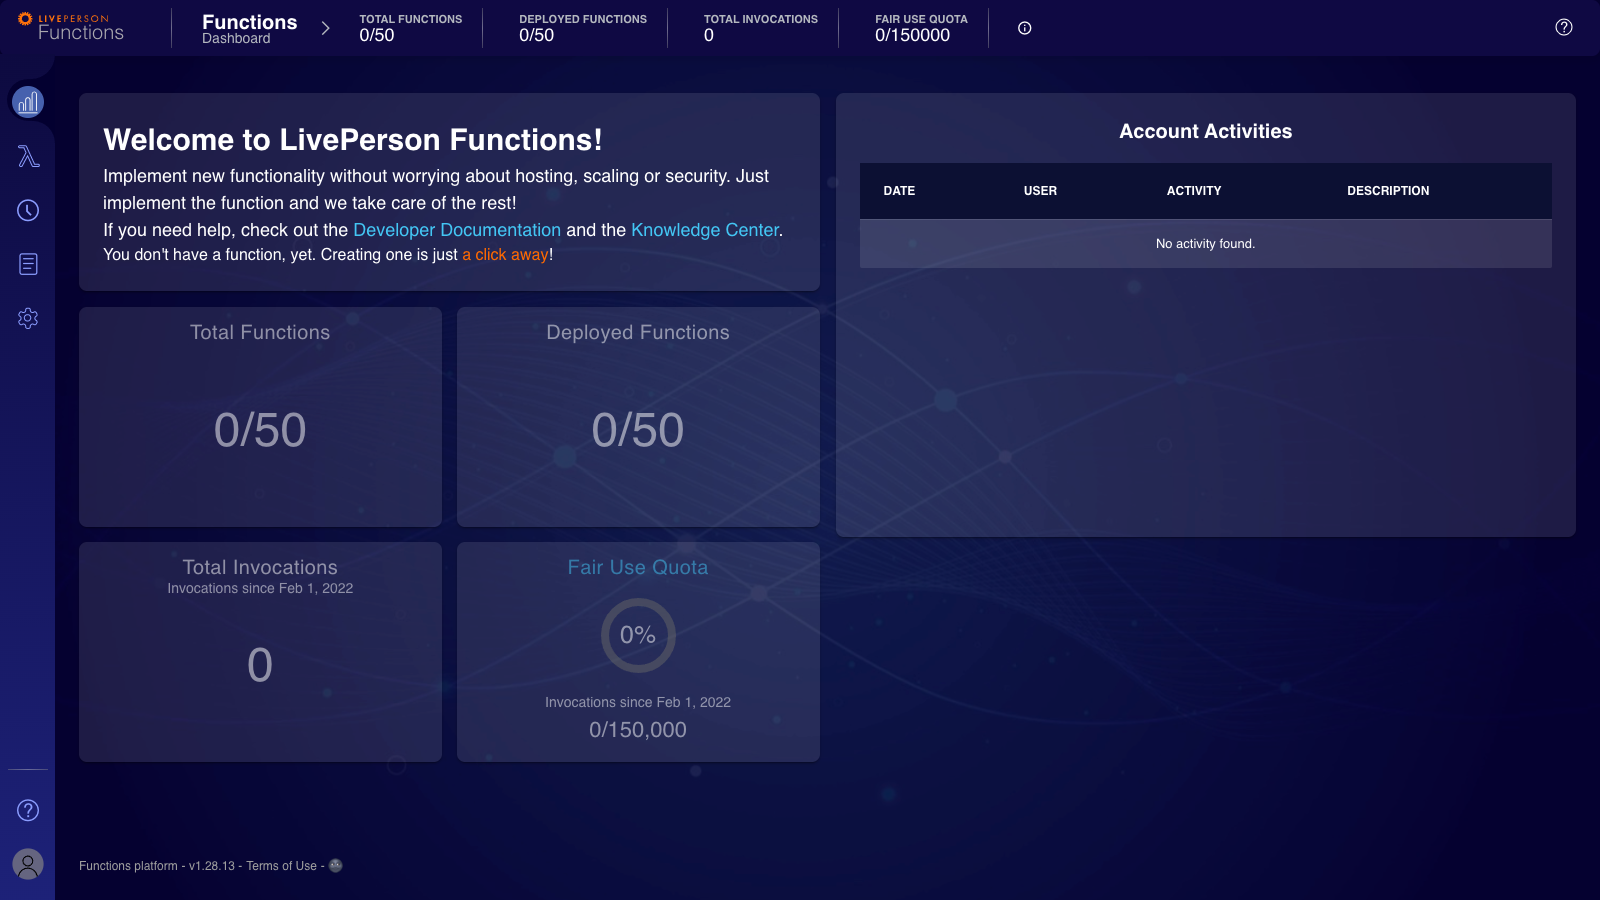
- After logging into the FaaS Functions platform, the overview page is shown. Navigate to the function management view to create a function by clicking on the "Lambda" icon on the left-hand side.
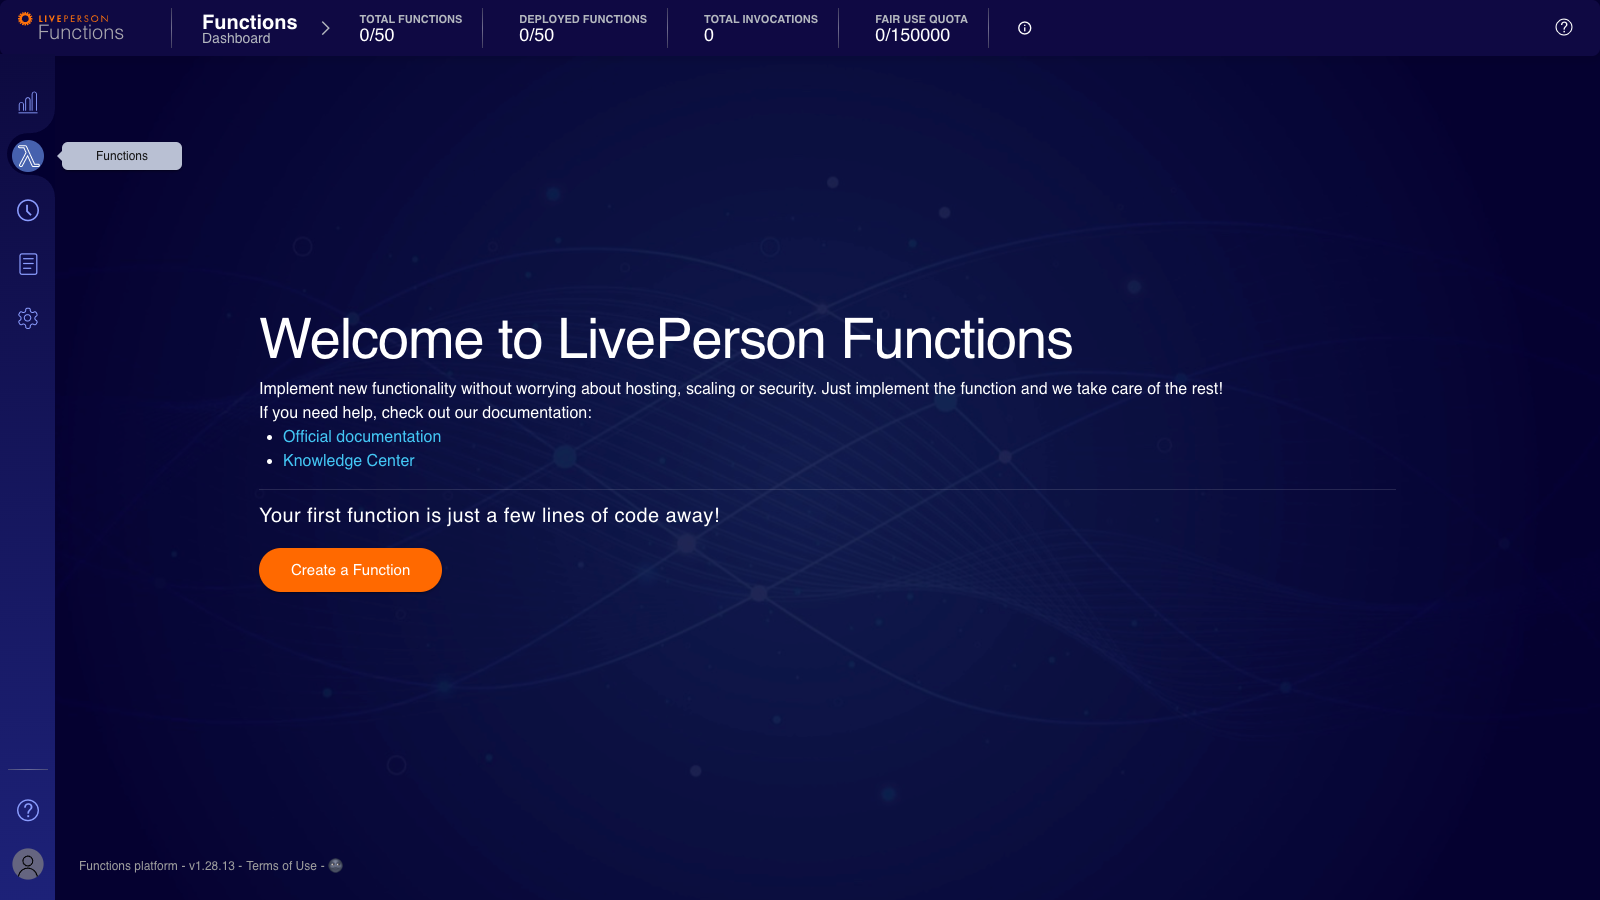
- This view shows you all created functions on your account. Click on the "Create a Function"-button to get started.
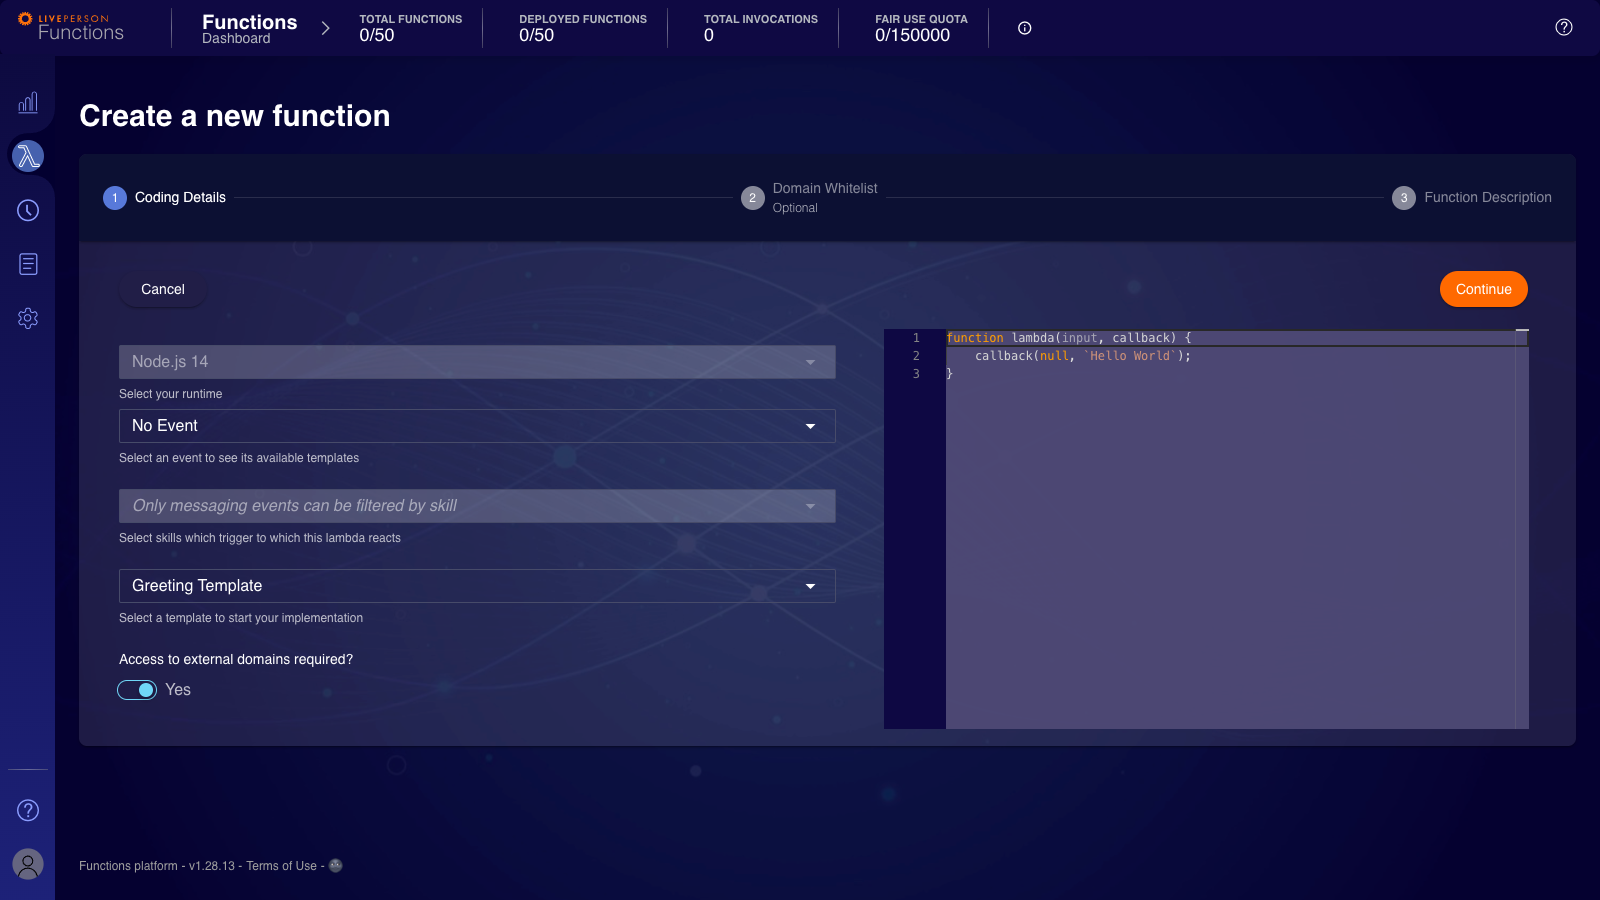
- To keep it simple, we proceed with the default selection "No Event" and "Greeting Template". On the right-hand side, you see the code that is generated based on your selection. Toggle the "Access to external domains required" switch to "No", as we will not use external resources in this walk-through.
- Now, you can provide a name and description for your function. The description field allows you to inform others what this function is supposed to do. Enter both a name and description of your liking, e.g.
greeteras name and description readingThis function greets the caller.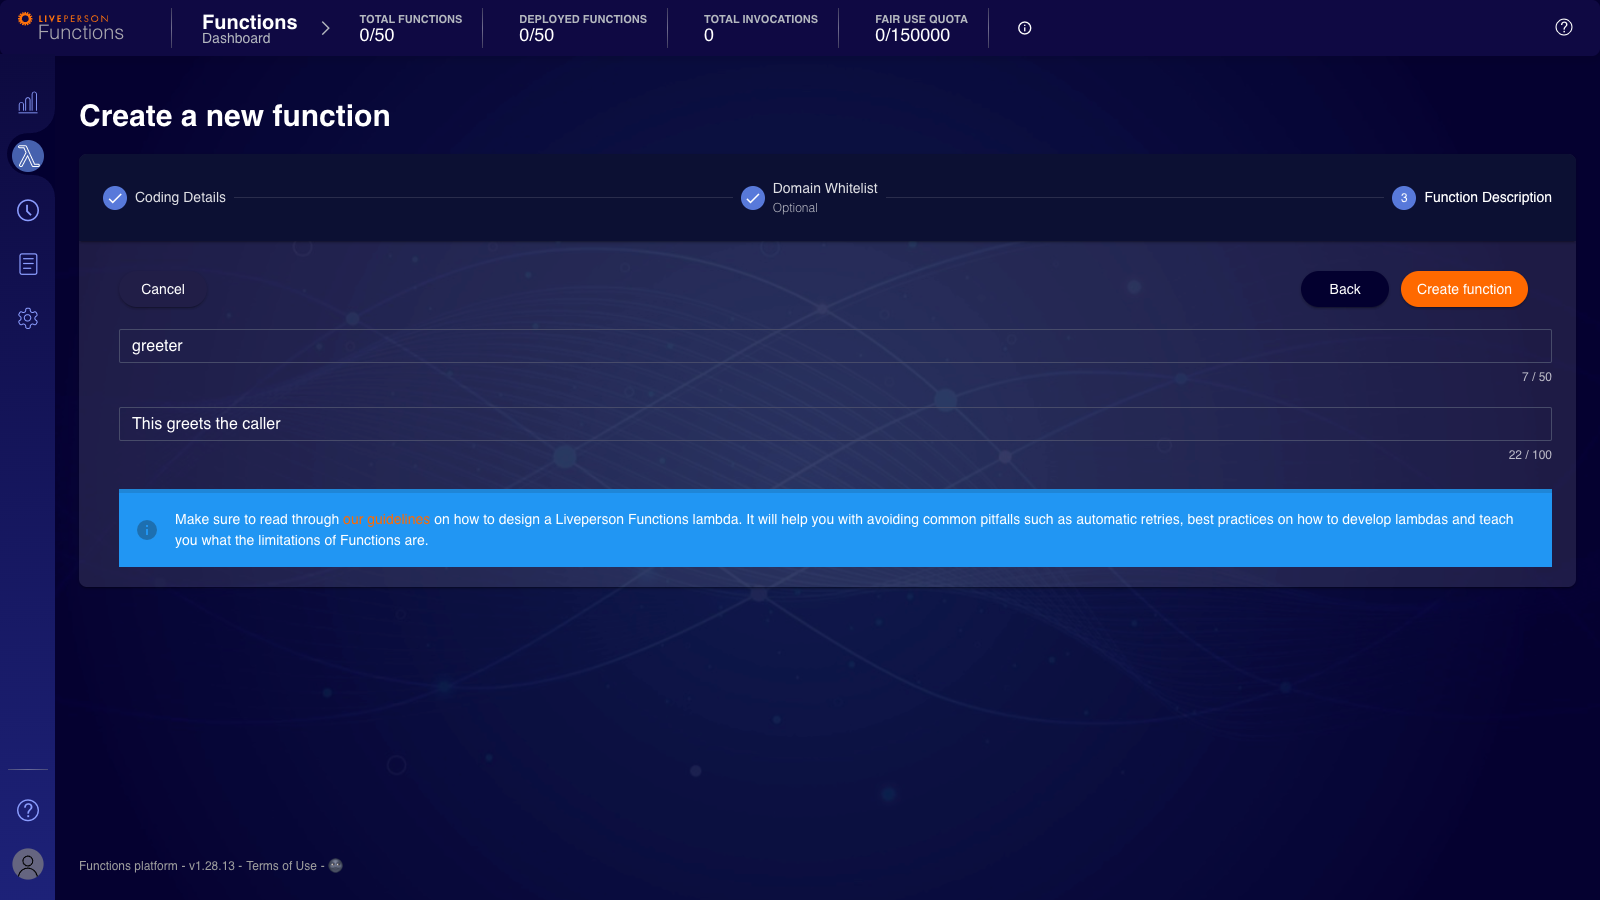
- Create the function by clicking on "Create Function".
- After the function creation, an editor with the function code is displayed. For details on the shown elements, refer to the deep dive UI. We will only focus on the displayed code for now.
- A function is getting a payload containing the Event Source / Trigger information. We will leverage this payload to obtain the
nameof the caller to adjust the greeting message. - Make the following adjustments:
- In the editor modify the existing line
callbackto becallback(null, `Hello ${input.payload.name}`);. - In the editor, add a new line before the callback line with the following content
console.info(`I was called by ${input.payload.name}`);.
- In the editor modify the existing line
- Notice how there is a message next to the "Save"-button reading "Unsaved changes". This informs you if there are any pending changes to the code.
- Go ahead and save the modified code by pressing "Save"-button.
- During the save process, you will see a short notification that it succeeded. Further, the message next to the "Save"-button now reads "No changes to Save".
- Now, you can leave the editor by pressing the "Close"-button.
- Head to the Deployment section as you finish creating and adjusting your first function.
Deploy
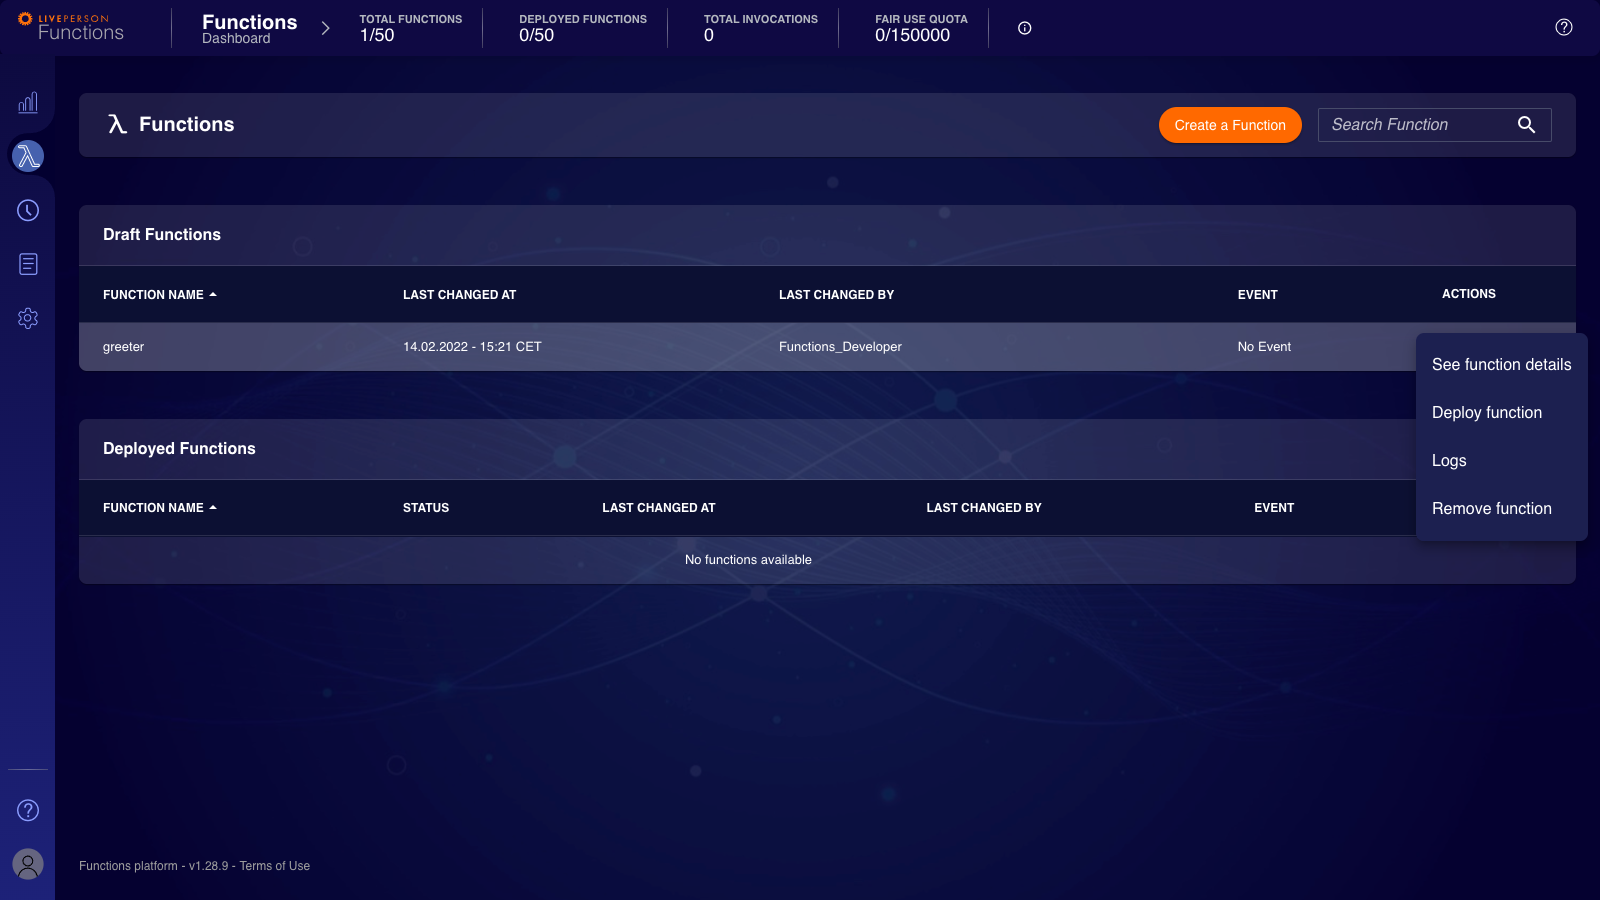
- Select the context menu by clicking on the three dots button next to the function you just created.
- Select "Deploy Function".
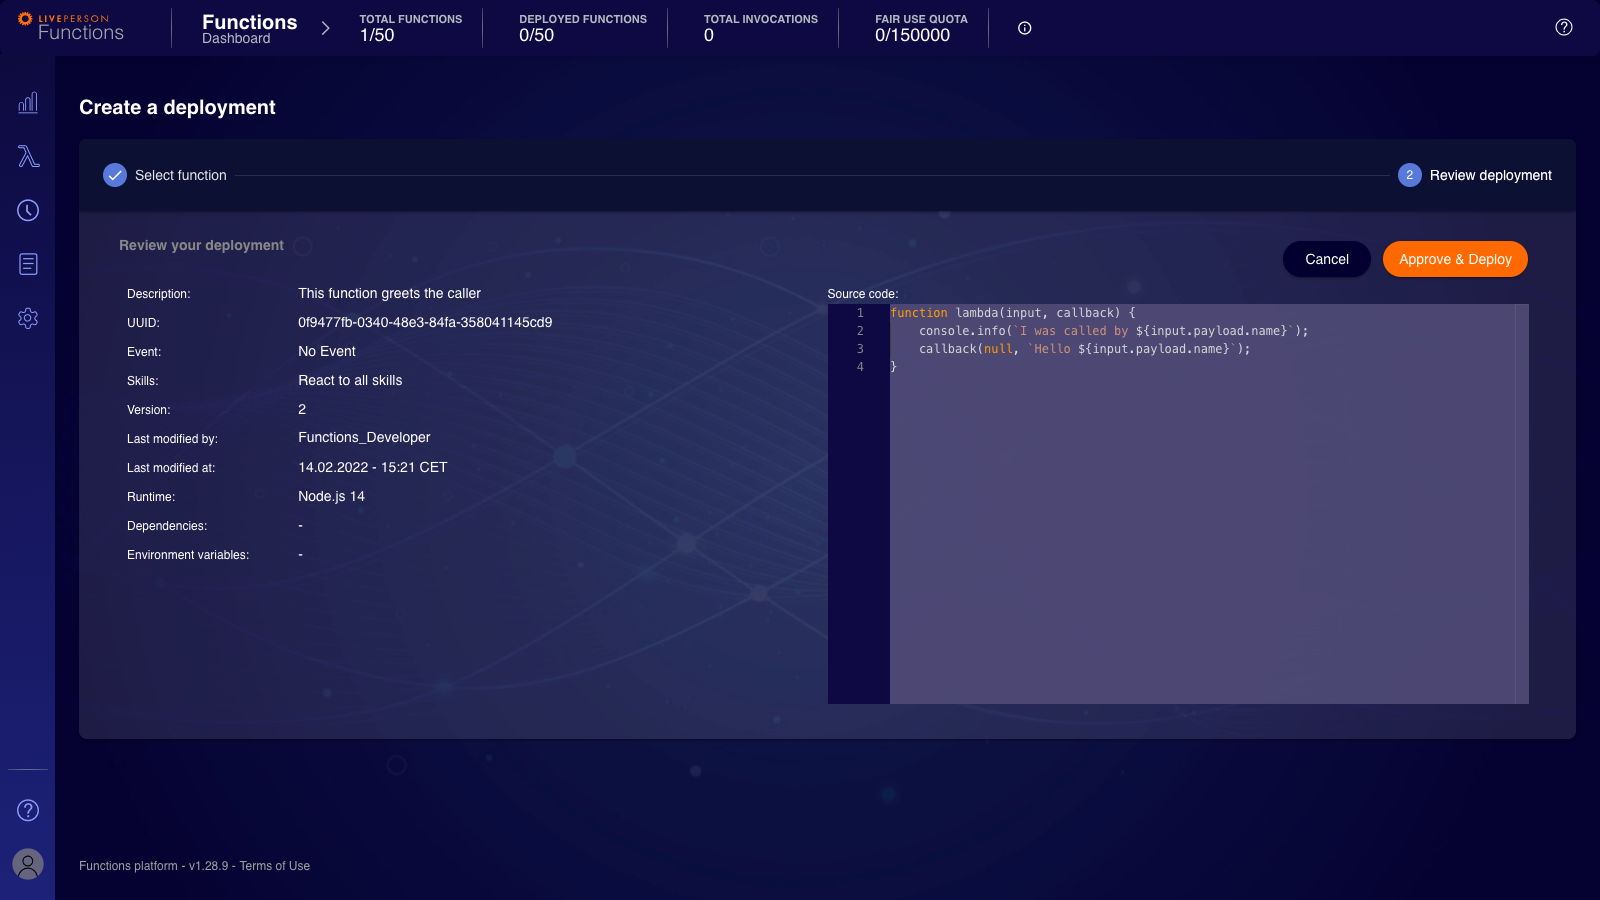
- You are shown a short dialogue that displays the code that gets deployed. For now, click on the "Approve & Deploy"-button.
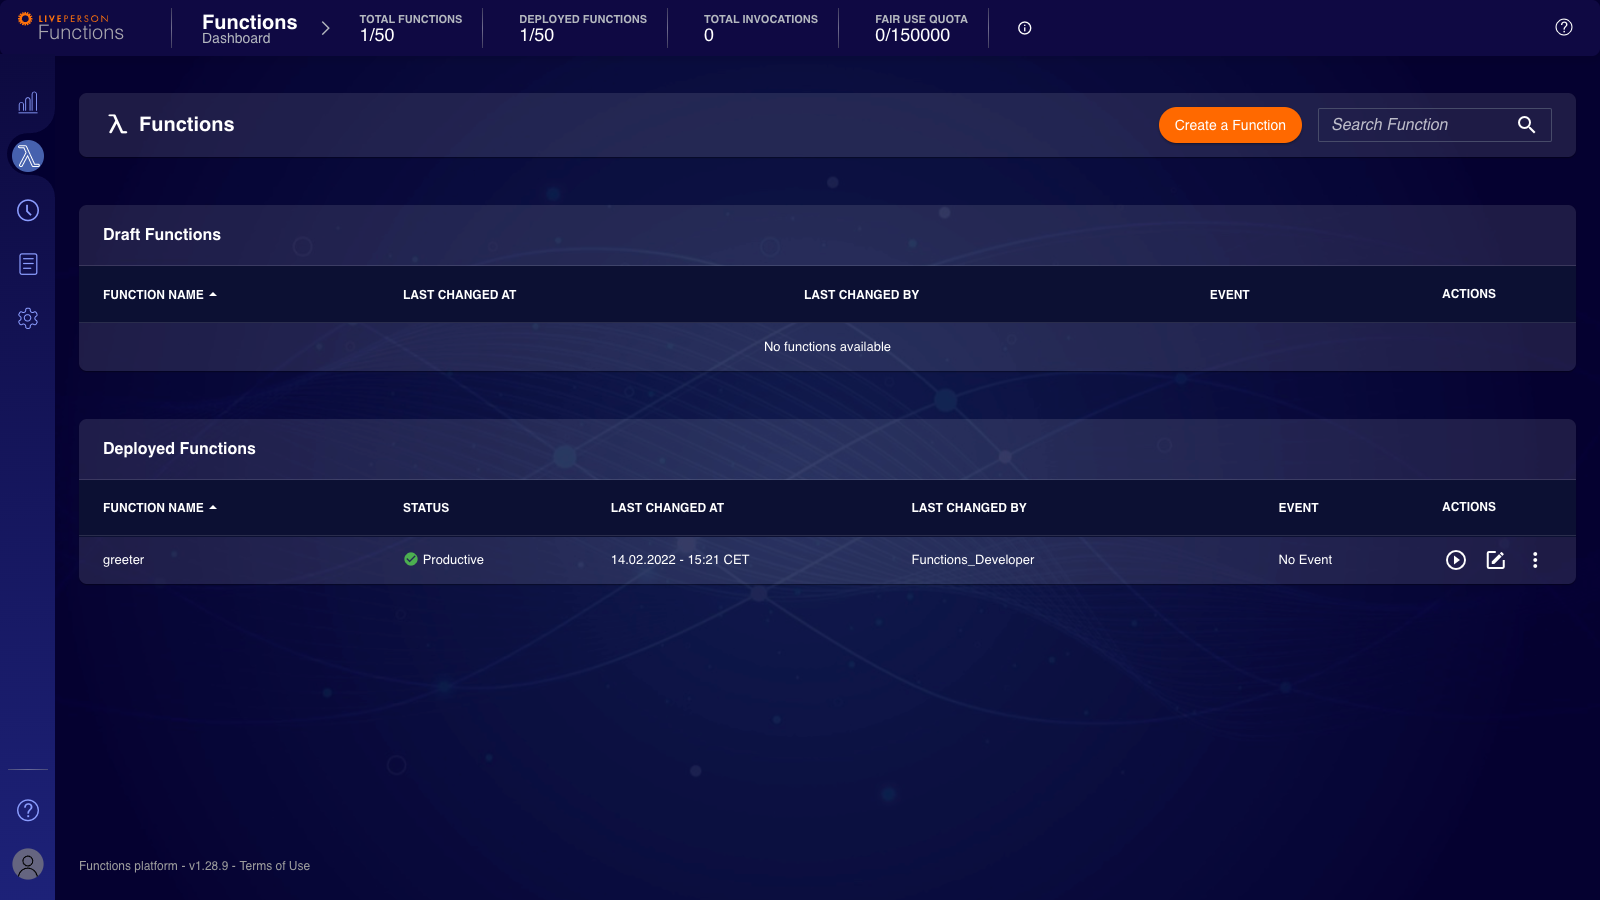
- Wait until the function status changes to
Productive. Please be aware that this can take some time. - Head to the Test section, as you finish deploying your first function.
Test
- To test your function, you can leverage our test invocation. This page can be reached by pressing the "Play"-button next to your deployed function.
- The test page comes with the basic payload structure. To provide the
name-parameter to the function, you want to add a new attribute topayloadwith a name of your liking.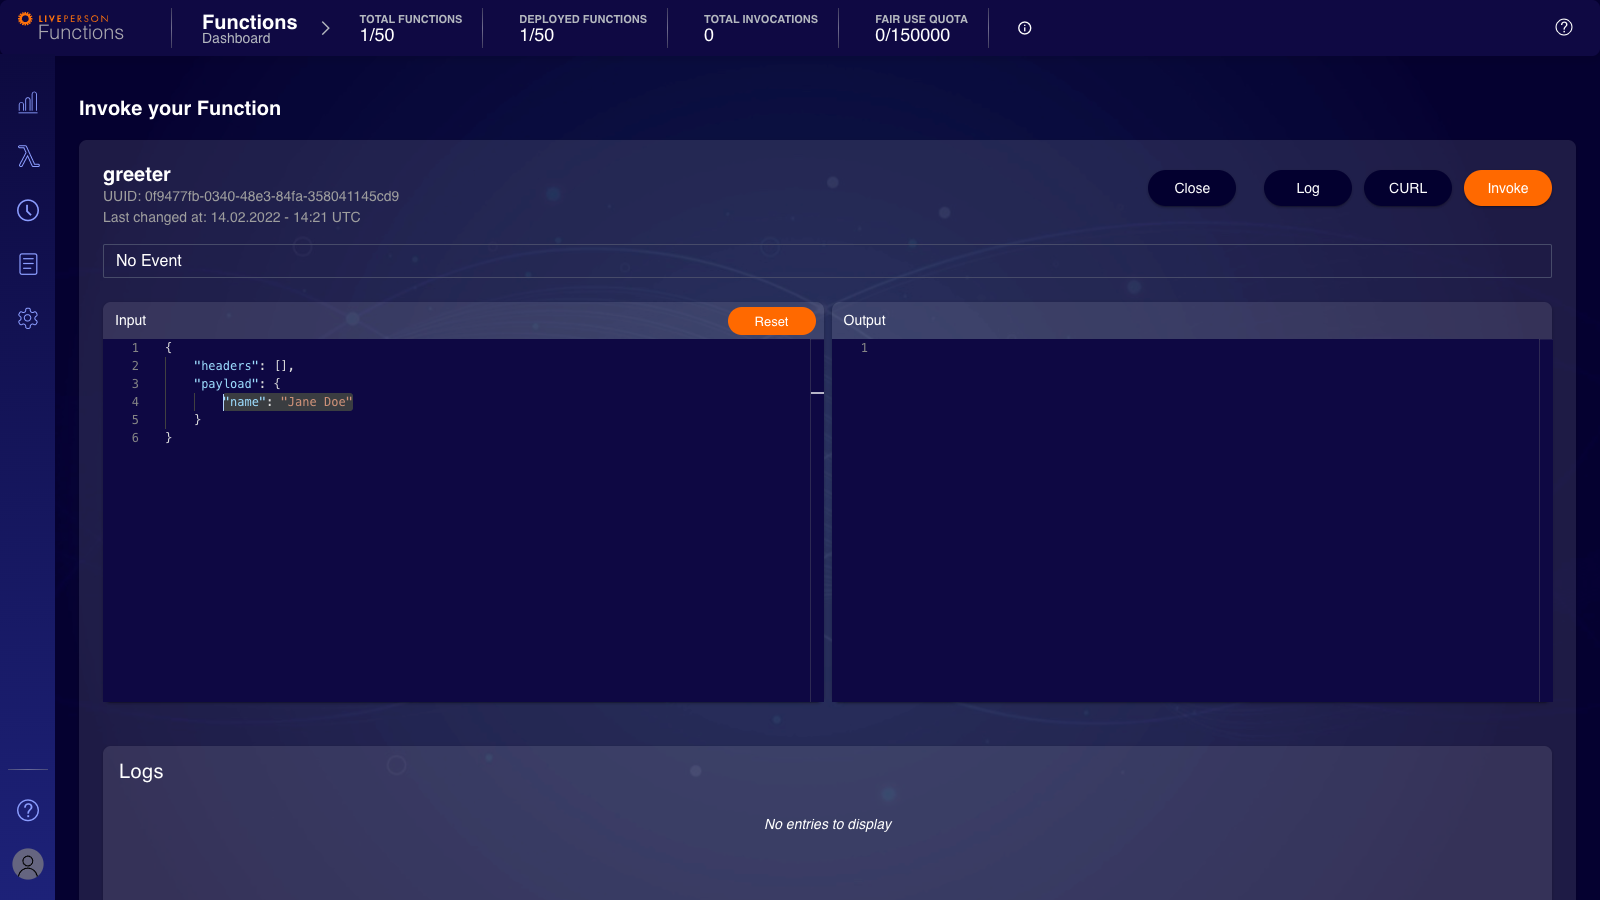
- Now, you can test your function by pressing the "Invoke"-button.
- After the invocation is finished, you can see that the output and logs section is populated with the data from your test invocation:
- In the output section, you can see
Hello YOURNAME. - In the logs section, you can see an entry with the message reading
I was called by YOURNAME.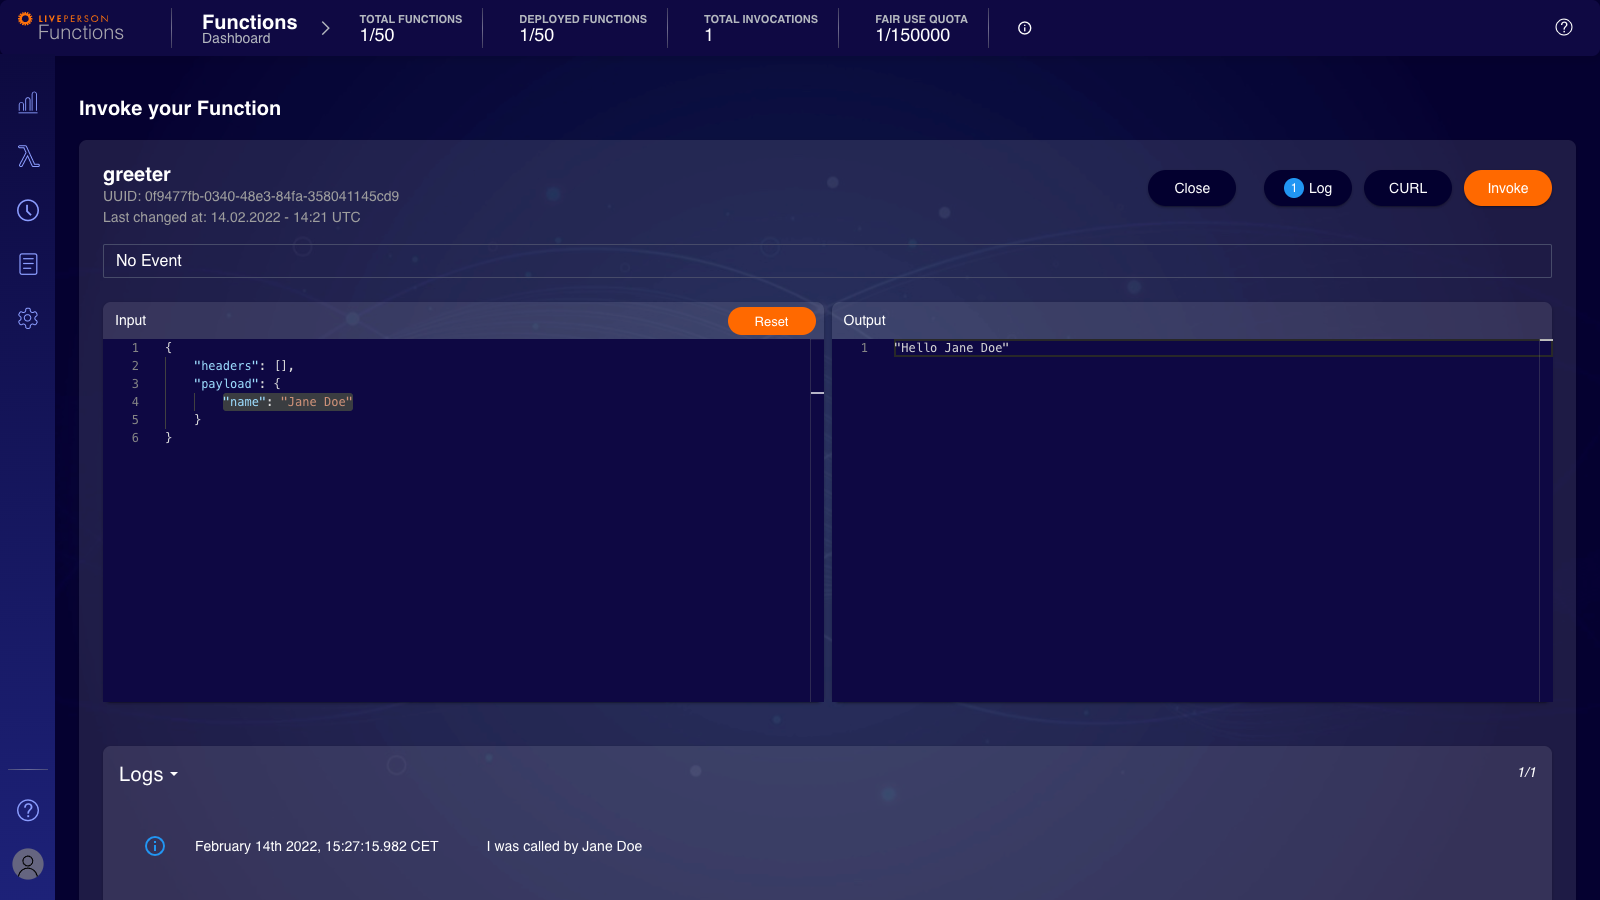
- In the output section, you can see
- You may now close the testing page by pressing the "Close"-button.
- Head to the Cleanup section, as you finished testing your first function.
Cleanup
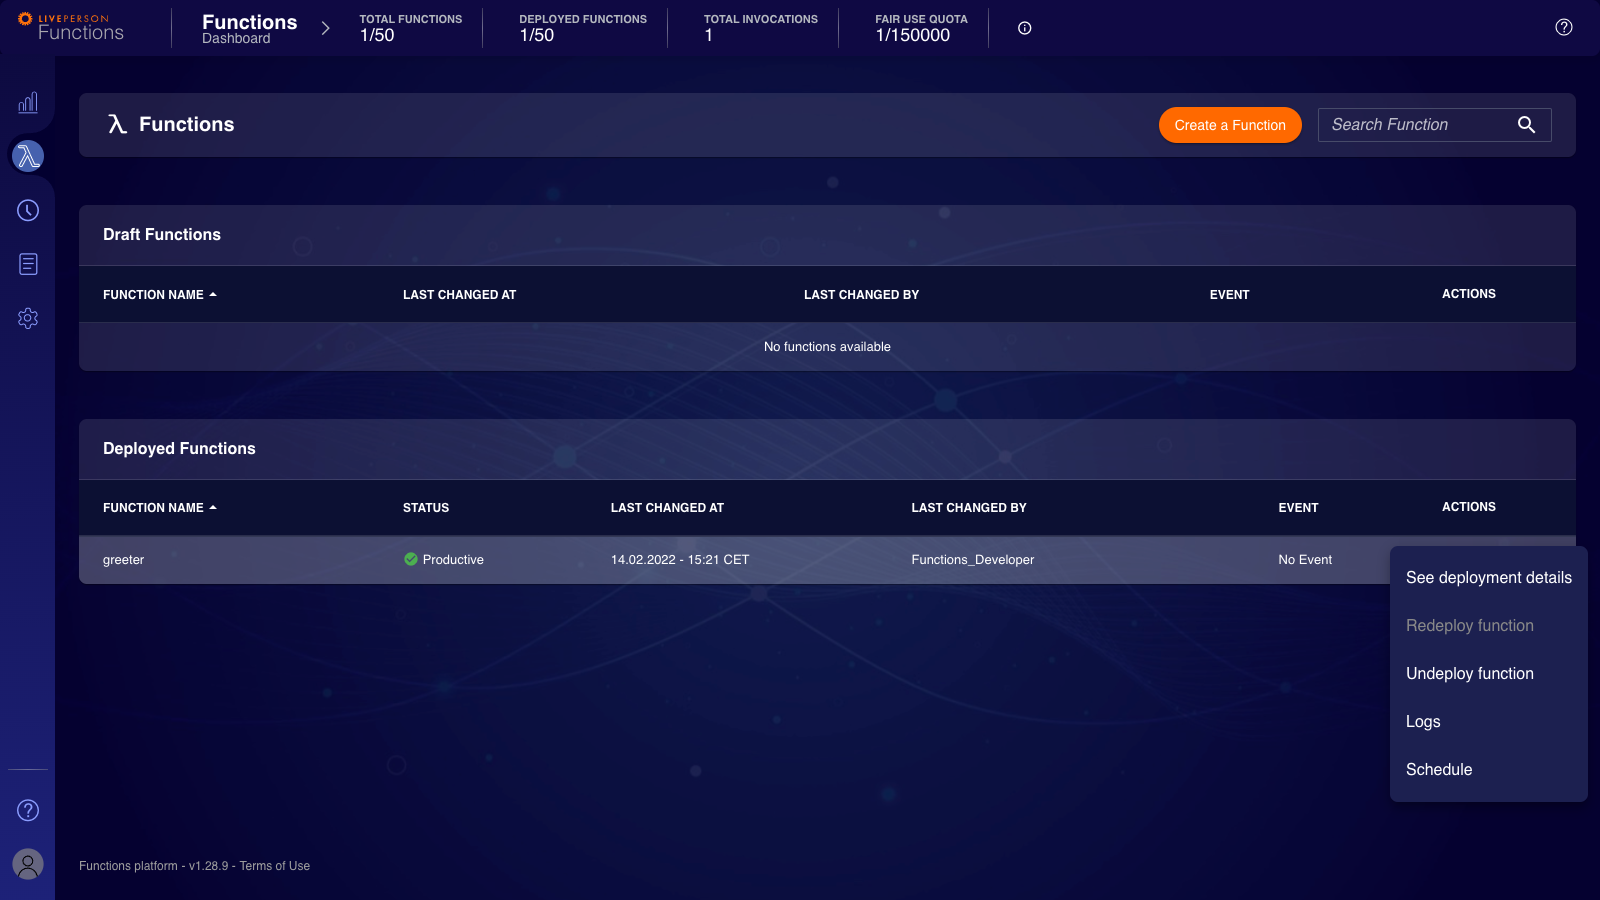
- Select the context menu by clicking on the "three dots"-button next to the function you just tested.
- Click on "Undeploy Function" in the dialogue and confirm the dialogue by pressing "Undeploy now".
- Wait until the status of the function is changed to "Draft". This may take a while.
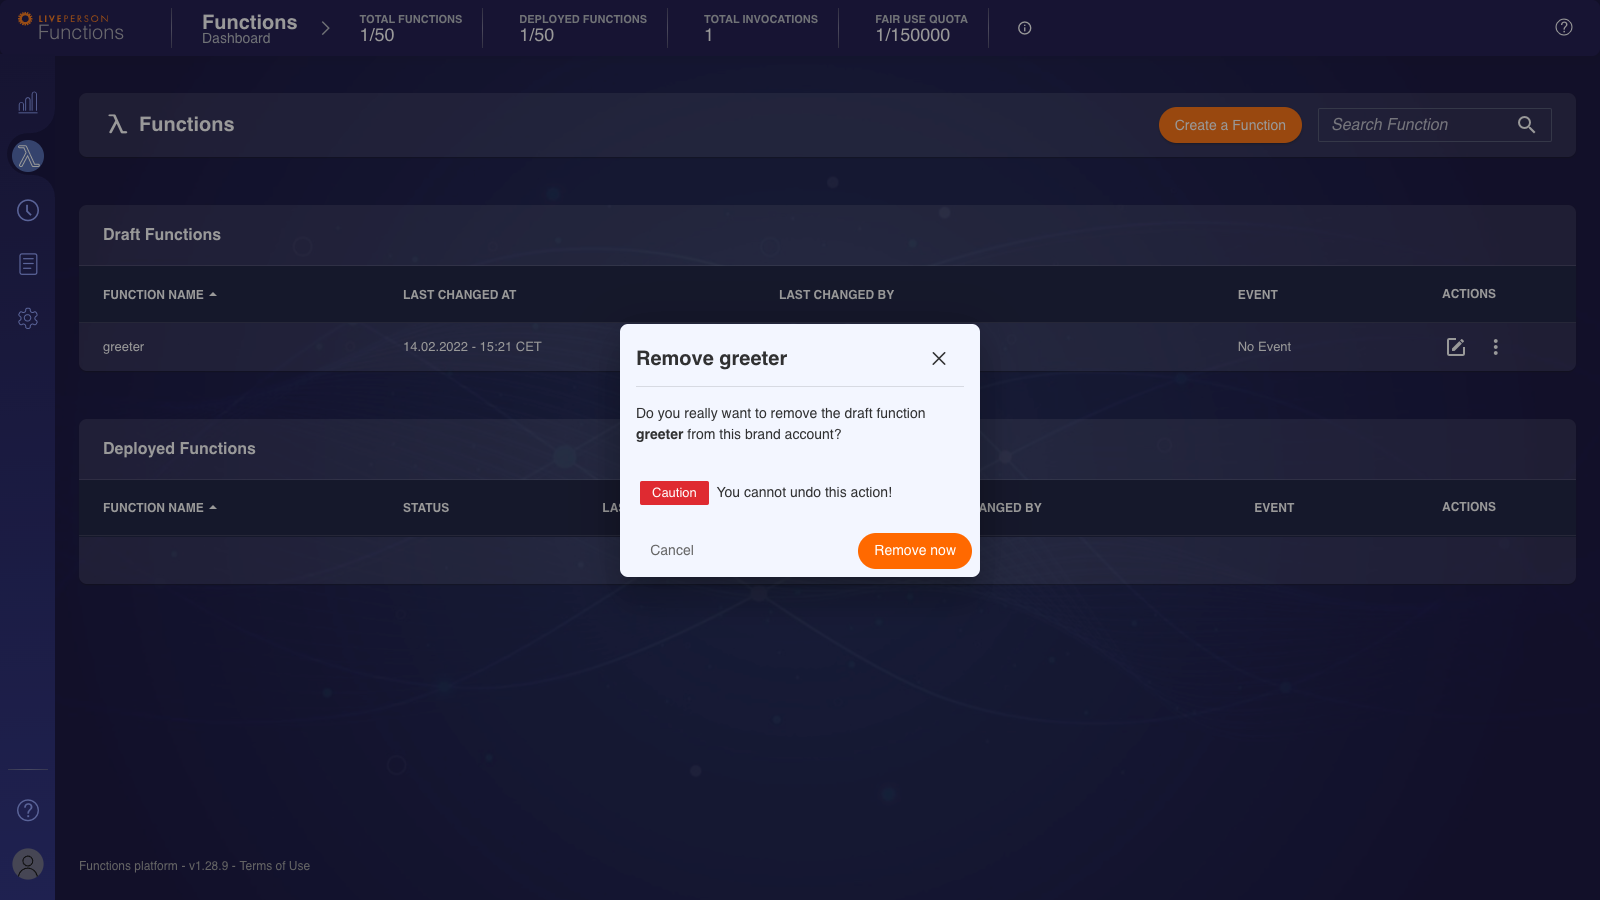
- Select the context menu by clicking on the "three dots"-button next to the function you just undeployed.
- Click on "Remove Function" in the dialogue and confirm the dialogue by pressing "Remove now".
- You just finished your first walk-through..
During the walk-through, you created a new function based on the default settings and modified the generated code. Then, you deployed it. You tested the function by performing a test invocation and observed the output of the invocation. Finally, you first undeployed your function and then removed it, cleaning up your account.