
Introduction
API Integrations allow LivePerson Conversation Builder to perform some action or access the features or data of an external service. For example, you might want to retrieve information on specific items in your product catalog, so you can use that information in interactions in a dialog.
For practice at using an API integration, try the Integrations tutorial. (You’ll need to complete the Dialogs & Patterns tutorial and the Intents tutorial first, as the tutorials build on each other.)
An API integration call times out in 20 seconds; within that time, the integration attempts 3 retries. This isn’t configurable.
API integrations versus LivePerson Functions
Use the following as guidance for when to use an API integration or a LivePerson function.
Leverage Conversation Builder integrations for:
- A single, straightforward API call
- A short sequence of simple API calls
Leverage LivePerson functions for:
- The same API request from multiple bots
- Multiple API requests that are needed simultaneously (Example: You need to retrieve five items (products, etc.) and show them to the consumer.)
- Multiple, consecutive API requests (Example: You need to get a JSON web token (JWT), then use the token to get the consumer's profile, and finally update the consumer's profile.)
- When you need to always have actual data (Example: JWT has a two-hour TTL. Instead of making an API call for JWT every time you need it, schedule a LivePerson function to update the JWT every two hours.)
- An action that is needed in response to an event (Example: React to an Idle event by closing the conversation.)
Dependencies
- An integration requires a REST-based web service or API.
- An integration requires a response format that's XML/JSON-compliant.
- If you have IP restrictions in place, you'll need to do some whitelisting before adding an API integration. This is so Conversation Builder can make calls to your brand's systems and vice versa.
Best practices
- Define an integration only once in the bot. If it’s called from different places in the bot, handle this dynamically using bot variables (for example, pass a needed skill dynamically). This leads to a more streamlined bot with fewer integrations.
- Set the URL, headers, query parameters, the payload for POST and PUT API calls, etc. using variables and environment variables that you’ve created.
- For optimal performance, store only access tokens that are 5 KB or smaller in variables. You can store larger tokens, but expect some latency in the API calls.
- Always perform a lookup of a LivePerson service domain using the Domain API dynamically. Then set the value in a variable or an environment variable, and reference the variable where needed (e.g., request URL). Don’t hard code the service domain. The value can change, although this happens infrequently.
- In the Data Sources > API area of Conversational Cloud, add permissions for the bot token to make API calls to the external service.
Security best practices
- URLs and URL parameters: HTTPS and HTTP are supported. Don’t send credentials or sensitive data in the parameters.
- Credentials: Use a secure form of authentication and authorization. OAuth is recommended. Learn more about credentials.
- API: Your brand’s API should be designed according to security standards. For example, at a minimum, use an authentication mechanism. Also provide support for other best practices, such as protecting the API from high volume and bursts in traffic.
- API response handling: For security and privacy reasons, you must not log returned customer data using the JavaScript API or store the data in permanent variables.
Retrieve service domains
Do you need to dynamically retrieve a domain for a given service in the bot? Don’t hard code it. Conversation Builder offers a scripting function named getLPDomain.
Add an API integration
Before adding an API integration, review the best practices above.
- Open the bot, and click Integrations in the upper-left corner.
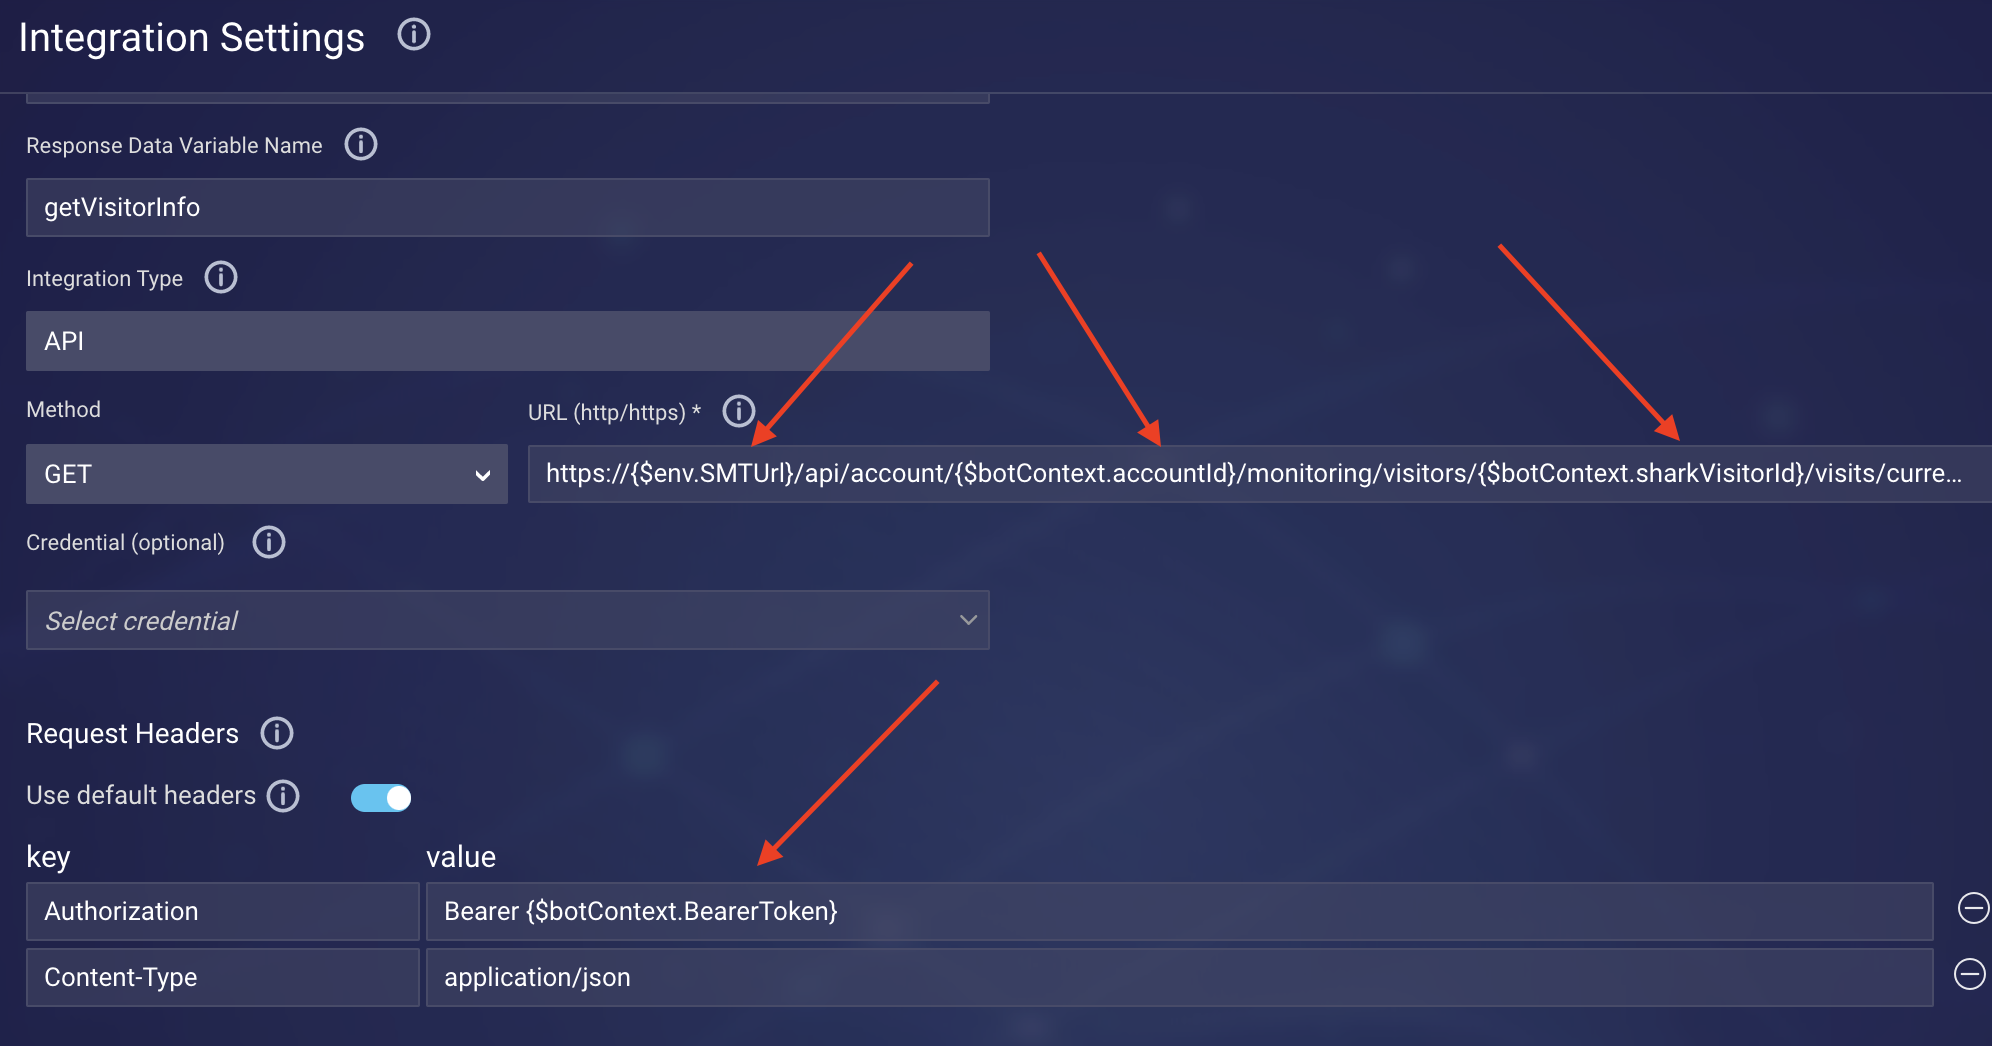
- Configure the integration settings (required fields are marked with asterisks):
- Integration Name: Enter the name of integration. Enter a name that's meaningful (it describes well the integration's purpose), concise, and follows a consistent pattern. This helps with organization, and it makes it easier for bot developers to work with the integration during bot development.
- Response Data Variable Name: Enter the name of the variable that gets populated with the response from the API.
- Integration Type: Select API.
- Method: Select the type of HTTP request method.
- URL: Enter the request target, the URL. You might want to pass variable values via the URL, like so:

- Credential: Select the credential to use for authentication if applicable. The bot will automatically enhance the request based on the credential's type and data.
-
Request Headers — Use default headers: When this toggle is on, the following request headers are included automatically in the API request:
- Accept: application/json;charset=UTF-8
- Content-Type: application/json;charset=UTF-8
Since these headers are commonly used, the toggle is on by default as a convenience. However, you can use different values if required by your API: Just turn off the toggle, and add the headers manually as key/value pairs.
- Request Headers — key/value pairs: Add any message headers to include in the request.
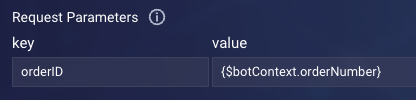
- Request Parameters: Add the request parameters to pass in the URL’s query string. It's more common to pass variable values as key/value pairs added here:
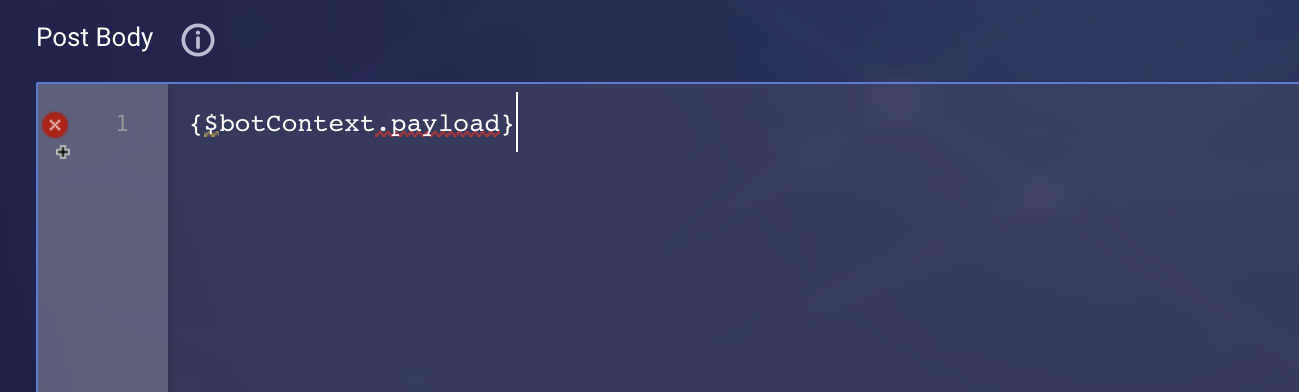
- Post Body: Enter the payload to send. You can also pass variable values using the post body, by writing them in JSON here:
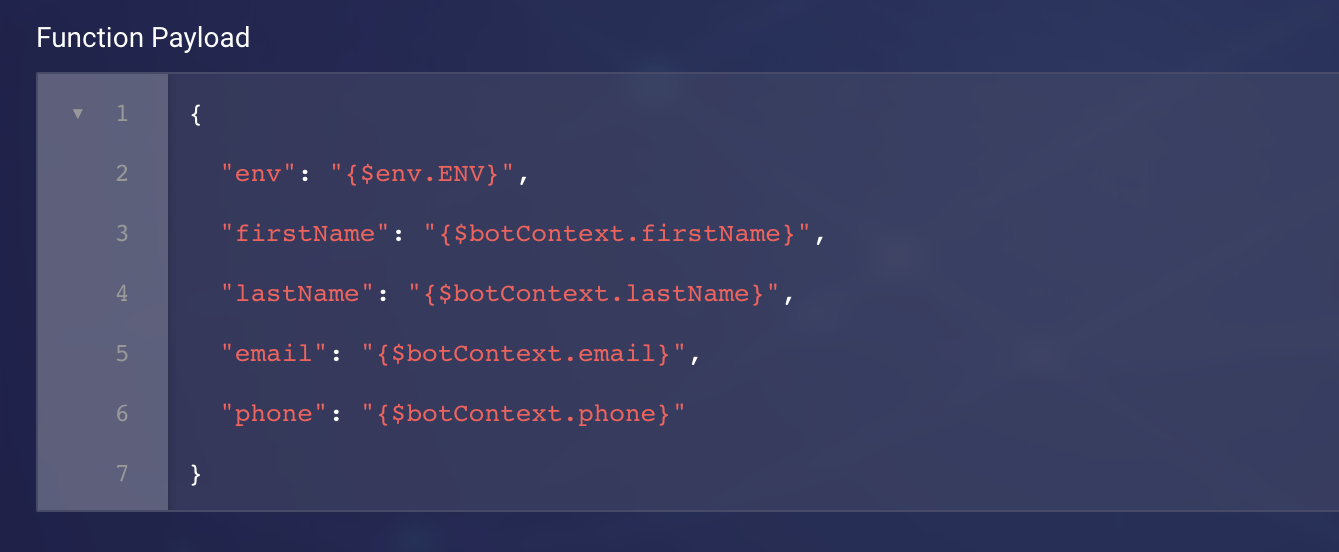
Overall, the Post Body must be an object or bot variable that’s saved via JSON.stringify(payload).
- Transform Result Script: If applicable, use this section to write JavaScript code that transforms the raw result (typically in JSON format), so you can use the information in the bot's dialog.
- Custom Data Fields: Add the fields that will store the result data in key/value pairs. Users who are tasked with creating bots can use and display this data in interactions by referencing these fields.
- Click Save.
Handling API responses
In the Integration interaction that invokes the API, you can define custom rules based on the result of the API call, i.e., its success or failure. This is done using the "API Result" match type.
In the case of a failure response (a returned status code other than 200 or 201), the bot sends a default error message of, "Sorry, I could not find anything for that." To override this message and send a different one, define a custom rule based on a failure result, as mentioned above.
Be aware that the API's response of success or failure only indicates whether the request was successfully received and processed. It doesn't indicate whether any results were returned. To determine this, you'll need to use JavaScript in the Post-Process Code of the Integration interaction to check for any results. You can then direct the conversation flow accordingly, for example:
var count = botContext.getBotVariable("FAQS.article.count");
if(count < 1){
botContext.setTriggerNextMessage("No Articles Found");
}else{
botContext.setTriggerNextMessage("Display Article");
}
Disabling the predefined request header fields (legacy)
This section discusses a legacy approach to disabling the predefined request headers in an API integration. The approach requires a bit of JavaScript code. But there's a simpler way: In the API integration, simply disable the Use default headers toggle. For more on this toggle, see "Add an API integration" farther above.
As a convenience, the following request header fields are predefined for an API integration:
- Accept: application/json;charset=UTF-8
- Content-Type: application/json;charset=UTF-8
Since the values are predefined, they're always used regardless of how you've configured the integration. However, if desired, you can disable these predefined header fields in order to use different values. To disable them for only the current request, use the following Pre-Process Code in the Integration interaction:
botContext.setBotVariable("__standardHeaders__", "off", false, false);
To disable them for the current session, use:
botContext.setBotVariable("__standardHeaders__", "off", true, false);
Troubleshooting
Messages before the API integration interaction aren’t being sent
Once a dialog is triggered, the execution of the interactions therein is almost simultaneous. To ensure each interaction is processed (in order) as expected, add a small message delay to each interaction. Learn more.