
This deep dive will look into how functions can be managed and configured via our web interface. If you want to learn how to interact with the functions platform via our command-line interface, head over to the deep dive.
When you use the LivePerson Functions platform for the first time please make sure that you are using a Conversational Cloud Admin account to ensure that the provisioning of the account succeeds.
Creation Process
Head to the function management view using the "Lambda" icon in the side panel on the left-hand side to create new functions. Here you can see all available functions on the account and their current state.
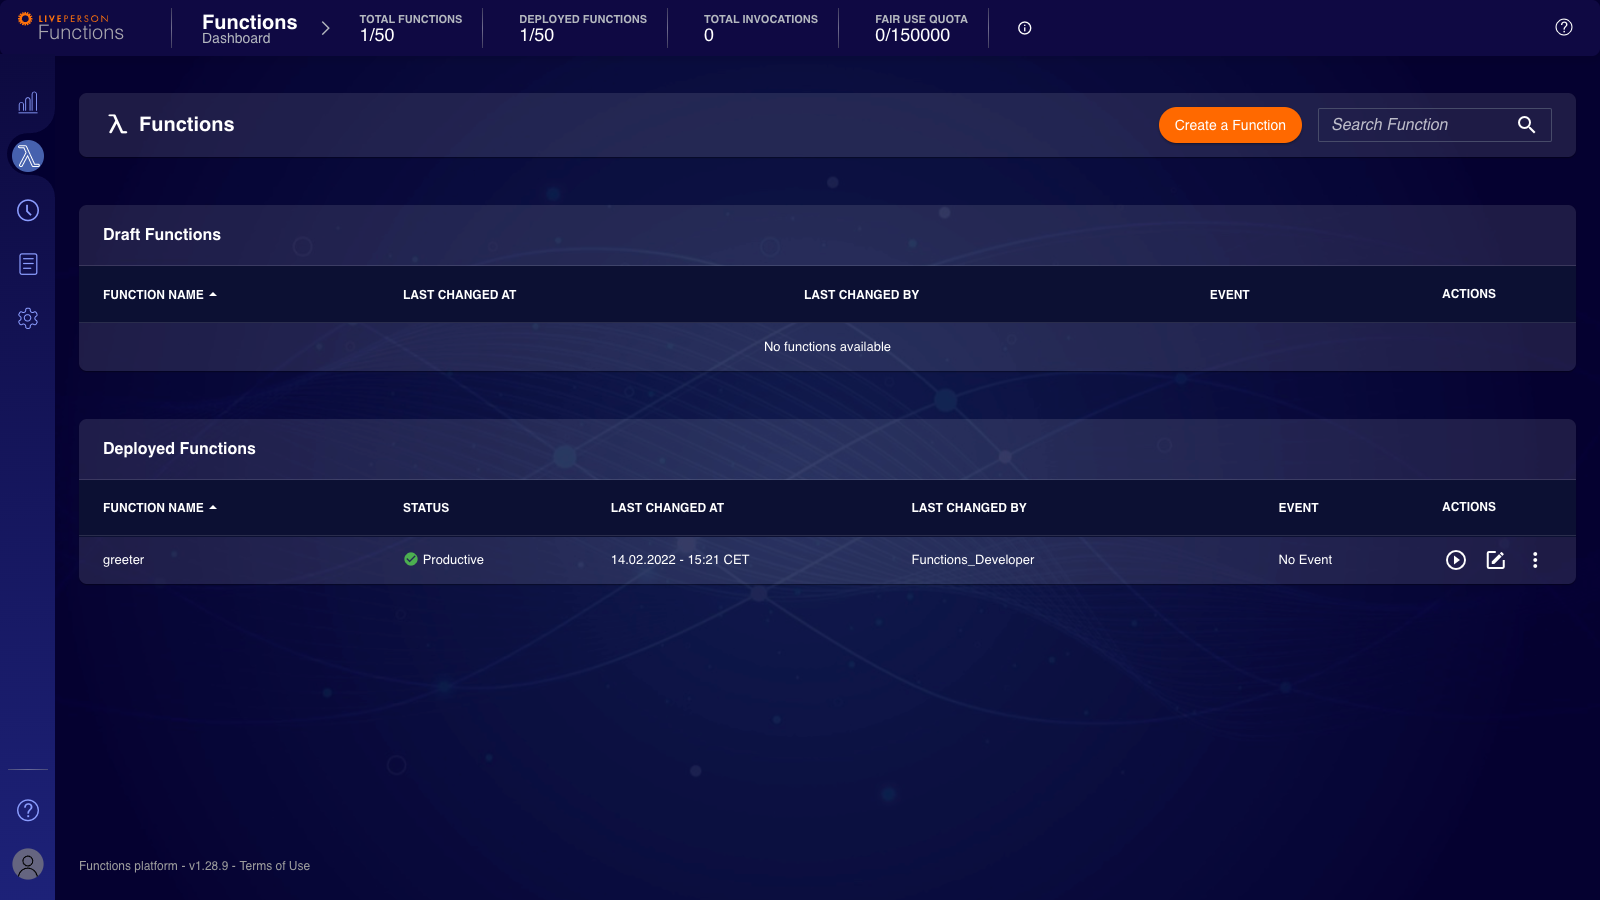 A function can behold the following states:
- Draft: function is not yet deployed
- Productive: function is deployed and does not have any pending modifications
- Modified: function is deployed and does have pending modifications
- Marked Undeployed: function is currently in the process of being undeployed
- Build Error: function was attempted to be deployed, but the building failed
- Deploy Error: function was attempted to be deployed, but the deployment failed
To create a new function, press the "Create a Function"-button displayed next to the header of the functions table.
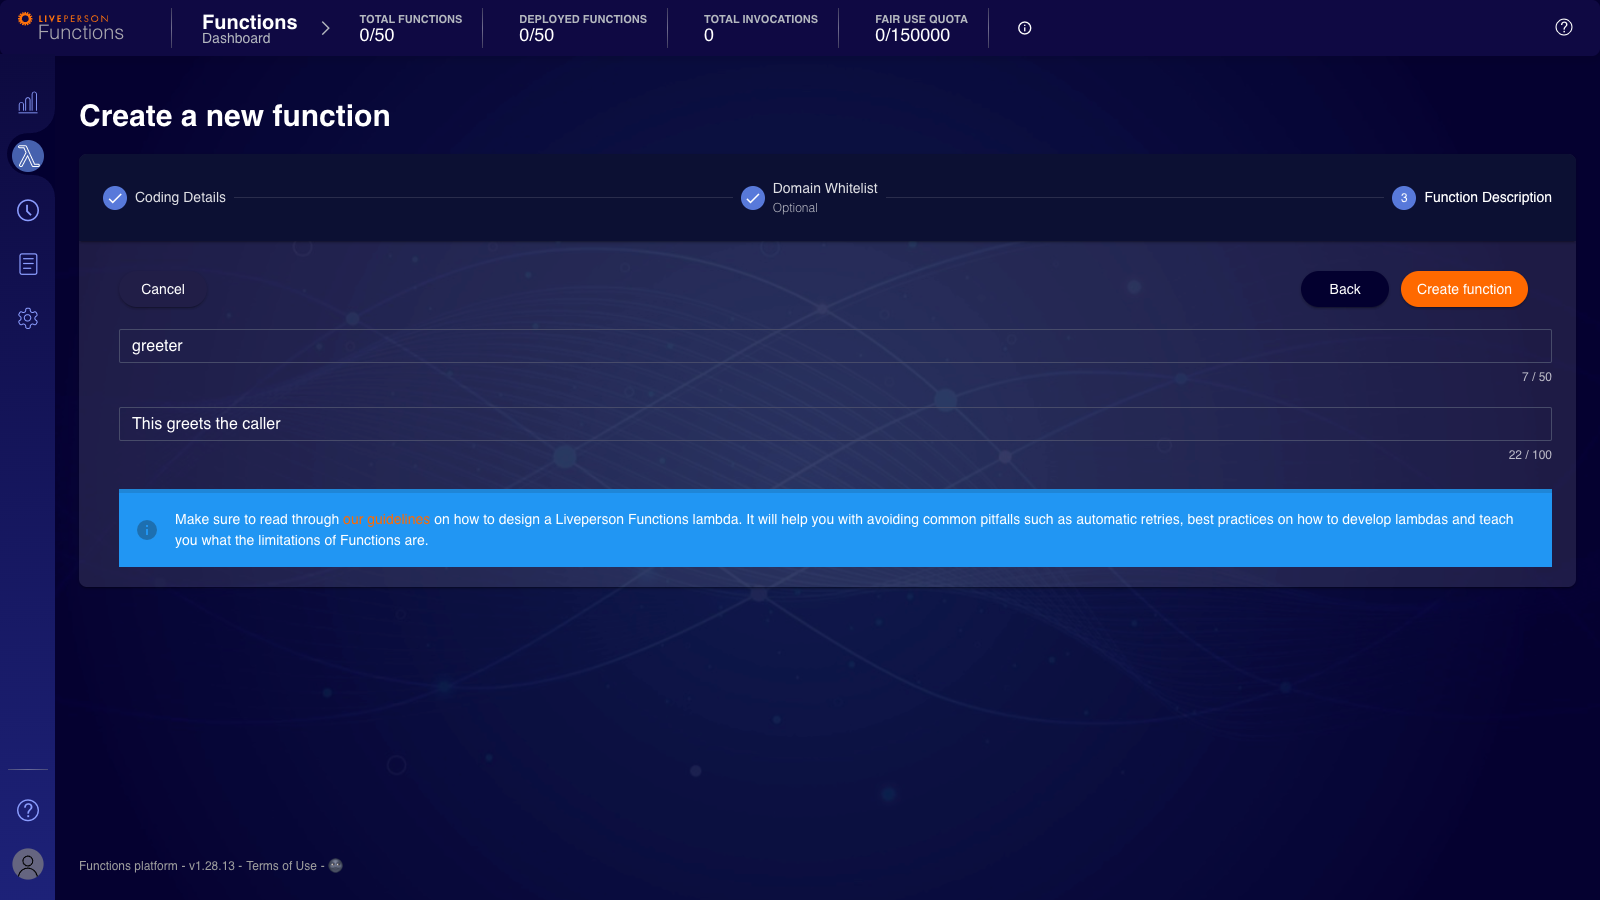
First step: Coding Details
On the first page of the "Create a new function"-assistant, you can set basic information for the function: the runtime version, the event to respond to, skills attached to this function, a template and access to external domains. The editor on the right side will always show you the initial code generated based on your selections.
You may choose an event to react to from the drop-down. The default value is No Event. For an overview of all available events, head over to our Event Sources. Some of the events have a variety of templates available to you.
The toggle at the bottom of the page can activate/deactivate the second step, which allows you to configure a allowlist entry.
If you want a function to be triggered only by specific skills, you may choose these in the drop-down menu, that is populated using the skills available in the Conversational Cloud. Please note that this functionality is limited to the Automatic Messages.
By default, the function will respond to all skills. The maximum number of skills is 50.

The drop-down menu is always disabled if the selected function template is not an Automatic Messages template.
You may choose to create more than one function of the same event if you set different skills for each function. As long as they are not overlapping, you can create multiple functions for the same event. The following Scenario should highlight the implications:
- ✅ Function 1 for Event A [Skill 1,2] + Function 2 for Event A [Skill 3,4]
- ✅ Function 1 for Event A [Skill 1,2] + Function 2 for Event A [Skill 3,4] + Function 3 for Event B [Default]
- ✅ Function 1 for Event A [Default]
- ❌ Function 1 for Event A [Skill 1,2] + Function 2 for Event A [Skill 3,4] + [Default]
The above example, "[Default]", refers to not selecting any skill, the default behaviour.
Second step: Adding Domains to the Allowlist
When adding a domain to the allowlist, you should always consider some common pitfalls. First, make sure your target domain is not redirecting: If it is, you also need to allowlist any domain that is part of the redirection chain. An easy way to test if your domain redirecting is the following command:
$ curl -v -L YOUR_DOMAIN 2>&1 | grep -i "^< location:"
Example:
The following example shows that when calling http://google.com, a redirection to https://www.google.com/ is performed.
    $ curl -v -L http://google.com 2>&1 | grep -i "^< location:"
    < Location: https://www.google.com/
Next, ensure that you allowlisted the correct domain when working with subdomains. Let's say you are visiting https://www.liveperson.com and therefore allowlisted liveperson.com. www.liveperson.com is a subdomain of liveperson.com so this will not work with your allowlist entry. Instead, the correct domain to allowlist would be www.liveperson.com or *.liveperson.com.
Finally, as shown above, we do support the use of wildcards by setting *. Be aware that we only support one wildcard in the domain, so *.*.liveperson.com is not possible, while *.liveperson.com is possible.

The domain is added by inserting it and clicking the "Add"-button next to the input field. Once it is saved, it will be reflected in the domain list below.
Adding a domain might take up to to 5 minutes until being "active"
Third step: Function Description
In this final step, you will need to provide a name and a description of your function. Names within an account need to be unique. Provide a meaningful description of what your function does in the "Description" field.
Deployment Process
The deployment process is started by pressing on the three dots next to the function you like to deploy. In the context menu, please select "Deploy Function". Once you press the button, you will be presented with the deployment review dialogue. Here you have a final chance to see which code will be deployed.
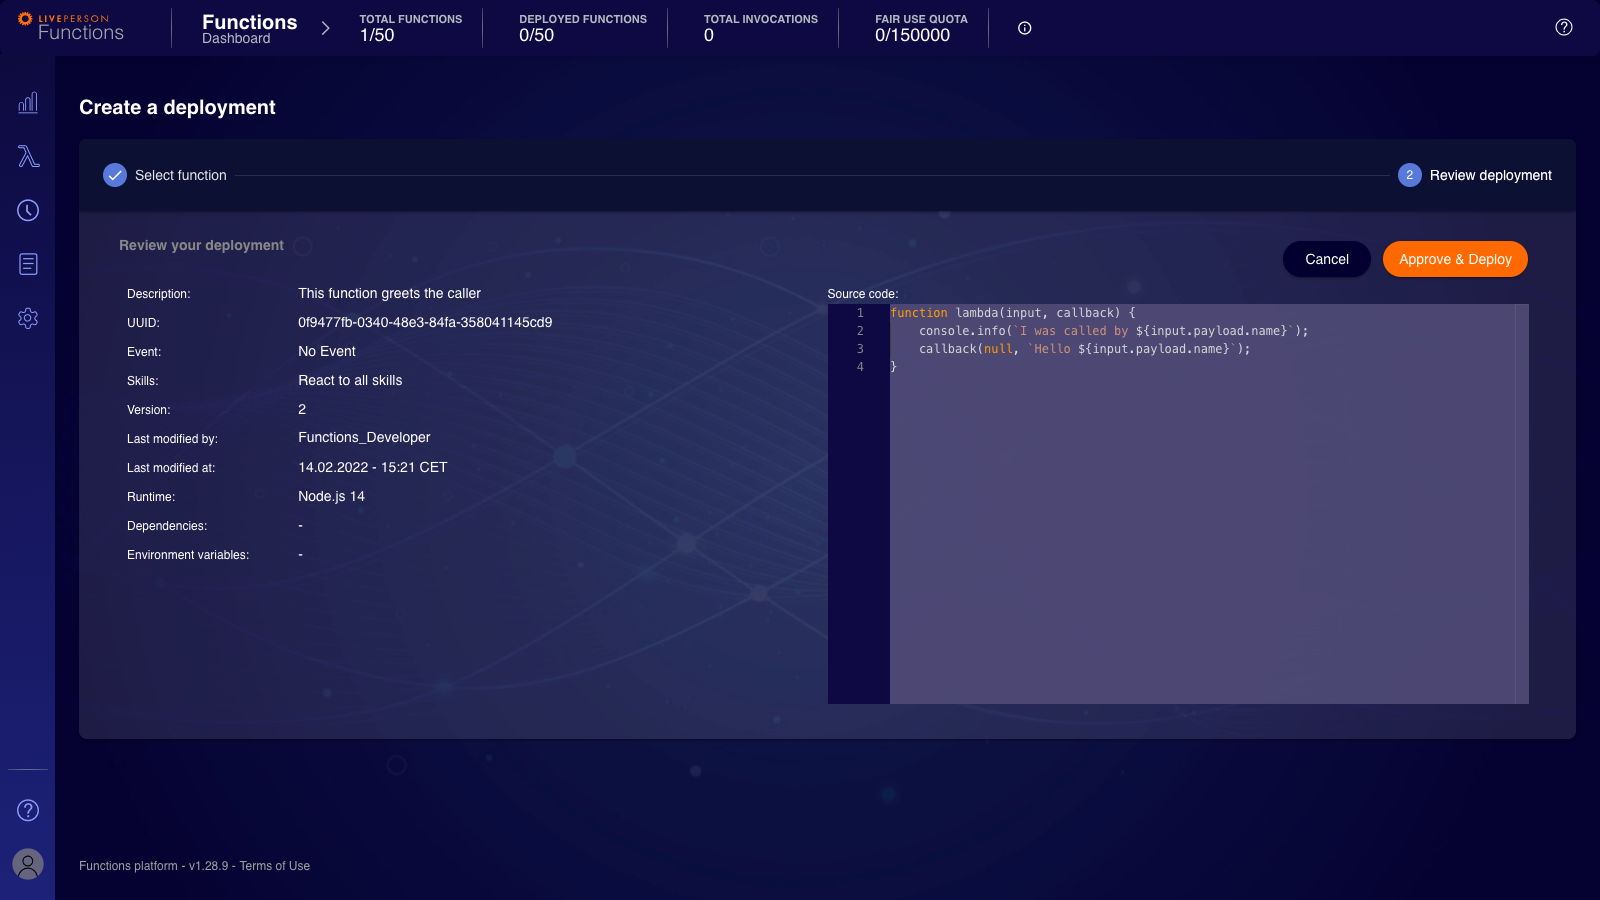
As mentioned previously, a deployment can encounter an error either in the build or deployment stage. In both cases, please attempt a retry after a couple of minutes to see if the issue persists.
Testing your Function
To test your function, you can leverage our test invocation. Press the "Play"-button next to your deployed function to use it.
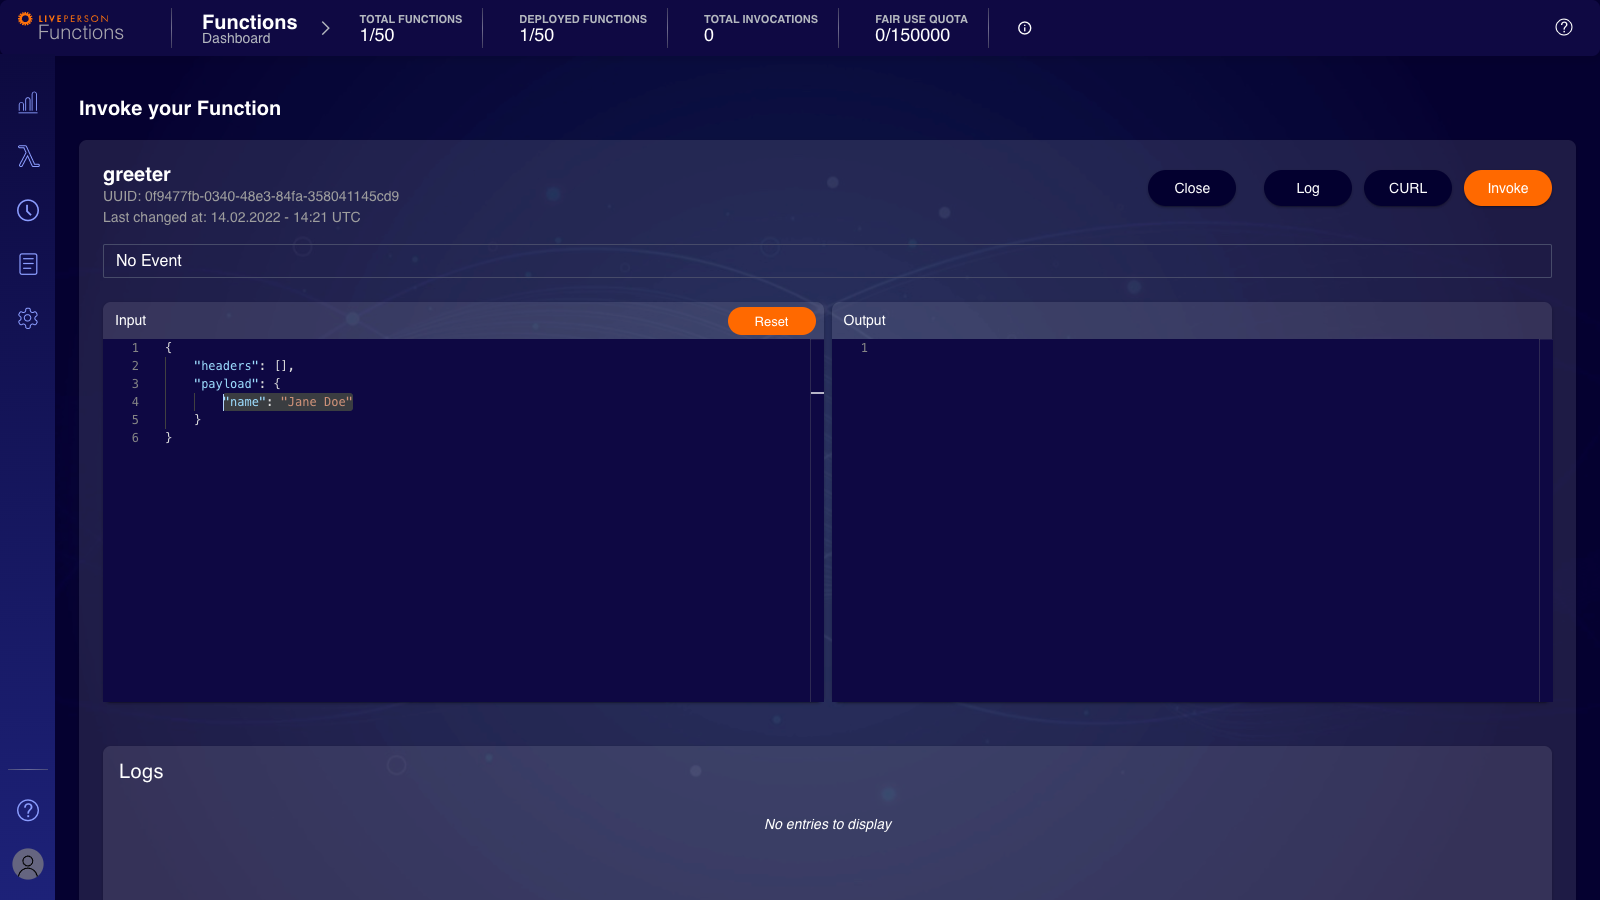
The displayed payload will be different based on the event you selected initially. You can modify the payload before performing the invocation. This enables you to test and debug edge cases within your function.
Please be aware that a large function responses can freeze both Testing UI and Debugger and degrade function performance. If freezing of the UI occurs we advise you to reduce the data to what's necessary to achieve your task.
The output of the call will be presented on the "Output"-Area. These can be found in the log section and logs created by the invocation. If you want to learn more about the logs, head over to here.
Development of Functions
Generally speaking, you can leverage the Environment variables and Secrets to make your function code configurable. Your function's code will be checked against the following requirements:
- Is your code syntactical correct, or are there syntax errors?
- Does the code exceed 100.000 characters?
- Did you implement our function contract
- Is there a function called
lambdadefined? - Is callback defined and called? (Please be aware this check does not consider all possible paths, so make sure that you handle exceptions correctly and call the callback function in all cases.)
- Is there a function called
- Did you use a forbidden expression like
eval?
In the following chapters, we will look at the Debugger and the Editor, talk about features and how they can enrich your development experience.
Debugger
The debugger allows you to simulate and analyse an invocation within the Functions platform.
Start working with the debugger by navigating the Debug tab Functions Editor sidebar. From there, you have several options:
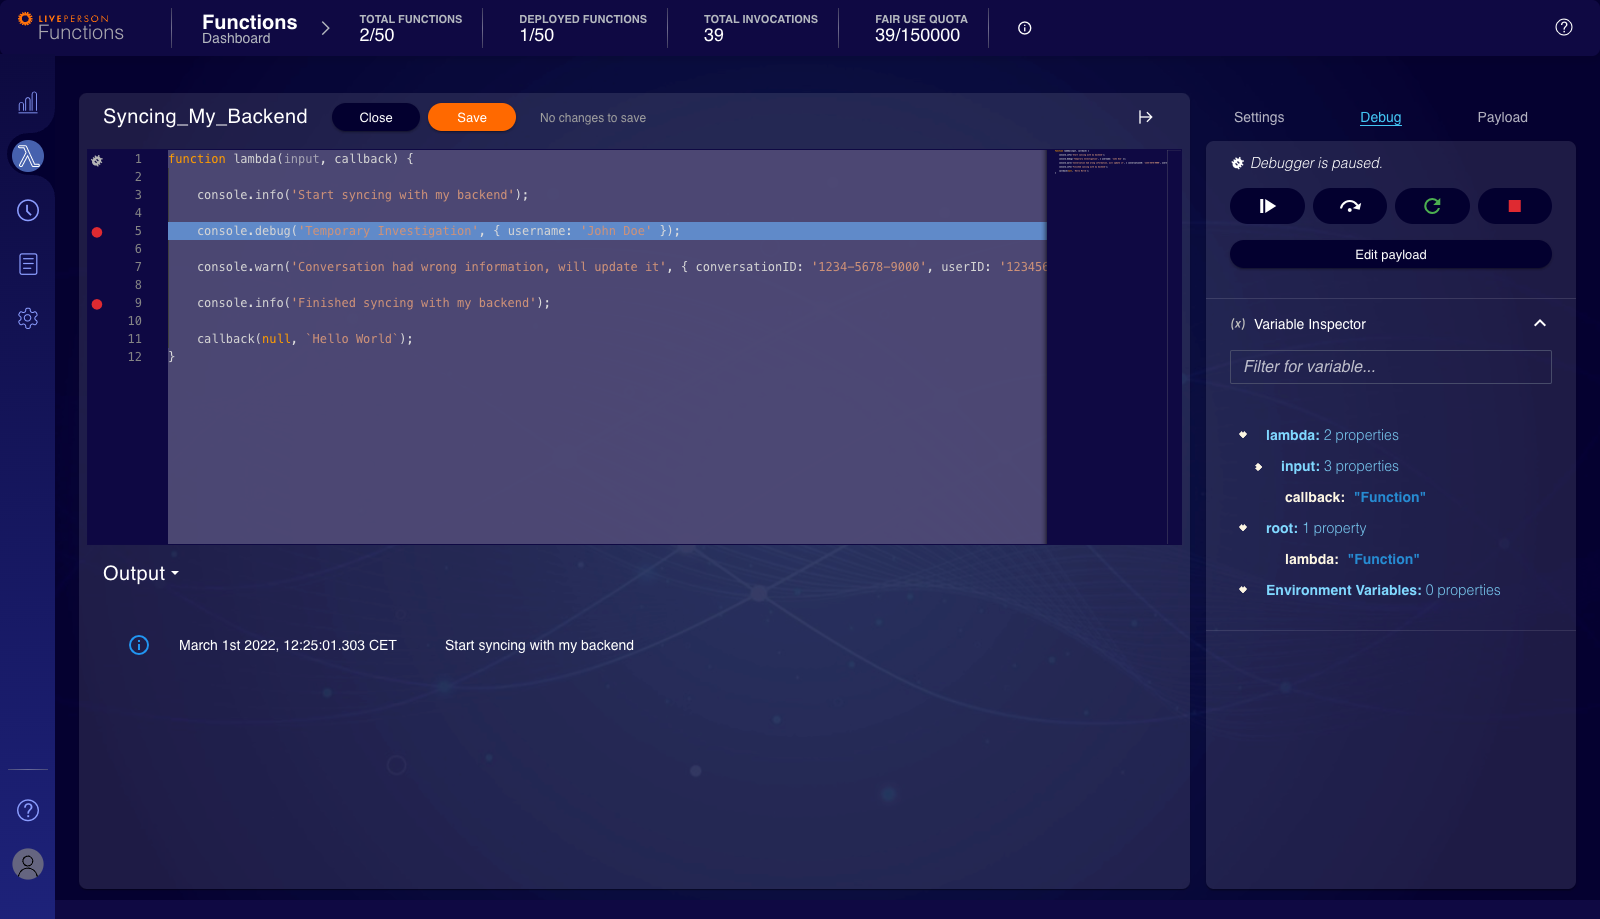
- Code: Here, you can set breakpoints and your execution current position.
- Debug Sidebar: Change the debug payload and control the debug execution.
- Log: Displays all log messages produced during the execution.
Before you start debugging your function, you might want to modify the debug input/payload for your function:
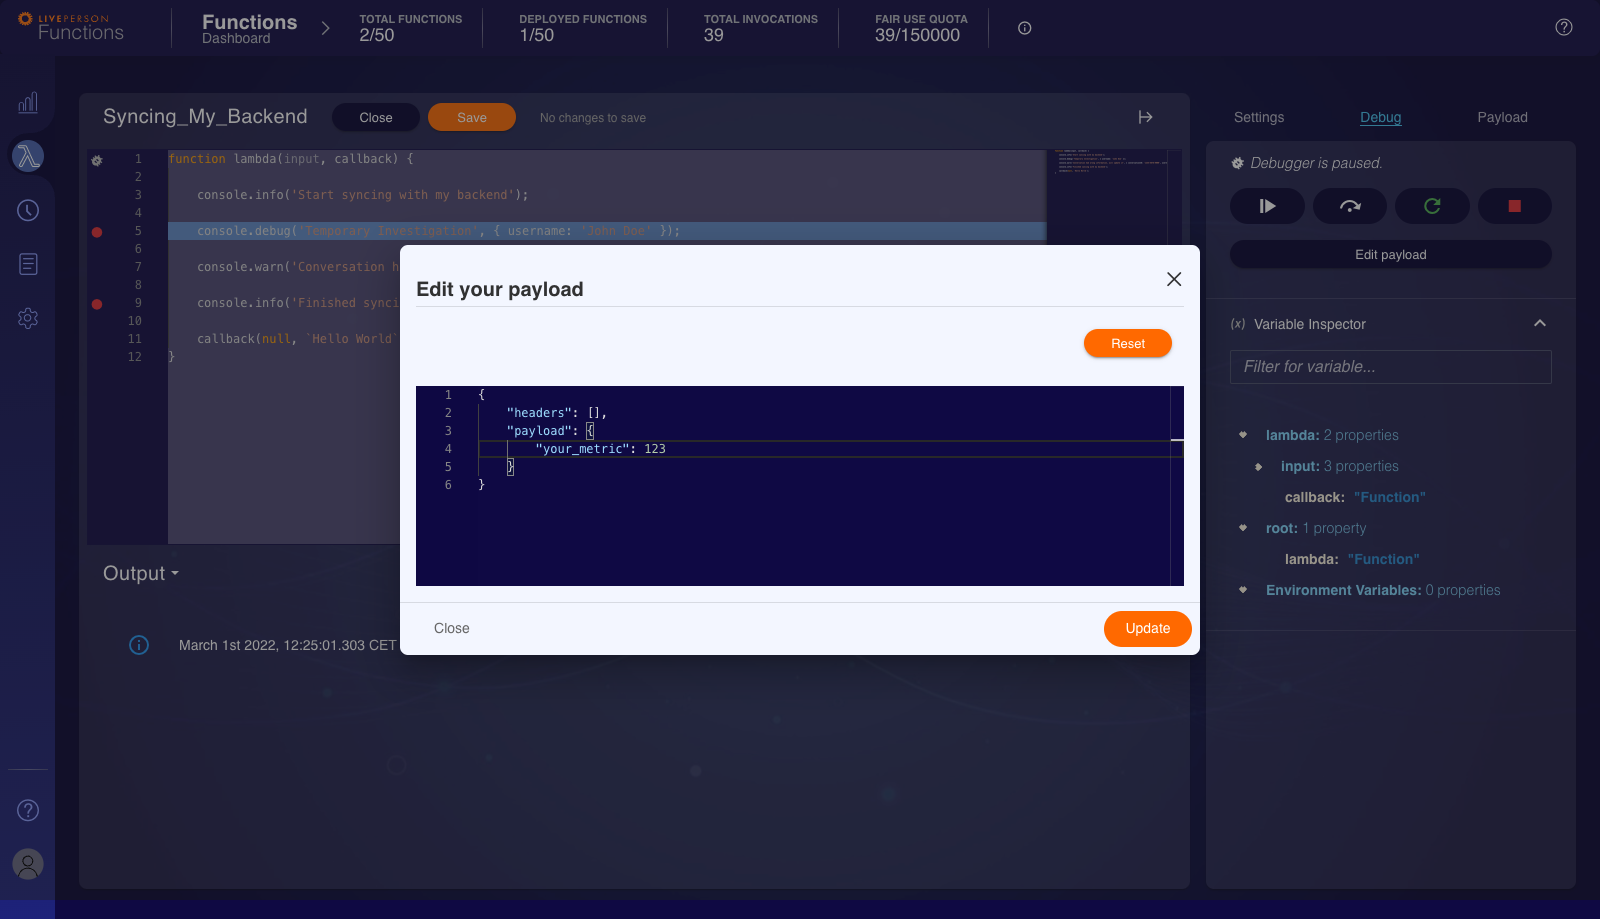
We supply each event with a default payload that can be used without modification but might not give you deep insights into the behavior of your functions.
Payloads are not saved on the server. Make sure to keep your payload locally if you want to reuse it at a later date. The payload is limited to 10.000 characters.
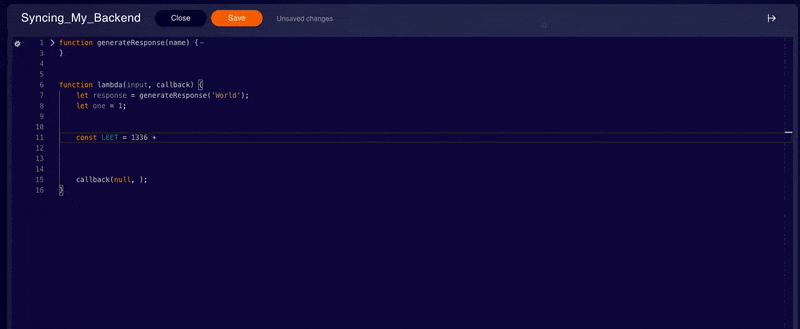
Once you are inside the debug tab, you can place breakpoints as you'd expect in any IDE. Breakpoints will halt the debug execution as expected in your local environment. Breakpoints can be set before or during a debugging session by clicking on the space left of the line numbers.
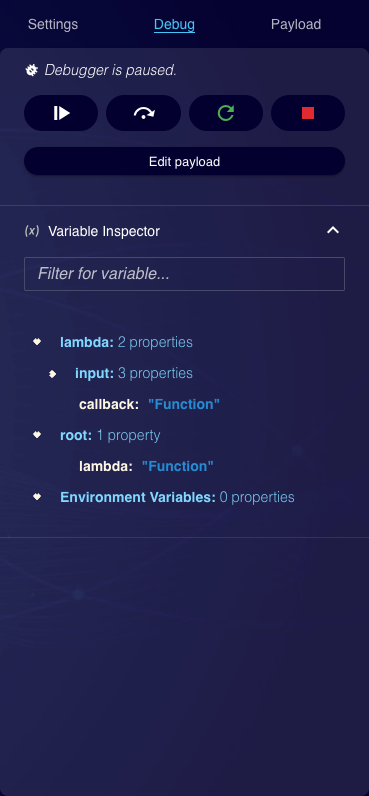
To start a debugging session, click the "Start Debugger"-button. This step will take a few moments as it prepares the debugging session. Once the session is created, you have four options:
- Resume: continues the execution until the next breakpoint
- Step Over: Will step to the next instruction in your function
- Restart: Cancel the execution and start from the top again
- Stop: Cancels the debugging session
Sometimes, the debugging session might be lost due to connectivity errors or the long idling of the debugger. The Functions platform will try to heal this situation automatically. If this is not the case stopping the debugging session and starting it will resolve the issue.
During the execution, the easiest way to analyse the state of the execution is using the variable inspector within the debug sidebar. It is a searchable list of all variables and their values currently active in the execution scope.
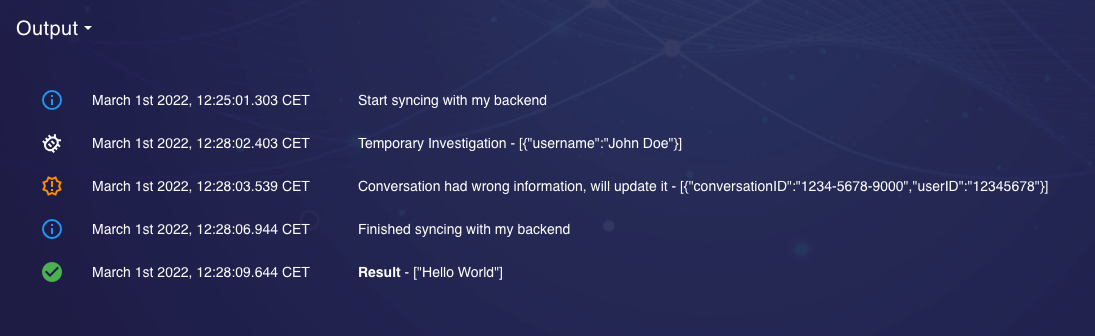
For additional information, the debug output will print out any console commands and the invocation result. Unlike an actual invocation, the console.debug commands will also be logged during a debugging session.
Once you close the editor, the debugging session will be closed.
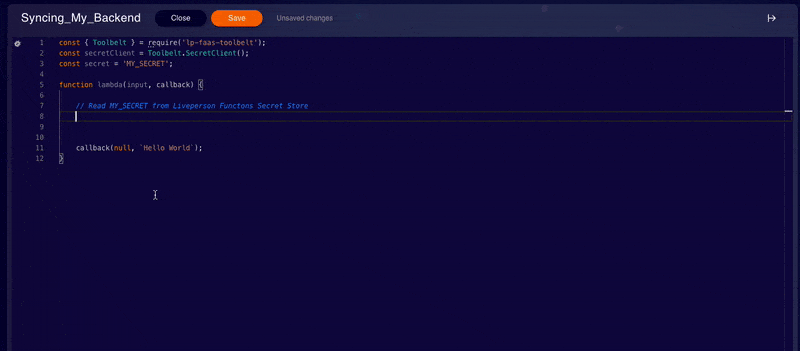
Editor
Our editor is based on Monaco, offering you access to a variety of its features. The context menu is most notable, which will provide you with access to snippets, general code suggestions, and context-aware code suggestions.
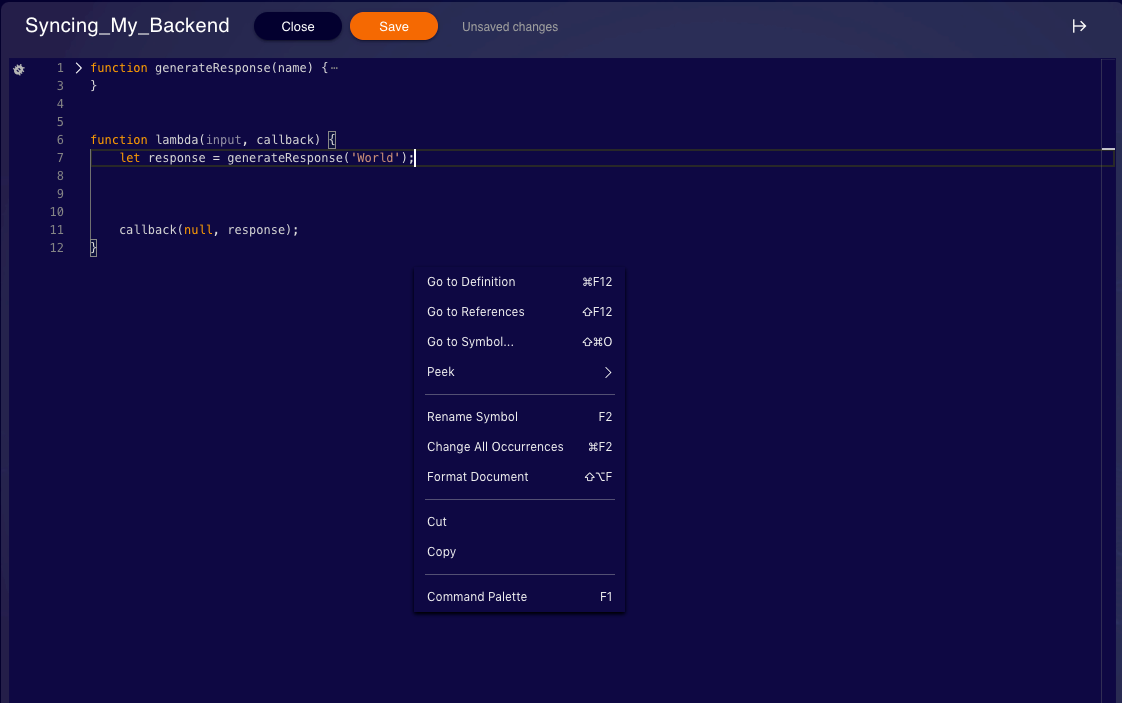
You can access a menu that allows basic code navigation and access to replacement/renaming functionality by right-clicking. You can also leverage this menu to reach the command palette, which offers a variety of features.
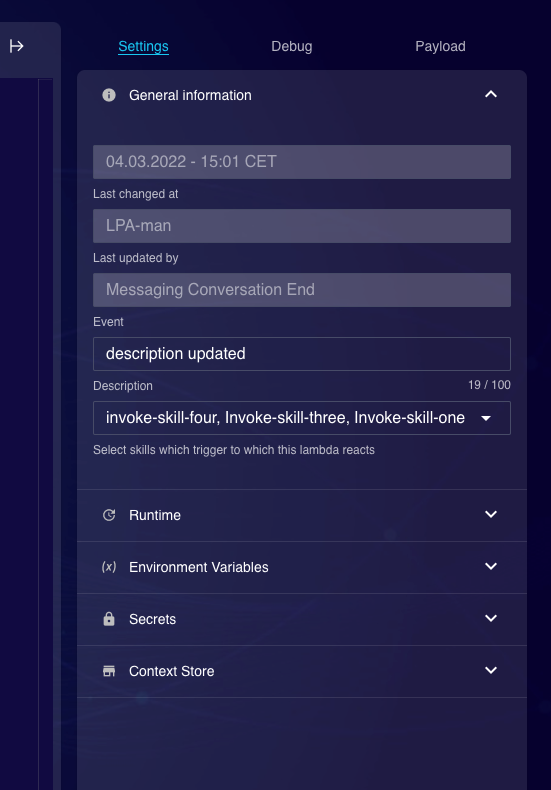
To update the skills on an existing function, you will find the skills drop-down menu inside the General information accordion menu on the right side of the code Editor. Updating skills does not require redeployment. The change is reflected within 5 minutes after saving.
Code Navigation
You can leverage code navigation offered within the editor. Right-Click on functions or variables that allow you to show references or definitions. Further, you can also change all occurrences from here or rename the symbol. Some of the functionalities have shortcuts that are displayed. Please be aware that macOS users might need to include the fn key when using the displayed shortcuts.
Snippets
We added our snippets to the context service, accessible by typing in Snippet and activating the context menu with Control + Space. Each available snippet will include everything needed to run it (including the imports). Hence you might want to remove the imports if you have already performed them before. Also important to consider is that if a template is generated with a try-catch, you must assume that the code may throw errors, so do not forget to handle the error.
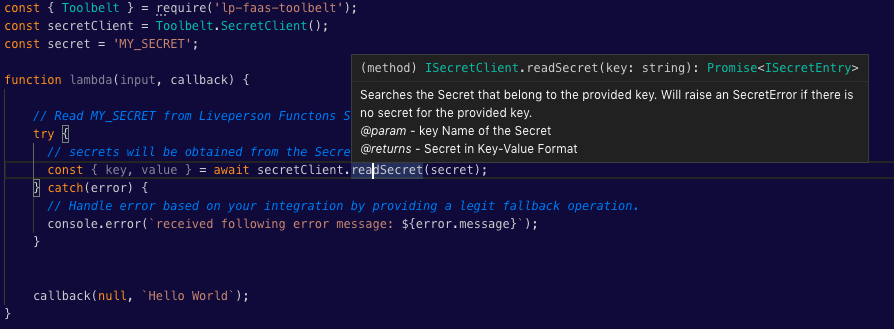
Code Documentation and Types
Our internal runtime library, the Toolbelt, as well as some of the included libraries, are shipped with JSDocs. This allows you to access the documentation from the editor directly by simply hovering over the function or the object. The docs will provide you with additional parameters and may give you information about the types.
Further, that information is also extended to function, parameters, and objects you specify within your code.
Please be aware that types are usually derived based on assignments or your definitions, but they are not checked. This implies that having a variable initially assigned a number will not fail if you assign it a string later.