Scheduling
The LivePerson Functions platform enables users to create scheduled functions. Two examples for these are OAuth 2.0 related refresh operations and scheduled invocation to keep functions warm. We allow the scheduling of functions based on CRON expressions. We urge leveraging this page to verify your expression. Please be aware of the following limitation:
Scheduled invocations are always performed in the UTC timezone and might differ from your local time. Please keep that in mind when scheduling any function.
- The lowest frequency for scheduled invocations is once a minute
- Only productive functions can be scheduled
- A maximum of 10 functions can be scheduled at any given time
- Configurable Payload is limited to 8000 characters
Undeploying a scheduled function will result in the deletion of the associated schedule. You will need to recreate it once you have redeployed the function.
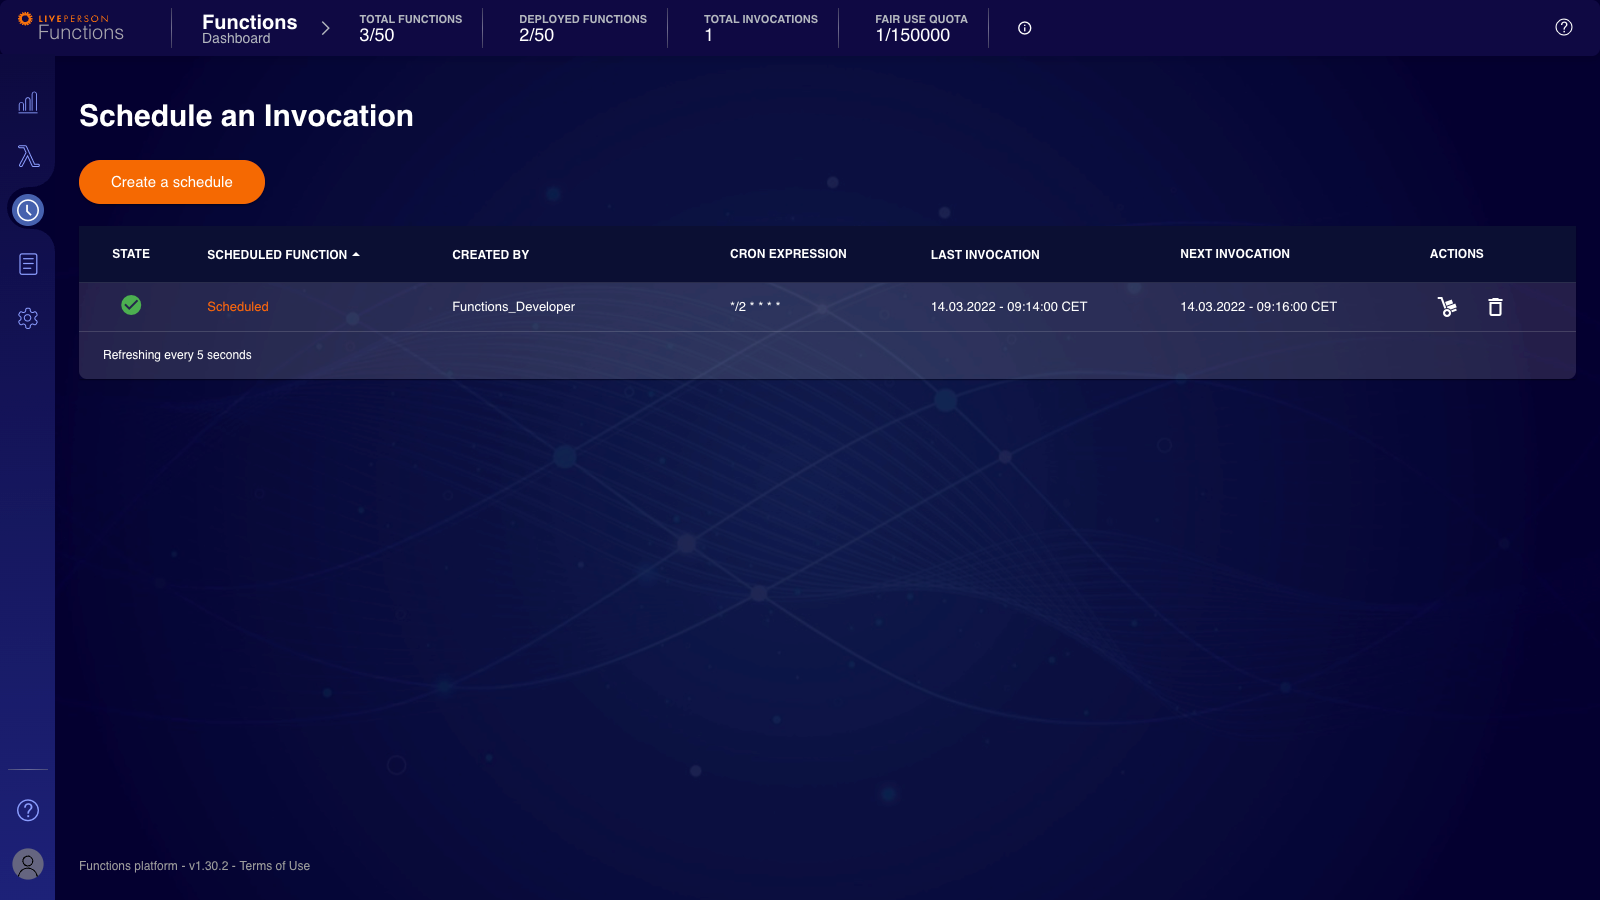
Schedules can be created by heading to the "Schedule an Invocation"-page reachable via the "Watch" icon on the sidebar. Here you will also see any existing Schedule. Further, it will show you the last and next invocation times in your local time. The "STATE" column will indicate if the previous invocation was successful or a failure.
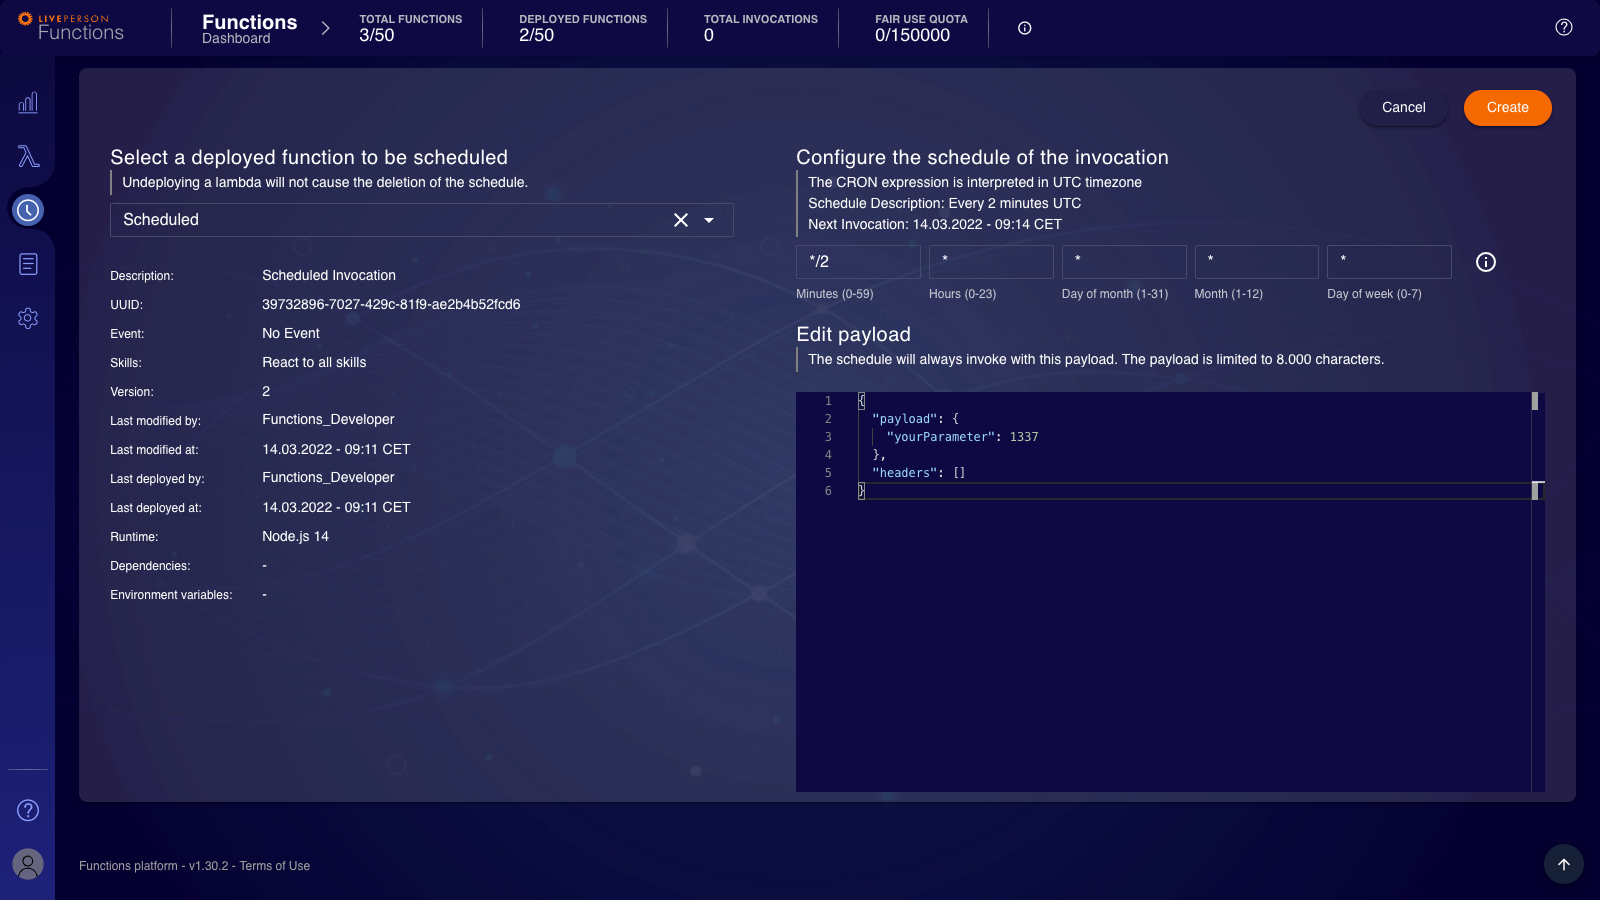
To create a Schedule, click "Create a schedule"-button. Then you can choose your productive functions from the drop-down. After that, provide a valid cron expression. The UI will always calculate the next invocation in your local time and display it. The UI will provide valid example values if you use an invalid expression. You may adjust the displayed payload. It will be then used for the scheduled invocation and therefore is available to the function during the invocation.
Toolbelt
To ease the solution of some everyday tasks, we introduced our runtime library, the toolbelt. It comes with a set of clients and features that allow accomplishing various tasks. Following clients are included:
- mTLS Client: Allows mTLS based requests to be sent, especially relevant for zero-trust environments
- HTTP Client: Allows HTTP/HTTPS based requests
- Secret Client: Interaction with our Secret Store during runtime
- Context Service Client: Interaction with Conversation Context Store, right now only supports V1 of the API
- LP Client: Eases the interactions with common LivePerson APIs
To utilize the toolbelt, you will need to import it as a dependency. This is achieved using the require function.
const { Toolbelt } = require("lp-faas-toolbelt");
Both the UI and the CLI come with out-of-the-box support for typings of our Toolbelt library. Nevertheless, you should check out the documentation of the toolbelt.
Secret Store
This chapter will highlight some important details about the Secret Store. If you want to learn how to set up a secret or access within the function works, head over to the configuration page. Ensure your user has the necessary permissions to interact with our Secret store.
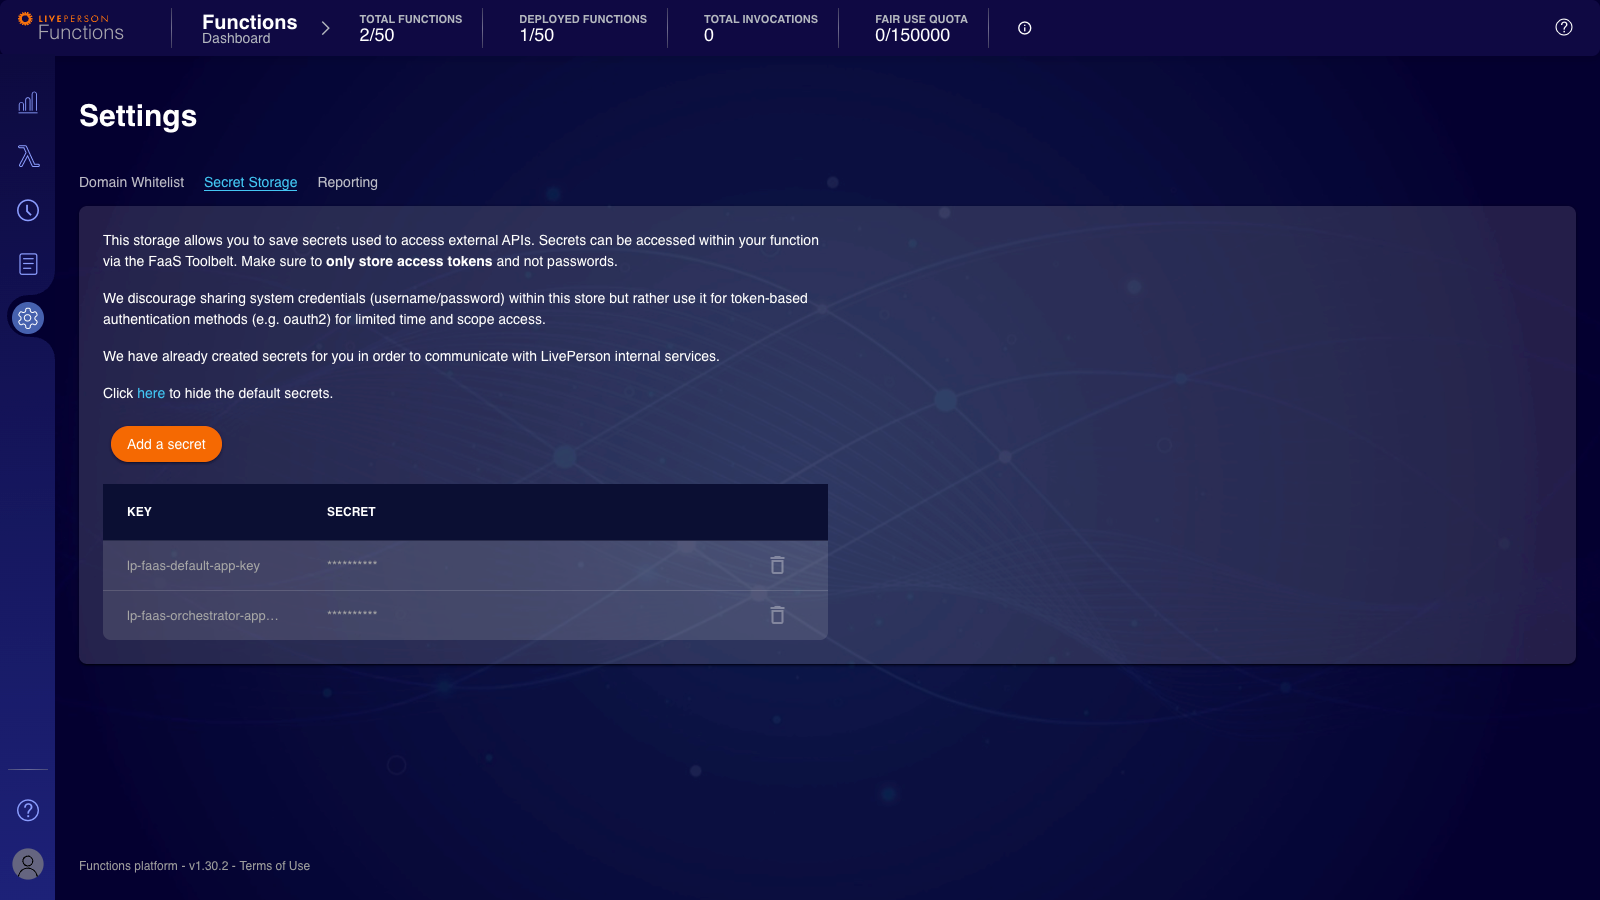
Our Secret Store allows you to store any credentials or secrets securely you may use in your function. The creation of secrets happens exclusively via the UI, not the CLI or from a function. Once you create a secret, you will no longer be able to see its value in cleartext. Only the key will remain visible.
Modifications of existing secrets are only possible by a function. Be aware of potential race conditions: The last writer will win if a secret is accessed and modified by multiple functions simultaneously.
You can only perform the deletion of a secret via the UI. The secret will become unavailable immediately to any functions using it with the deletion. Therefore, you should ensure it is not used anywhere before deleting the secret.
During the provisioning process, a couple of default secrets are created. Those are not displayed by default, but they are viewable for debugging purposes.
Domain Allowlisting
As explained within our networking foundation, the communication between a function and external services is subject to a domain allowlist. The following paragraphs highlight how to add new domains to the allowlist and remove them. Furthermore, it will provide crucial hints based on frequent questions about the allowed listing of domains.
Adding a domain to the allowlist
There are two ways for adding a domain to the allowlist. Either during the creation process, which is shown here or by heading to the "Settings"-Page and opening the "Domain Allowlist"-Tab (opened by default).
When adding a domain to the allowlist, you should always look out for common pitfalls. First, make sure your domain is not redirecting because, in this case, you also need to allowlist any domain that is part of the redirection chain. An excellent way to test if your domain is redirecting, if you are not sure, is to leverage the following command:
$ curl -v -L YOUR_DOMAIN 2>&1 | grep -i "^< location:"
Example:
The following example shows that when calling http://google.com, a redirection to https://www.google.com/ is performed.
    $ curl -v -L http://google.com 2>&1 | grep -i "^< location:"
    < Location: https://www.google.com/
Next, ensure that you safe list the correct domain when working with subdomains. Let's say you are visiting https://www.liveperson.com and therefore allowlisted liveperson.com. Then, you fell into a trap because www. is a subdomain. Instead, the correct domain to allowlist would be www.liveperson.com or *.liveperson.com.
Finally, as shown above, we do support the use of wildcards by setting *. But you should be aware that we only support one wildcard in the domain, *.*.liveperson.com is not possible, while *.liveperson.com is possible.
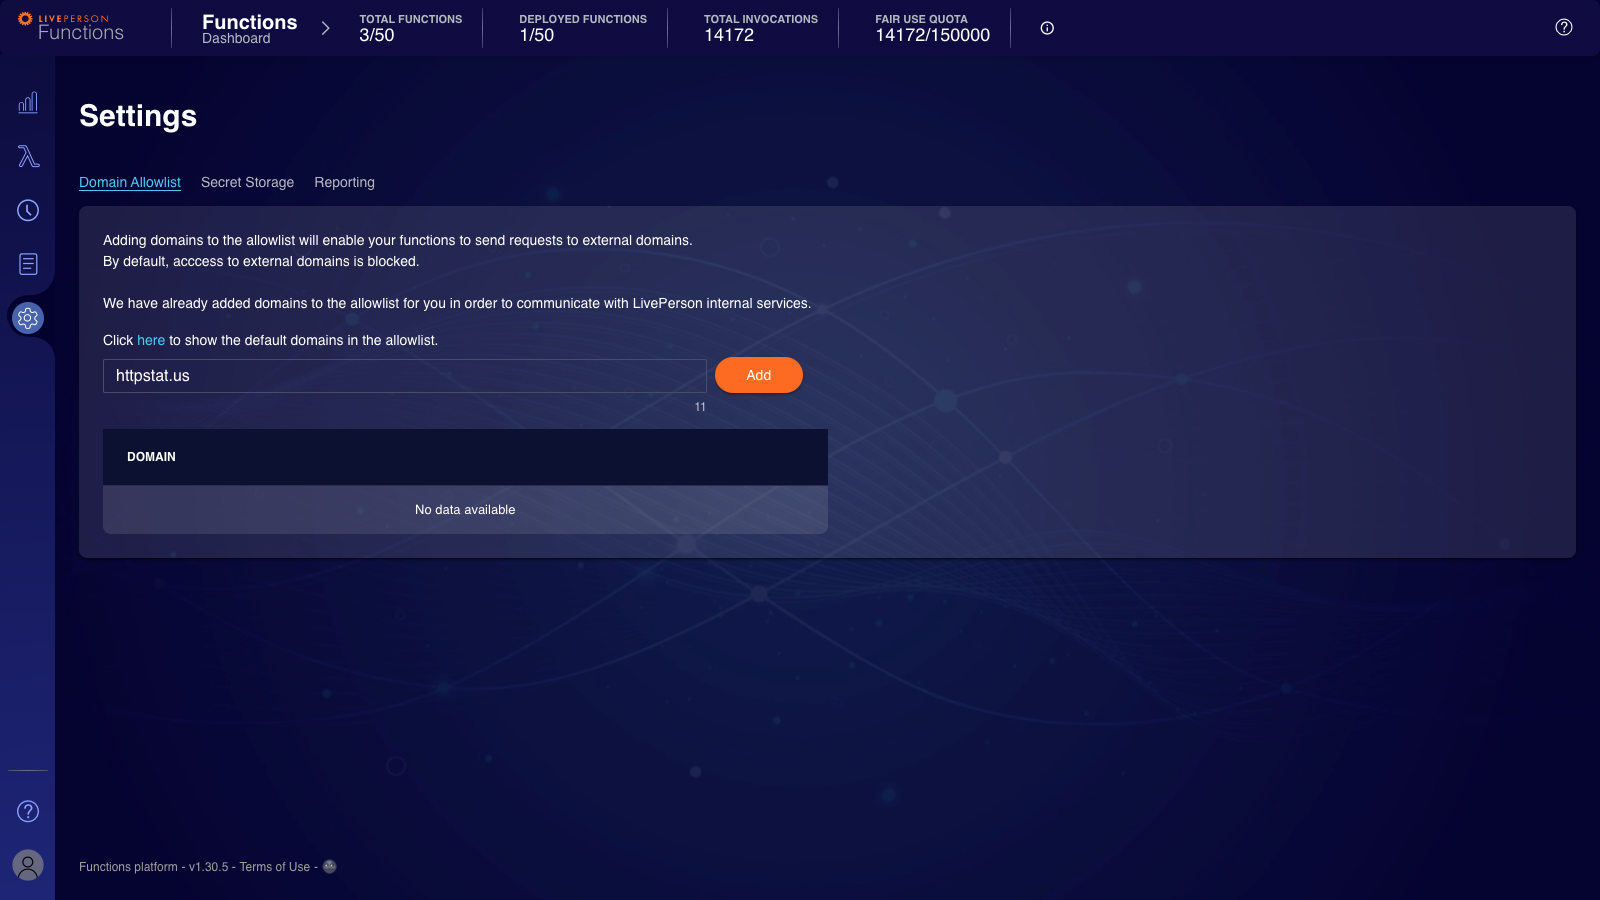
Type the domain in the text field and click the "Add"-button. Once it is saved, it will be reflected in the domain list below.
Be aware that adding a domain can take up to 5 minutes until being "active".
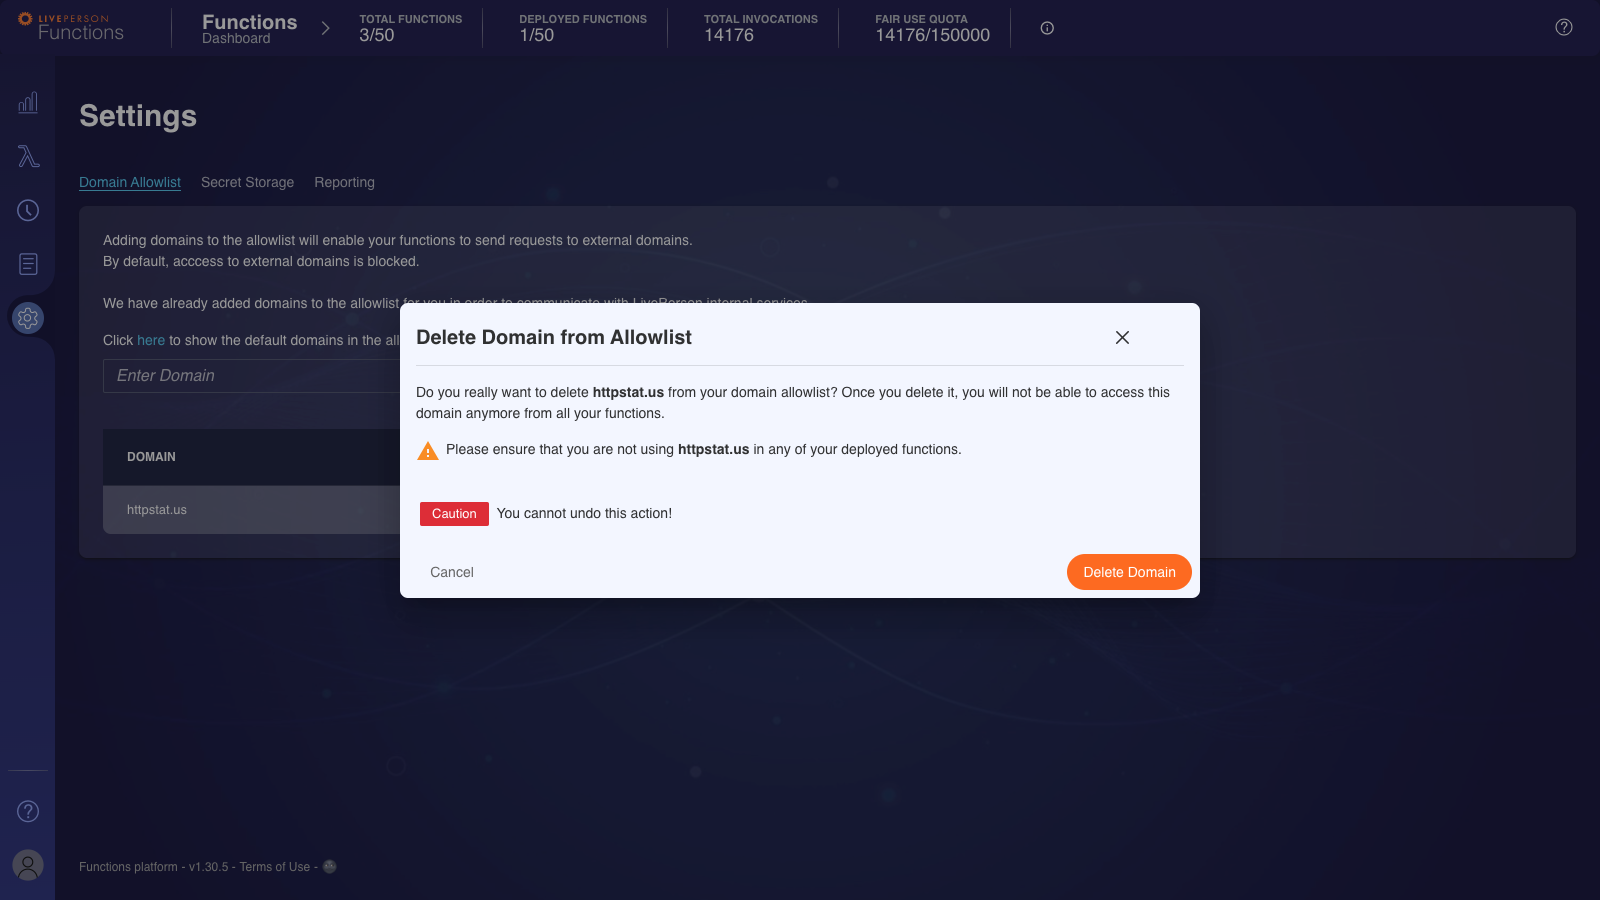
Removing a domain from the allowlist
Removing a domain allowlist entry is only possible from the "Domain Allowlist"-Tab located inside the "Settings"-Page. Click on the "Bin" icon next to the entry you want to remove.