
Introduction
You can create bot groups and add bots to them for two purposes:
-
You want to group together bots to make them easier to access and work with on the bots dashboard. In other words, you simply need the grouping mechanism.
-
You want to enable automatic, bot-to-bot transfers for the bots within a given bot group.
While you can include a post-conversation survey bot in a bot group for grouping purposes, a survey bot doesn’t participate in automatic, bot-to-bot transfers.
It's common to organize bots into groups based on business function. You could then further organize them based on environment. In the image below, bots are grouped based on business function (Checking and Savings).
Note the following about the bots dashboard when bot groups exist:
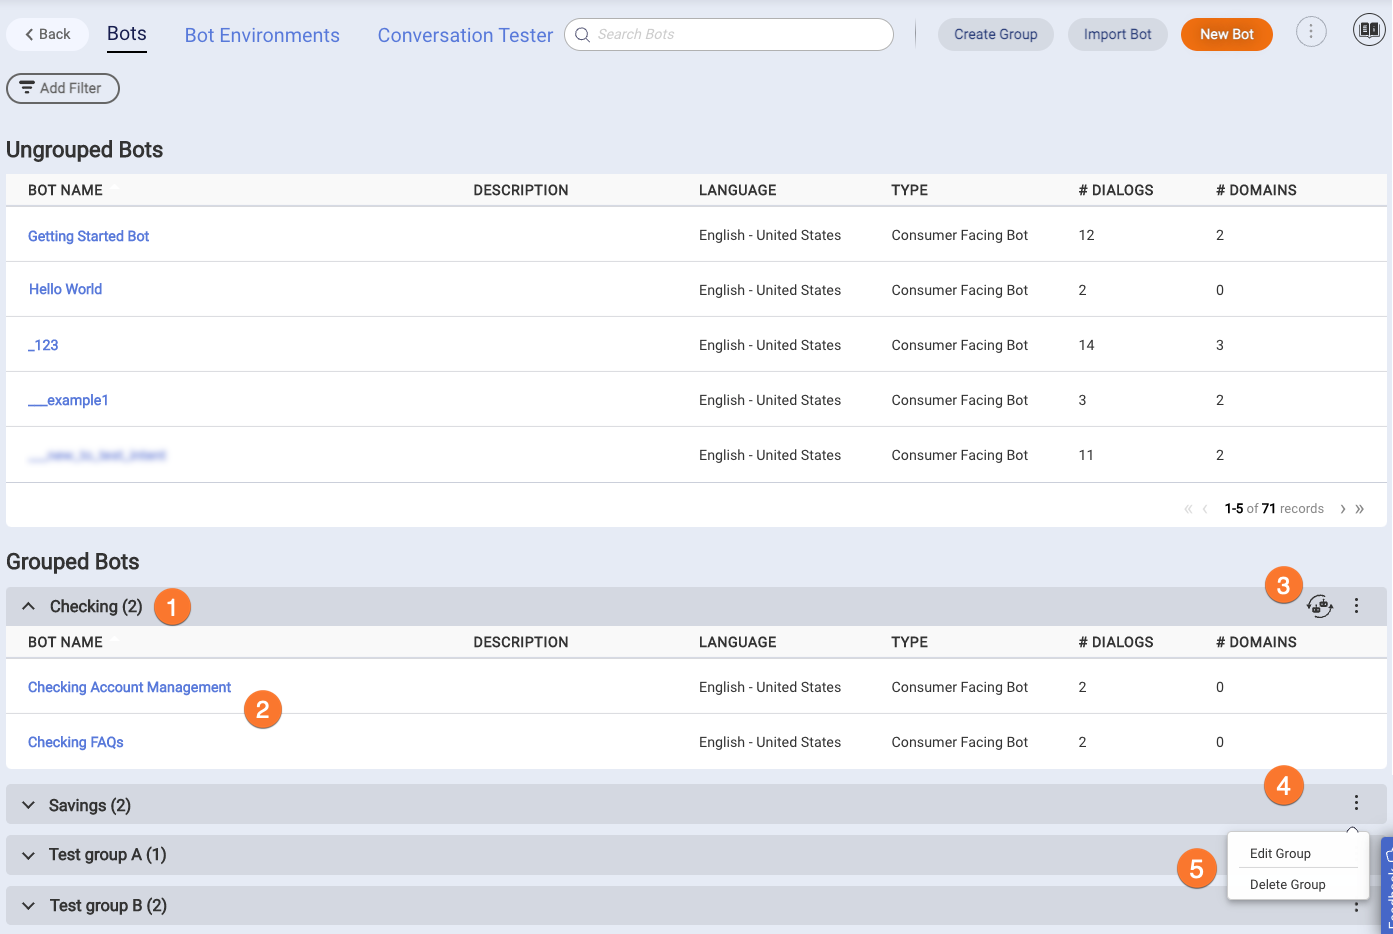
- The bot group name. Click this bar to show/hide the bots in the group.
- The list of bots in the group. Click any bot name to open the bot in the Dialog Editor.
- The Collaboration icon lets you know that collaboration (automatic transfers) is enabled for the group.
- No icon is displayed when collaboration is disabled for the group.
- Click the
 icon to access the group menu, which provides options for editing and deleting the group.
Create a bot group solely to group bots
You can create a bot group for the singular purpose of making it easier to access and work with your bots on the bots dashboard.
To create a bot group solely to group bots
- From the bots dashboard that lists your bots, click Create Group in the upper-right corner.
-
In the Create Bot Group window, specify the following:
- Bot group name: Enter a group name that's concise and clear.
- Collaboration: This setting lets you enable/disable automatic transfers on a group-by-group basis. Keep this set to Off (Disabled), which is the default value.
- Add Bots: Select each bot to add it to the group. A bot can be a member of only one group. You can select from the bots that are not yet assigned to a group.
- Click Create.
Create a bot group that supports collaboration (automatic transfers)
Automatic transfers rely on bot groups to determine which bots can talk to one another and transfer conversations automatically. When you create a bot, you have the option of assigning a bot group to it.
To create a bot group that supports collaboration (automatic transfers)
- From the bots dashboard that lists your bots, click Create Group in the upper-right corner.
-
In the Create Bot Group dialog, specify the following:
- Bot group name: Enter a group name that's concise and clear.
- Collaboration: This setting lets you enable/disable automatic transfers on a group-by-group basis. Set this to On (Enabled).
- Transfer message: Enter the message to send to the consumer prior to the transfer, something like, "Hold on while I transfer you to a chatbot that can assist you…" If you need to insert a new line, use an escape character like so: \\n. You can use bot context variables in the message. You can also leave this field blank if desired.
- Add Bots: Select each bot to add it to the group. A bot can be a member of only one group. You can select from the bots that are not yet assigned to a group.
- Click Create.
Enable or disable collaboration for a bot group
You can enable or disable collaboration for a bot group, respectively, to enable or disable automatic transfers within the group.
To enable or disable collaboration for a bot group
- From the bots dashboard that lists your bots, click the icon that corresponds to the bot group name.
- Select Edit Group from the menu that appears.
- In the Edit Bot Group dialog, click the Collaboration slider to turn it on (Enabled) or off (Disabled).
- Click Update.
Delete a bot group
You can delete a bot group at any time; this doesn't delete the bots therein. If you delete a bot group that contains bots, the bots simply no longer have an assigned bot group. So, they are moved to the Ungrouped Bots list.
To delete a bot group
- From the bots dashboard that lists your bots, click the icon that corresponds to the bot group name.
- Select Delete Group from the menu that appears.
- Click Yes to confirm the action.
Best practices
For bot groups that are intended only for grouping purposes:
- Make sure to disable the Collaboration setting.
For bot groups that are collaborative (the Collaboration setting is enabled):
- If the group will include multiple bots, LivePerson recommends the use of the LivePerson engine for NLU.
- The group should not contain more than 15 bots. A larger group can impact performance due to the increase in time that it takes to search within the group for a matching bot.
- Make sure there is no overlap in the intents and patterns used by the bots.
FAQs
In a collaborative bot group, what is the order of operations when matching patterns versus intents?
This works like it does in a single bot. That is, across the collaborative group, patterns in dialog starters are evaluated first, then the intents are evaluated.
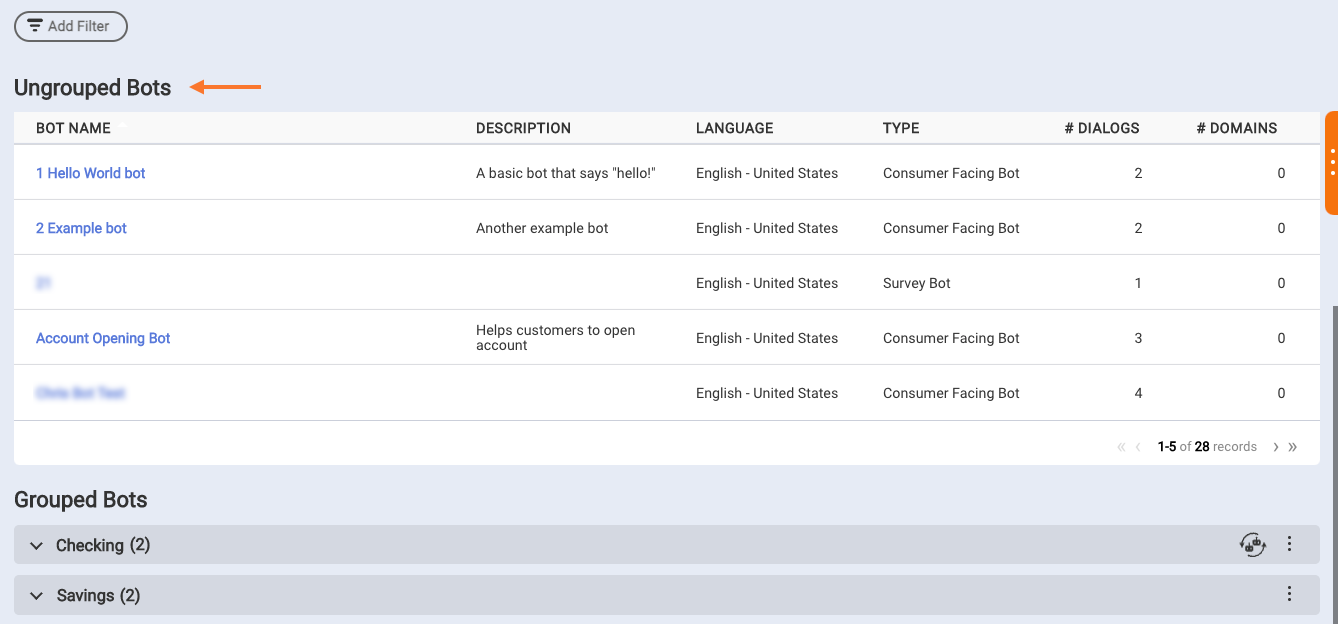
If I use bot groups, must I assign all bots to a bot group?
No, this isn't required. Bots that aren't assigned to a bot group are listed above the bot groups.
Can I test bot groups using Preview?
No, Preview can't be used; you must test bot groups using deployed bots. For some practice at this, complete the Bot Groups & Other Techniques tutorial series.