Introduction
Use the LivePerson Functions integration to invoke a function (lambda) that is deployed to the LivePerson Functions (Function as a Service or FaaS) platform. There are no constraints here; if there is some custom logic (a function) you want to invoke with a bot, you can do it with a LivePerson Functions integration.
Enabling the use of LivePerson's Function (FaaS) integrations requires a configuration change made by LivePerson. Contact your LivePerson account representative for assistance.
LivePerson Functions versus API integrations
Wondering when to leverage which? See this discussion.
Timeouts
LivePerson Conversation Builder waits a certain amount of time for a response from the LivePerson function, where that value differs based on environment:
- North America (VA) = 47 seconds
- North America (GCP US) = 47 seconds
- EMEA (LO) = 20 seconds
- APAC (SY) = 20 seconds
LivePerson Functions takes the above value and divides it using a 1:3 ratio; the resulting values are its connect and read timeouts. For example, given a value of 20 above:
- Connect timeout = 25% of 20 = 5 seconds (to wait for a connection)
- Read timeout = 75% of 20 = 15 seconds (to wait for a response from the API call)
Add a LivePerson Functions integration
- Open the bot, and click Integrations in the upper-left corner.
- Configure the integration settings:
- Integration Name: Enter the name of integration. Enter a name that's meaningful (it describes well the integration's purpose), concise, and follows a consistent pattern. This helps with organization, and it makes it easier for bot developers to work with the integration during bot development.
- Response Data Variable Name: Enter the name of the variable that gets populated with the response from the API.
- Integration Type: Select FaaS.
-
Function: Select the function (
lambda) to invoke via this integration. You can select from all functions added under your LivePerson account. Each is listed with its status.
The Function list provides an easy pass-through to the Functions UI in case you still need to create or modify the relevant function. Clicking Create New Function or
 (pencil icon) beside a function name opens a new browser window and prompts you to log into the Functions UI where you can do the work. Once done, return here and click
  (reload icon) to refresh the Function list if needed.
- Function Headers: Add the necessary data in key/value pairs to pass into the request via the header.
-
Function Payload: Enter the payload to pass into the function. You can enter a fully dynamic payload, for example:
{$botContext.payload} - Transform Result Script: If applicable, use this section to write JavaScript code that transforms the raw result (typically in JSON format), so you can use the information in the bot's dialogs. For more on this, see Transform an API result.
- Custom Data Fields: Add the fields that will store the result data in key/value pairs. Users who are tasked with creating bots can use and display this data in interactions by referencing these fields.
- Click Save.
Example guide
Step 1: LivePerson Functions — Configure the function
-
In Conversational Cloud, open the menu on the left side of the page, and select Automate > Functions.
This opens LivePerson Functions in a separate tab in the browser.
-
Create and configure a function with the custom JavaScript logic that you need for your use case. As an example, the following function takes
itemandpricefrom theinputObject, and, based on the value of price, it decides which sentence to send back to the bot. (This sentence is subsequently displayed in the conversation.)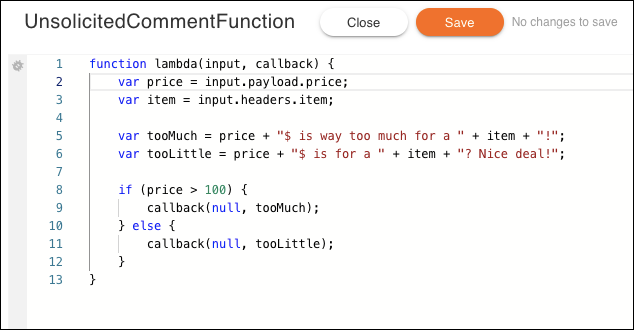
-
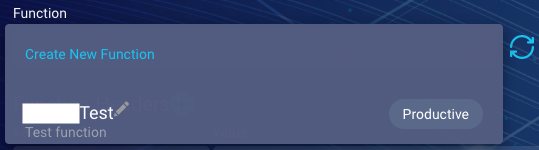
Once you’re happy with your function, deploy it.
You should see the status of the function change from
ModifiedtoProductive.
Step 2: Conversation Builder — Configure the integration
- Within Conversational Cloud, open the bot in Conversation Builder, and click the Integrations tab.
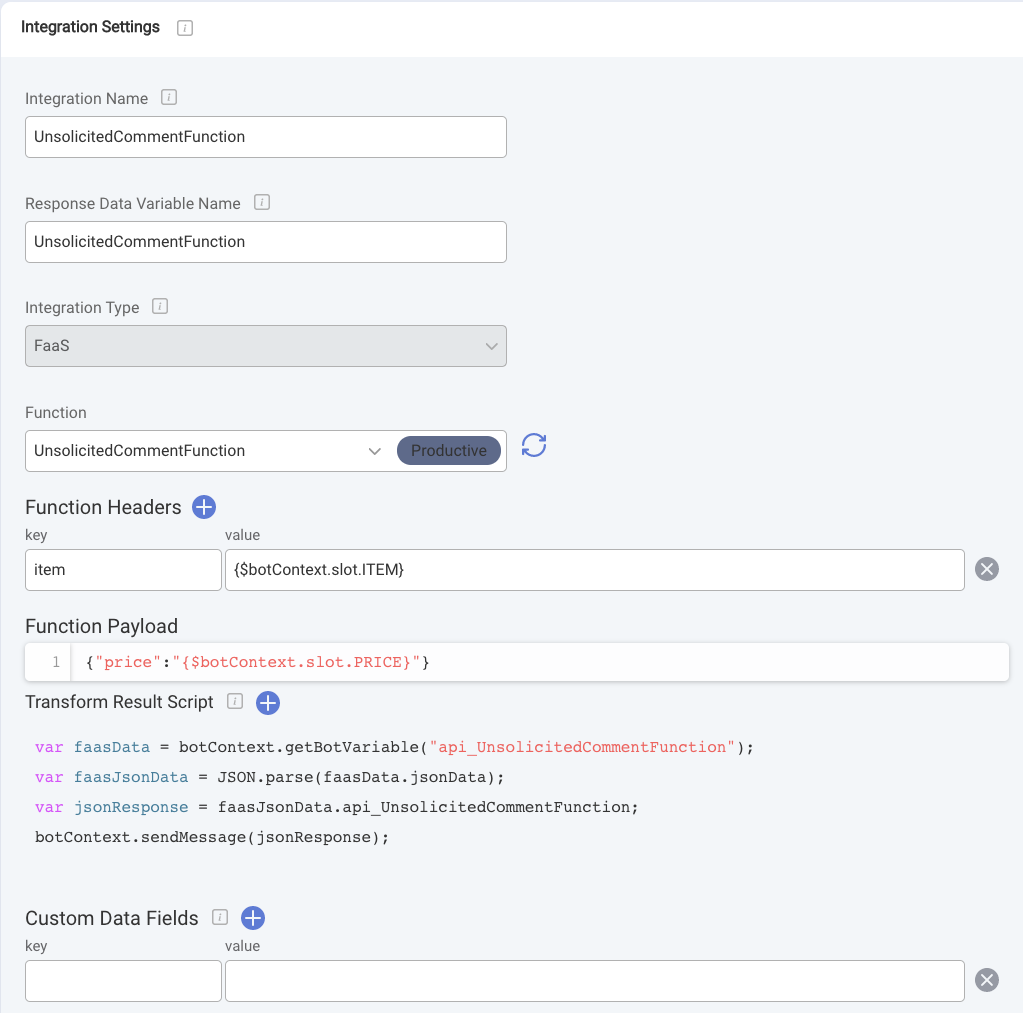
- Provide a name for the function’s integration. In our example, we'll use
UnsolicitedCommentFunction. - Set the Integration Type to
FaaS. - Select the
Productivefunction that you want to integrate. - Function Headers: This is where you should set particular key/value pairs like bot variables or slots.
- Function Payload: This is where you should set a specific JSON body to send to the function. Note: In the example below, for demonstration purposes, the two slots are being set in both the headers and the payload. By doing this, you’re able to understand the correct notation to use. In a real world scenario, the best practice is to use slots, custom variables, and bot variables as Function Headers and a JSON body to be set as the Function Payload.
- Transform Result Script: To process the response coming from the function, you can set the following code to extract it in a JSON format and then send the sentence (in this case, it's a string) directly as a bot message.
var faasData = botContext.getBotVariable("api_UnsolicitedCommentFunction");
var faasJsonData = JSON.parse(faasData.jsonData);
var jsonResponse = faasJsonData.api_UnsolicitedCommentFunction;
botContext.sendMessage(jsonResponse);
In this scenario the Transform Result Script is used because the function is simply returning a string. In the case where a function returns a complex JSON structure, it's up to you to use the same or to take advantage of the Custom Data Fields. For instance, if the response from the function were:
{“response”: “200$ is way too much for a bag!”}
You could set the following as Custom Data Fields:

Then, you could use the response within a dialog’s interaction by using the following notation:
{UnsolicitedCommentFunction.response}
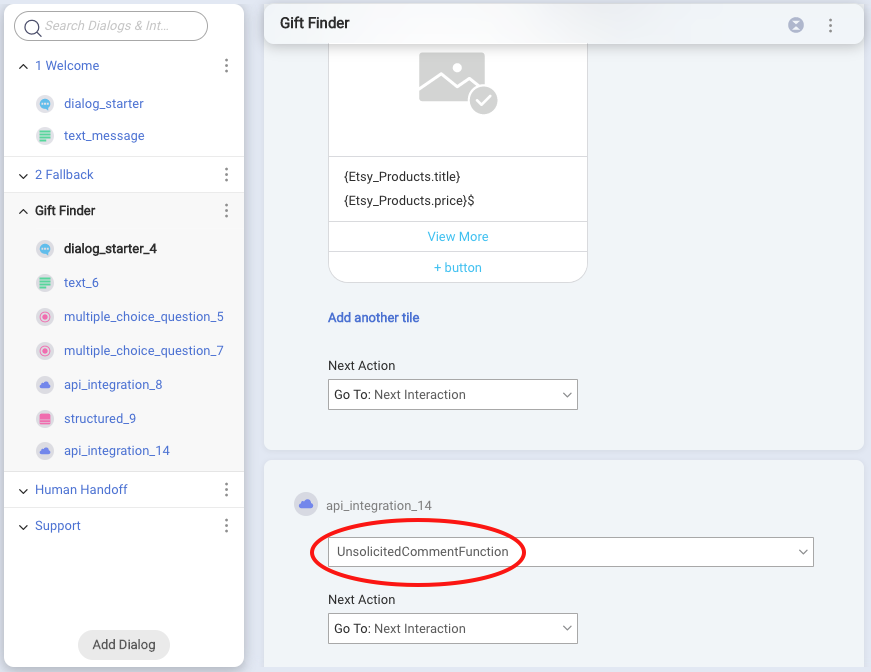
Here’s a visual summary of what needs to be done within the Integrations tab:
Step 3: Conversation Builder — Configure the dialog
- Create an interaction of type Integration, and select from the dropdown the function’s integration.
- Save the change.
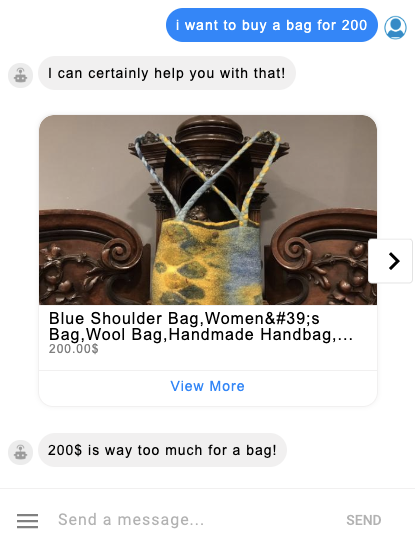
Step 4: Conversation Builder — Preview
This is the end user's experience in a conversation: