
In this tutorial you will create a new conversation with your contact center, publish text messages, and receive agent responses.
Prerequisites
- Docker
- LivePerson account enabled with two features:
Async_MessagingandAuthenticated_Chat. If you are not sure that your account is enabled with these two features, please contact LivePerson Support (use the chat on this page, or message Support).
Step 1 — Launch your Shell
We will use a docker image called lp-shell to run the shell for this tutorial. It is a Linux image equipped with curl,wscat,jq and several scripts.
After replacing the __YOUR_ACCOUNT_ID__ with your account ID, type the following into your terminal:
docker run --env LP_ACCOUNT=__YOUR_ACCOUNT_ID__ -it lpinc/shell
You should receive a shell line.
Step 2 — Create a Token
Decide which type of consumer you wish to use from the below guides.
Note: For unauthenticated messaging, please see unauthenticated messaging for more detailed information.
For authenticated consumers, use the authenticated method as described here.
This above guides create a new consumer identity, extract the JWT from the response, and set it as a variable called LP_JWT in your shell. This new identity will be used in the next step.
To check the value inside the LP_JWT, type:
> echo $LP_JWT
eyJraWQiOiIwMDAwMSIsInR5cCI6IkpXVCIsImFsZyI6IlJTMjU2In0.eyJzdWIiOiI1OTI2MzFhMC01ZmFlLTQ2YTMtODk2NC0xYzRjM2U3MjBhNGEiLCJhdWQiOiJhY2M6cWE1NzIyMTY3NiIsImlzcyI6Imh0dHBzOlwvXC9pZHAubGl2ZXBlcnNvbi5uZXQiLCJleHAiOjE4ODIzNTg5NDMsImlhdCI6MTQ3MjExODkwM30.iJFlQuMyO8BVRH4ybgNfZxiTTQbAIWHDa4e24TohZGdqyZSv0Vlc4zgVP9wf0Svxbye_yyTx-Q_f8BB7Vy1ZdUYy0t_NK57bAxFTV8x4lx9fxAj_PJ0VvJncJjhn7JFu3s46WeKScFv28D78wJMgoHOKAKD-CacGzGtvFU9NuUQ
Step 3 — Connect to the Messaging Service
Using the JWT we have created, we can open the connection to the UMS:
wscat -k 60 -H "Authorization:jwt $LP_JWT" -c "wss://$LP_ASYNCMESSAGINGENT/ws_api/account/$LP_ACCOUNT/messaging/consumer?v=3"
In the following steps we will send JSON requests and receive responses and notifications through this connection.
If the connection is closed, you can reconnect using the same wscat command.
Step 4 — Create a New Conversation
Before creating the conversation, log into Conversational Cloud as an agent. In order for the agent to receive the messages, ensure that no other agent is logged into your account.
To request a new conversation, paste the following message into the connection from the previous step.
{"kind":"req","id":1,"type":"cm.ConsumerRequestConversation"}
In response, you will receive the ID of the new conversation.
{
	"kind": "resp",
	"reqId": "1",
	"code": 200,
	"body": {
		"conversationId": "7507be78-60ef-4468-b3b1-baa47fbeea21"
	},
	"type": "cm.RequestConversationResponse"
}
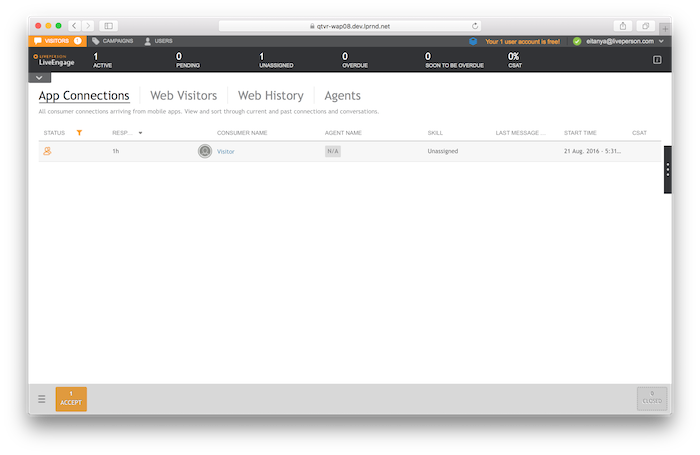
Open the Agent Workspace (from Step 1), and accept the incoming request by clicking the Accept button.
Step 5 — Publish a Text Message
In order to publish content to a conversation, substitute the __YOUR_CONVERSATION_ID__ with the conversationId you got in the response of Step 4, and paste it into the opened WebSocket.
{"kind":"req","id":2,"type":"ms.PublishEvent","body":{"dialogId":"__YOUR_CONVERSATION_ID__","event":{"type":"ContentEvent","contentType":"text/plain","message":"hi there"}}}
Note: You can use the message builder () to build the above message.
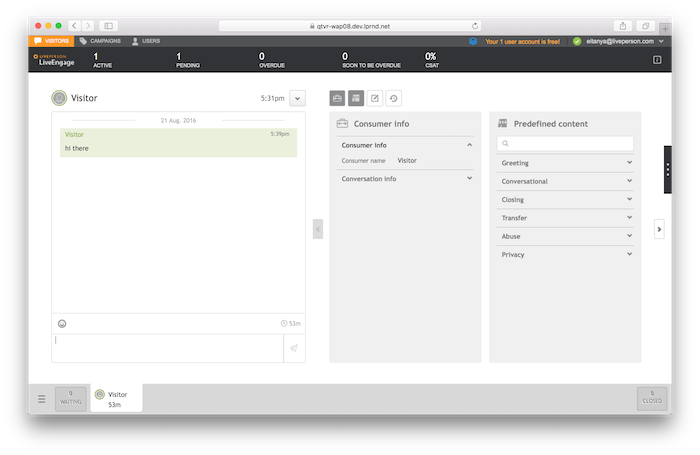
The published message will be displayed on the agent side:
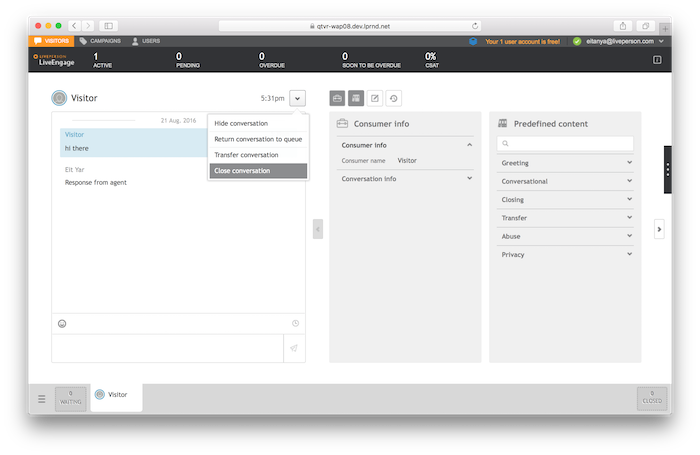
Now close the conversation from the Agent Workspace using the Close conversation menu item:
Step 6 — Record LP_JWT to Next Tutorials
In order to use the consumer token (LP_JWT) in the following tutorials, we will put a file on your machine. Create a new file outside of the lp-shell and paste the following content into it:
LP_ACCOUNT=qa57221676	put your account id here

* Put here the JWT you have created in this tutorial
* You can use echo $LP_JWT from your lp-shell to view it
LP_JWT=eyJraWQiOiIwMDAwMSIsInR5cCI6IkpXVCIsImFsZyI6IlJTMjU2In0.eyJzdWIiOiJmMDY4ZTllZi1lMzkzLTQxYTEtYmMyYy1hOTZhOWZmMGY2ZmIiLCJhdWQiOiJhY2M6cWE1NzIyMTY3NiIsImlzcyI6Imh0dHBzOlwvXC9pZHAubGl2ZXBlcnNvbi5uZXQiLCJleHAiOjE4ODIwMjM2MzIsImlhdCI6MTQ3MTc4MzU5Mn0.HUJe1CZzqzRoJJxoTll_vDvRalKIeJJRt2MEhY-aFq__V6lrN-ebrRxydozm-gjbpMecKiZDZZiJPw3hf560iKbW-gK1AzsfHxiPrxMdg_TRZqsNhXui_7k579IpfAvKSdgQHZ5uLfGq2XtQNfBdvKWPCIAfW8mJ7oZT-aNMhjE
What's next
You can now close the lp-shell and move on to the next tutorial.
Explore API messages in the API Reference page. In order to build your own messages, you can use the message builder