Dialog structuring
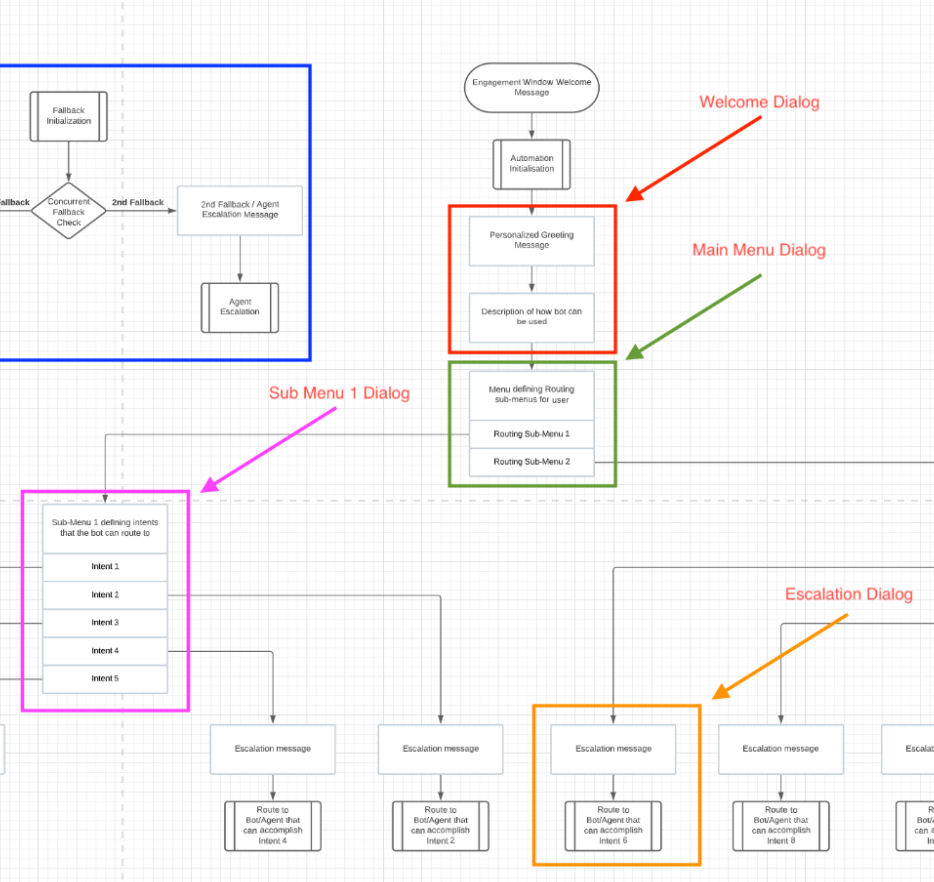
Split the bot design into logical blocks. These blocks will become the bot’s dialogs, for example:

As one example, a bot might have six dialogs:
- Welcome
- Main Menu
- Sub Menu 1
- Sub Menu 2
- Escalation (Transfer to agent)
- Fallback
Dialog naming
Give a dialog a name that reflects the logic within the dialog. Also consider numbering the dialogs, so they're sorted accordingly. This helps you understand the bot's flow.

One bot with many dialogs, or multiple bots
The decision to build one bot with many dialogs or to build multiple bots largely depends on two key factors:
- Complexity: Split a bulky, complex bot — i.e., one that has 30+ dialogs — into multiple bots, e.g., a Welcome bot, an Escalation (transfer) bot, and so on.
- Multiple channels: Split a bot that’s built for several channels (and has a lot of structured content) into multiple bots by channel, e.g., a Web bot, an SMS bot, an Apple Messages for Business bot, and so on. You’ll also have to create a separate skill for each channel and name them according to the channel, e.g., Web_Concierge_Bot, SMS_Concierge_Bot, and so on.
Consolidating dialogs
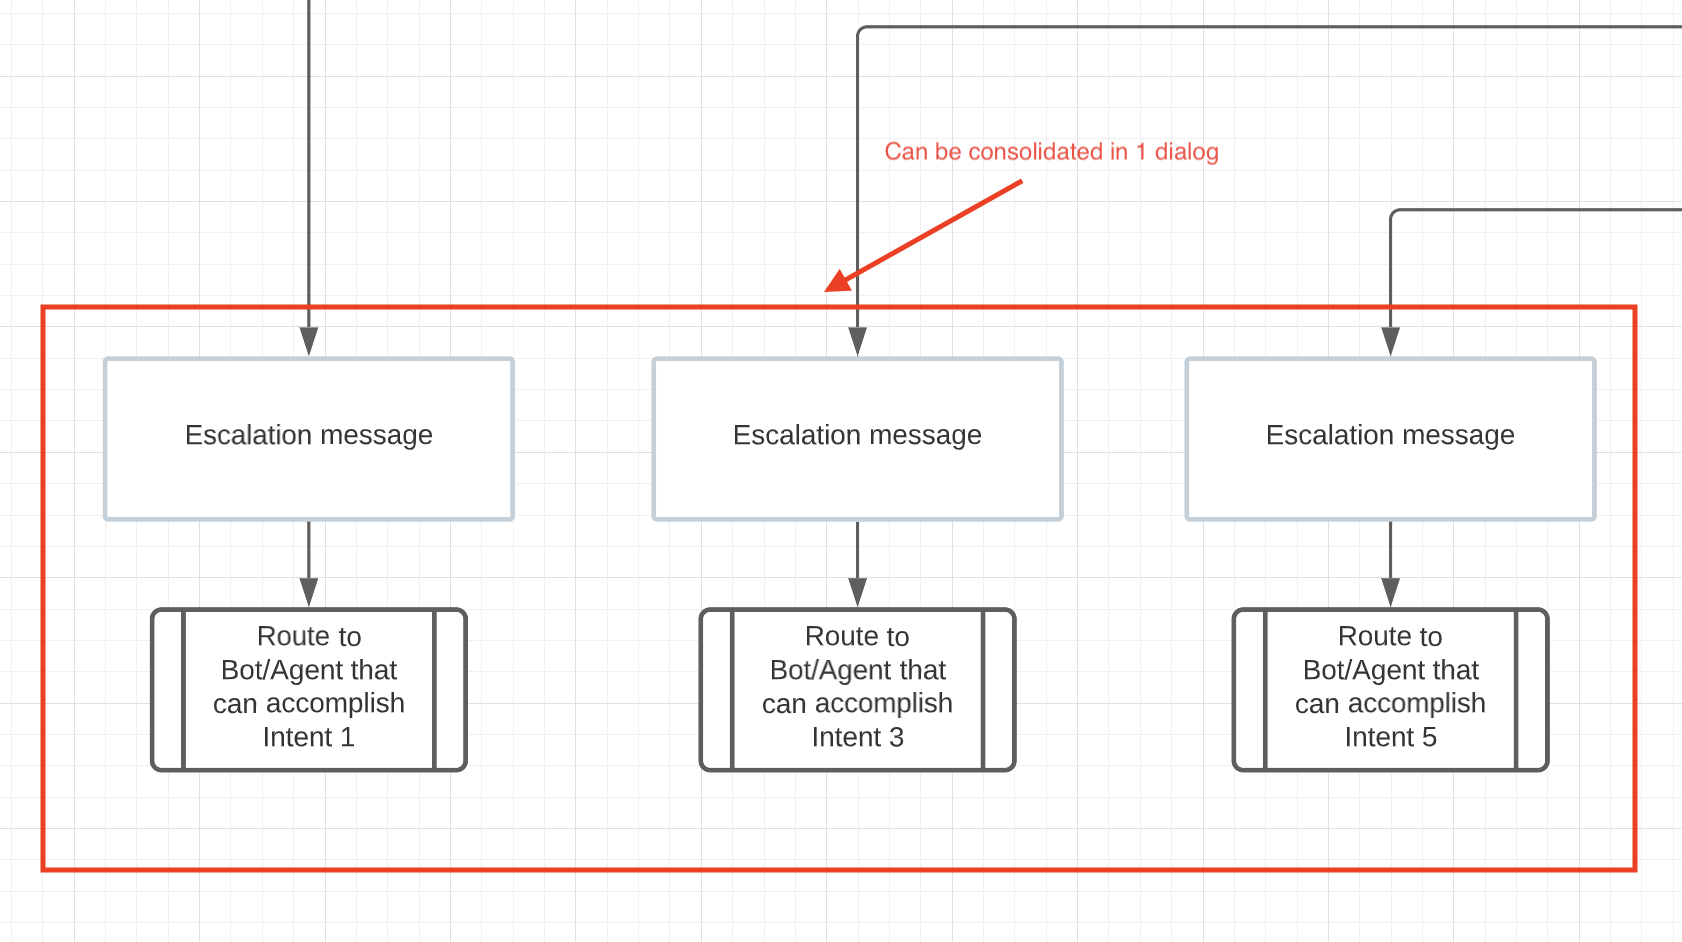
When multiple dialogs have the same logical meaning, consolidate them into a single dialog.
For example, assume you have several dialogs that escalate (transfer) the consumer to an agent. The dialogs differ only by skill. In this case, you can consolidate all of them into a single Escalation dialog and use variables to transfer consumers to the correct skill.

Splitting dialogs
Consider the following factors when deciding whether to split a dialog into two or more:
- Complexity: If the dialog is highly complex and has several subtopics, split the dialog into logical parts and create dialogs for each part.
- Number of interactions: If a dialog has more than 10 interactions, split it into multiple dialogs.
- API calls: If several dialogs make the same API call, put the interaction that makes the API call into its own dialog. You’ll also need to save the “next interaction name” as a variable, so you can route to it (i.e., back to the original dialog) after the API interaction is executed.
