Next Action
Every interaction has a specified next action. This determines the direction of the dialog flow after the interaction has been processed.
You specify an interaction's Next Action directly on the interaction tile:
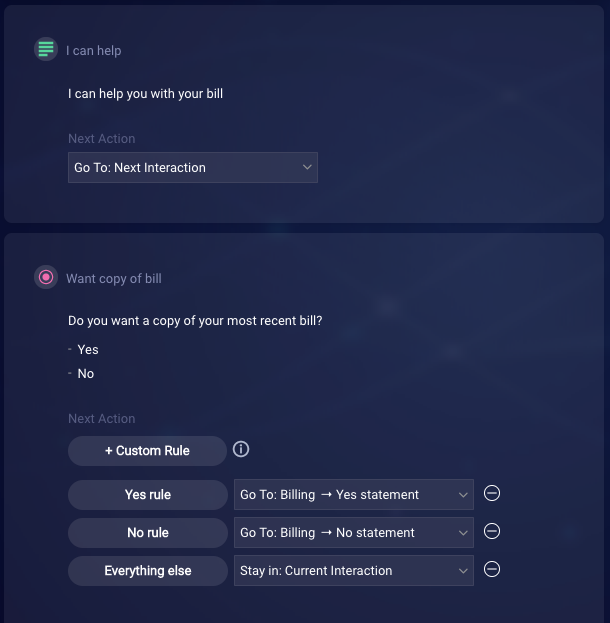
When specifying the next action, you can select from the following options:
- Next Interaction: Directs the flow to the next interaction in the dialog.
- End Interaction: Stops the flow within the dialog.
- Close Conversation: Closes the conversation but doesn't trigger a post-conversation survey.
- Close Dialog: Closes the conversation and triggers a post-conversation survey.
- Escalation: Available only in Secure Form interactions. Transfers the conversation to the skill or agent that you specify in the Secure Form interaction's settings.
- {Interaction Name}: Directs the flow to the interaction with the specified name.
Next Action options depend on the given interaction; only suitable options are available. For example, "Close Conversation" isn't available for Dialog Starter interactions.
As shown in the image above, in question and integration interactions, you can create custom rules that determine the next action that occurs. This is discussed next.
Custom Rules
A custom rule contains a set of instructions for how to respond to the user input or to the result of an integration call.
As an example, the following rule says that if the user responds to a Yes/No question with the pattern "yes," "yah," or "yup," the dialog flow should continue to the Yes statement.
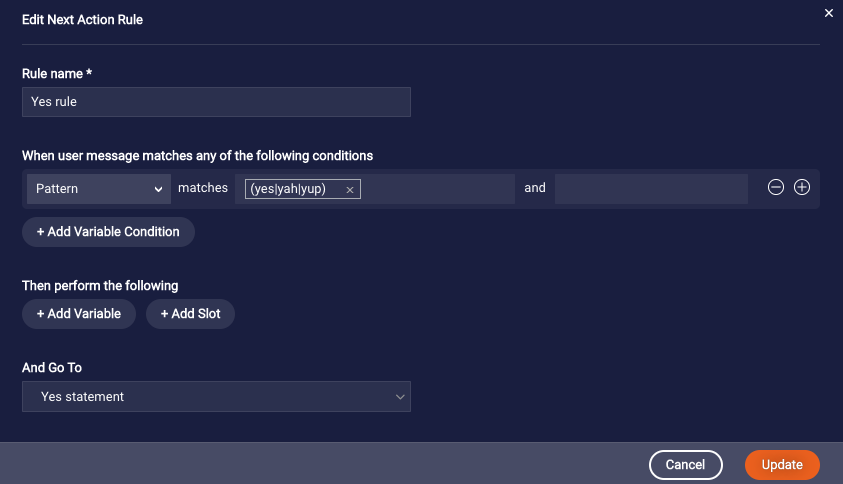
In question and integration interactions, you can create one or multiple custom rules depending on how many responses you need to support.
Use the guided Add/Edit Next Action Rule window to:
- Specify the rule name.
- Define the condition that must evaluate to true for the rule to be executed.
- Store data in a variable or slot. (Multiple variables can be added to a rule, but only a single slot can be added to a rule. A rule can fill only a single slot because it evaluates only a single element in the consumer's utterance against the defined condition.)
- Specify the next step in the dialog flow.
Adding variable conditions
As illustrated in our Complex Conditions tutorial, you can create more complex rules by adding one or more variable conditions using + Add Variable Condition.
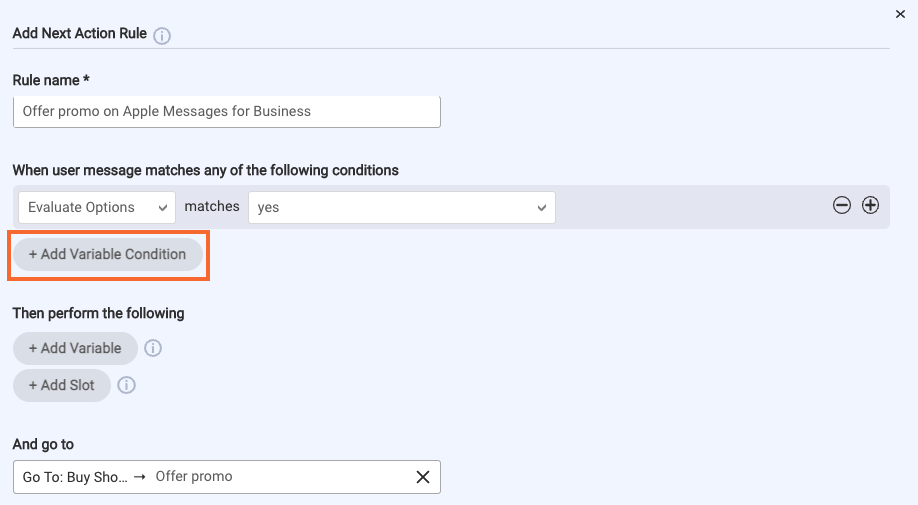
If you add a variable condition, both the first defined condition and the variable condition must be true for the next action to be performed.
To specify a botContext variable in a variable condition, enter only the variable name.
In our example below, the consumer must answer "yes" to our question, and the channel variable must be "AMB" for Apple Messages for Business. If both are true, then the consumer is offered a promotion.
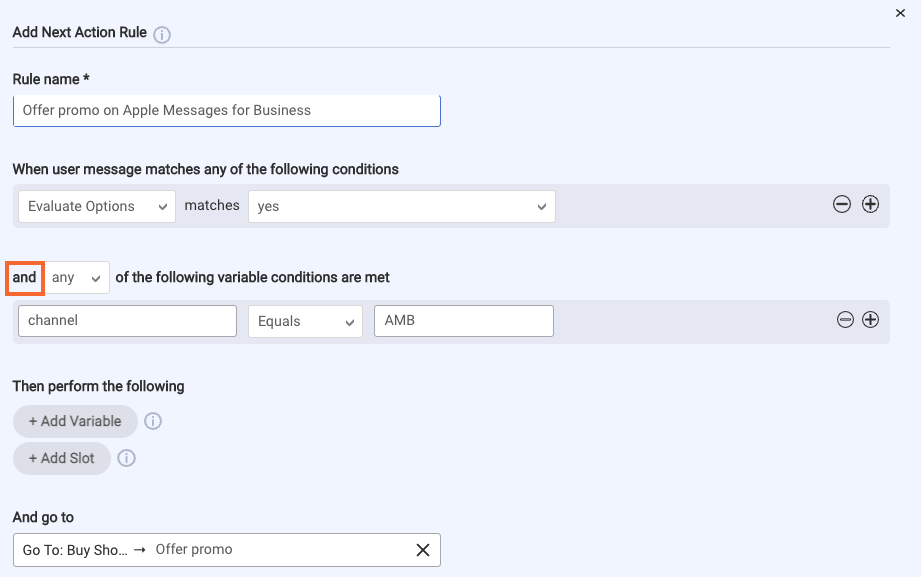
We could further expand the example to include additional custom rules with variable conditions that checked for other channels, e.g., SMS and so on, and configure next actions for those as well.
Need another example? Check out this one in our tutorial.
Multiple rules (order of execution)
If an interaction has multiple custom rules, they are evaluated in the following order:
- Rules with a "Response Intent" match type are evaluated first.
- Rules with any other match type except "No Match" are evaluated next.
- A rule with a "No Match" match type is always evaluated last.
Within the above confines, the rules are then evaluated in the order they are listed.
To reorder rules, move the cursor over the area to the left of the rule, and click the Up or Down arrow that appears.
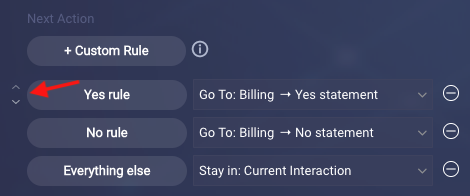
For information on the match types mentioned above, see Conditions, which is discussed next.
Conditions
Conditions are "if…, then…" statements that, when combined with pattern matching, intents and entities, deliver a powerful flow control engine for the bot.
Conditions in question interactions
Consider the following question that asks the user for their 6-digit account number.
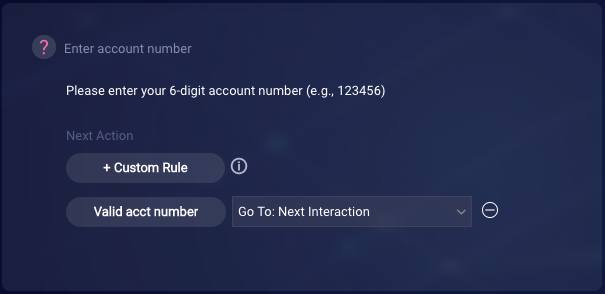
The question contains a single rule, which is this:
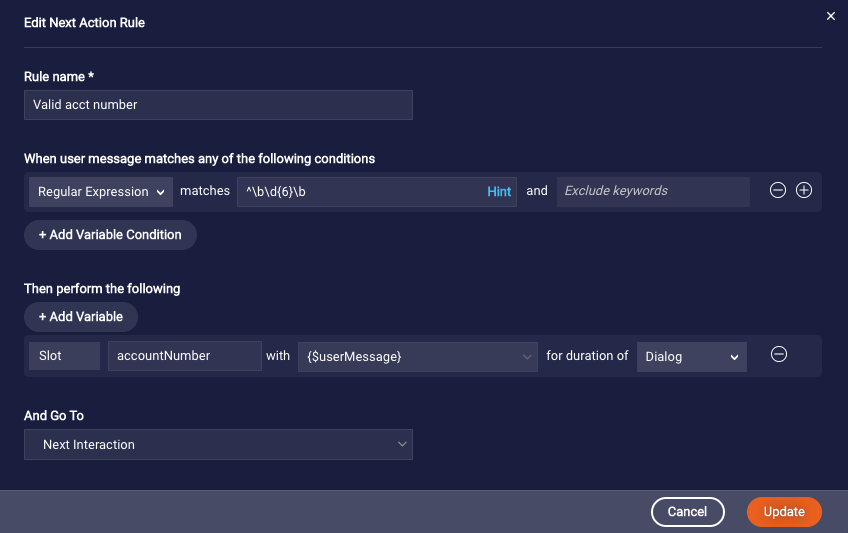
In the rule, there's a condition that determines if the user's response matches the RegEx for a 6-digit number. If it does, the user's response is stored in a slot, and the dialog flow continues to the next interaction.
Like in the example above, when you define a condition (in a rule) in a question interaction, you specify how you want to match the user's input. You can select from the following match types:
- Response Intent: This triggers the Next Action when the user input matches the selected intent. Make sure to connect your domain and populate it with intents, so they'll be available for conditions. See this example of usage.
- Regular Expression: This triggers the Next Action when the user input matches the RegEx that you specify. All standard Regex rules apply. Take advantage of the hint feature that's available.
- Pattern: This triggers the Next Action when the user input matches the pattern that you specify. Take advantage of the pattern library that's available.
- Exact Value: This triggers the Next Action when the user input matches an exact value that you specify. This is useful for questions where you present the user a set of predefined answers, such as multiple choice questions, since you can anticipate the user's answer precisely.
-
Language Detected: Available only for Voice bots. This triggers the Next Action when the consumer input matches the language and locale that you specify in the rule. Learn about use cases.
The Language Detected condition match type isn’t available by default. Contact your LivePerson representative to enable this feature.
-
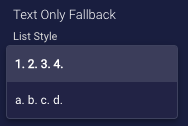
Evaluate Options: Available for multiple choice questions only. This triggers the Next Action when the user's choice matches the choice that you select here. For a match to be found, the consumer must select the option, enter the choice exactly, or, in text-only channels, enter the corresponding letter or number (configured in the interaction's settings).
If you need more flexibility (e.g., you have a Yes/No question but you want to account for "Yeah" and "Yup" in the condition), use a different method instead.
When defining a condition using Evaluate Options, make sure the choices in the question are defined before defining the condition. Otherwise, the choices won't be available for use in the condition.
-
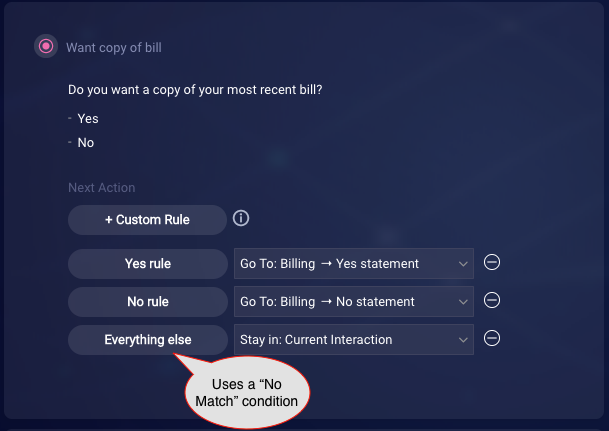
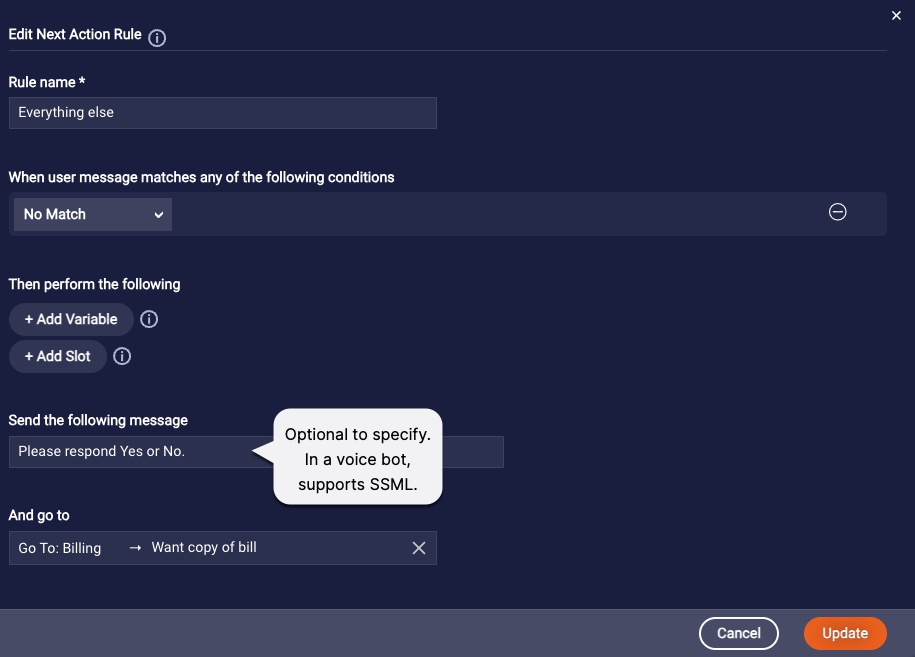
No Match: This triggers the Next Action when a match to an earlier rule in the interaction isn't found. Use this option in a final rule to catch all utterances other than those caught by earlier rules.
The No Match option is a great way to repeat the same interaction until the consumer enters an expected utterance. This is done below.
Take care when using No Match conditions. They can break your fallback logic.
Additionally, be aware of the following:
- The No Match rule is always the last rule to be evaluated regardless of where you place it in the list of rules in the interaction. Therefore, as a best practice, place the No Match rule last in the rule list.
- You have the option to define a message that is sent before the Next Action is executed. See the example in the image above. In a voice bot, this field supports SSML.
- Context switching based on the consumer's utterance doesn't happen when an interaction has a No Match rule. This is because a No Match rule is always executed when there isn't a match to an earlier rule in the interaction.
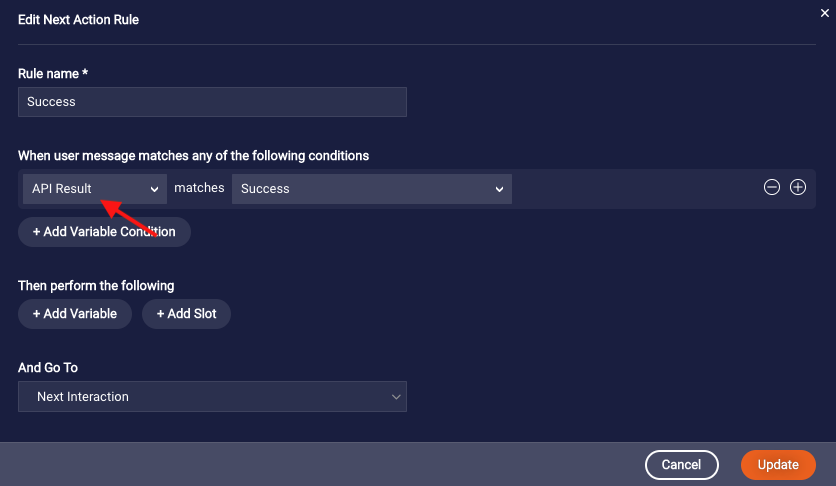
- API Result: This triggers the Next Action when the result of the API call is success or failure. This match type is available in Integration interactions and Agent Transfer interactions.
- KB Result: This triggers the Next Action based on whether the knowledge base search returned an answer or not. This match type is available in KnowledgeAI interactions.
- Secure Form Submission: This triggers the Next Action when submission of the secure form is successful or has failed. This match type is available in Secure Form interactions.
Conditions in integration interactions
You can define a condition (in a rule) in an integration interaction to direct the dialog flow based on the result of the API integration call. This is a best practice that's recommended by LivePerson.
