
The Welcome Event
The behaviour of the welcome event is different depending on whether the bot is for chat and messaging. This divergence comes down to the way that each individual LivePerson product works..
A Messaging conversation qualifies as "initiated" from a Conversational Cloud perspective only after the consumer sends their first message. The consumer is prompted for their initial message in the channel they have chosen to initiate the conversation. As a result, the consumer’s first message is something that can be parsed by Dialogflow ES and an intent determined.
The below documents cover where to configure the initial message on a given platform.
| Platform | Docs | Attribute |
|---|---|---|
| iOS | https://developers.liveperson.com/consumer-experience-ios-sdk-localizationkeys.html | hiMessage |
| Android | https://developers.liveperson.com/android-modifying-string.html#resultOverlayRecordTemplate | lp_first_message |
| Web | N/A | Default LP Message |
| Other | N/A | N/A |
A Chat conversation is considered started when the chat is routed to an agent. Best practice is for the agent to provide the first response. In this scenario, there is no text from the consumer to parse, thus the default ‘WELCOME’ event is utilised as a start point for the bot to prompt the user to provide input and progress the conversation.
Ensure you have an ‘entry point’ intent that utilises the default ‘WELCOME’ event.
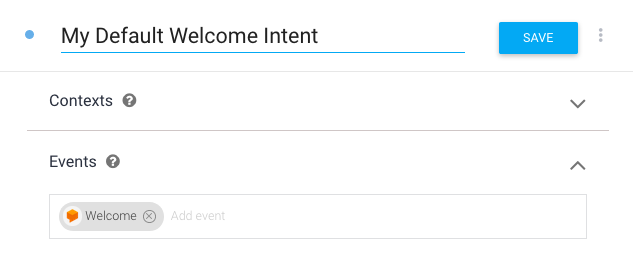
Figure 2.1 Configuration of the welcome event
Sending Rich Content (Structured Content)
Structured Content/Rich Content is supported by the core LivePerson platform. Documentation for the feature can be found here.
To send Structured Content via Dialogflow ES, send a custom payload option via an intent.
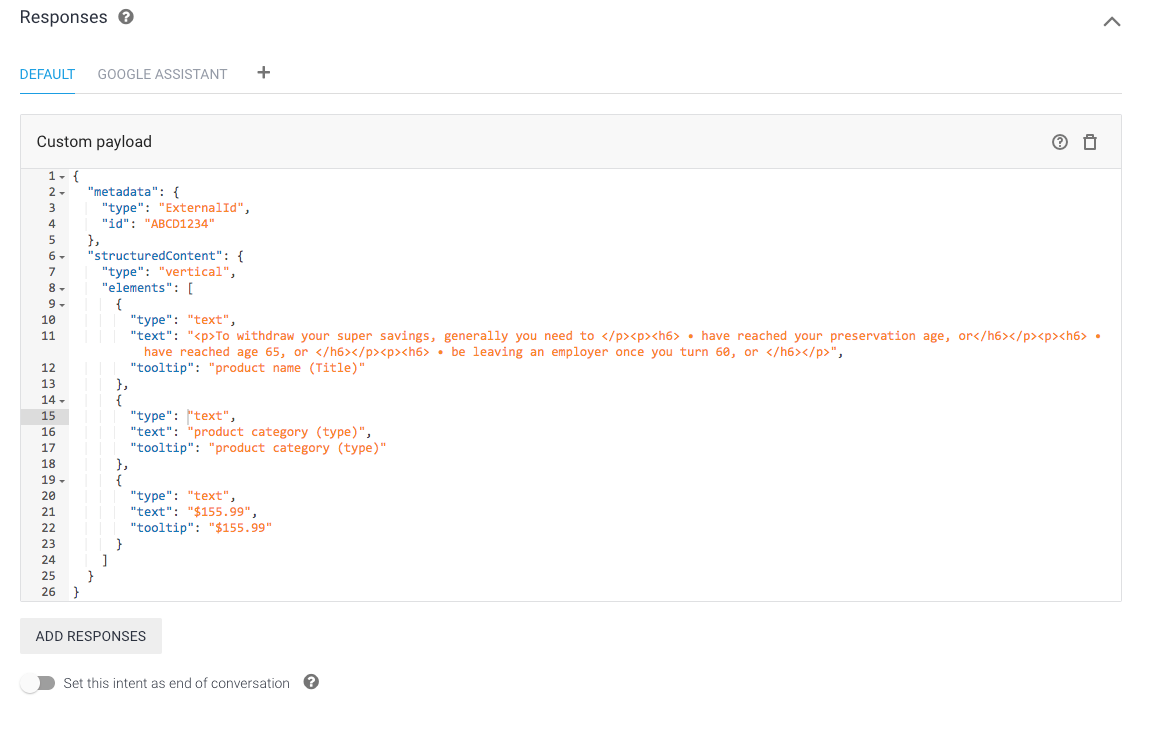
Figure 2.2 Configuration of Structured Content
If Images are referenced in structured content, their URLs must be added to a whitelist via internal LivePerson
configuration (Houston: messaging.rich.content.valid.urls).
Please note that you must add all possible domains to this list as wildcards are not supported.
Moreover, All domains must be HTTPS secure.
This should contain valid structured content, along with any optional metadata required for the structured content (as seen in Figure 5.1). Always validate your structured content using this tool before entering into the Dialogflow console.
Note: Caution when creating a custom payload. Delete the existing text response before saving the intent. If not Conversational Cloud will receive a blank text response followed by rich content payload.
Example Metadata
{
  "metadata": [
    {
      //Mandatory
      "type": "ExternalId", //Mandatory
      "id": "ABCD1234" //Mandatory
    }
  ],
  "structuredContent": {
    //Mandatory
    "type": "vertical",
    "elements": [
      {
        "type": "image",
        "url": "https://i.ytimg.com/vi/zmeByDJ02mQ/hqdefault.jpg",
        "tooltip": "image tooltip"
      },
      {
        "type": "text",
        "text": "product name (Title)",
        "tooltip": "product name (Title)"
      },
      {
        "type": "text",
        "text": "product category (type)",
        "tooltip": "product category (type)"
      },
      {
        "type": "text",
        "text": "$155.99",
        "tooltip": "$155.99"
      }
    ]
  }
}
Figure 2.3 Structured Content Example
Sending Quick Replies (Structured Content)
Please note Quick Replies are only supported in Messaging Conversations.
Quick Replies is a special type of Structured Content. It is a message sent along with predefined answers. For detailed information on Quick Replies check out the documentation for the specific channel (Mobile SDK and Web, Facebook Messenger, Google RCS Business Messaging).
{
  "structuredContent": {
    "quickReplies": {
      "type": "quickReplies",
      "itemsPerRow": 8,
      "replies": [
        {
          "type": "button",
          "tooltip": "yes I do",
          "title": "yes",
          "click": {
            "actions": [
              {
                "type": "publishText",
                "text": "yep"
              }
            ],
            "metadata": [
              {
                "type": "ExternalId",
                "id": "Yes-1234"
              }
            ]
          }
        },
        {
          "type": "button",
          "tooltip": "No!",
          "title": "No!",
          "click": {
            "actions": [
              {
                "type": "publishText",
                "text": "No!"
              }
            ],
            "metadata": [
              {
                "type": "ExternalId",
                "id": "No-4321"
              }
            ]
          }
        }
      ]
    },
    "message": "Do you like Bots?"
  },
  "metadata": [
    {
      "id": "1234",
      "type": "ExternalId"
    }
  ]
}
Figure 2.4 Example of Quick Replies as Structured Content
Bot Actions
Please note we only support ONE ACTION per response
Transfer
If the bot needs to transfer the conversation to a human agent, or the conversation flow indicates that another bot is better suited for the identified intent, you will need to tell the connector to transfer the conversation to a given skill.
This is achieved using the built in "Actions and Parameters" section of the Dialogflow console.
Multiple scenarios for transfer/escalations exist triggered by the transfer action object.
-
Explicit request from visitor to transfer to an agent (e.g., action: transfer)
-
If the Bot does not have an appropriate answer, it should recognise this as a scenario for a transfer. Depending on the connector configuration or the decision making capacity of the bot, the bot will transfer to a particular agent, skill or default skill.
-
If there is a internal error or the bot service cannot be reached the connector will transfer to a default skill set up during configuration.
Transfers and escalations rely on the action item in the response object.
Action: TRANSFER (case-sensitive)
Transfer To Skill
This option transfers the conversation to the next available agent using the provided skill.
Parameters: ‘skill’ (case-sensitive) with ‘value’ of skill name (case-sensitive) in Conversational Cloud.
![]() Figure 2.5 Configuration for transfer to skill
Figure 2.5 Configuration for transfer to skill
Transfer to Agent
This feature is depending on permissions
This option transfers the conversation to the particular agent matching the provided agentId and skill. If the agent is not available, the conversation will be transferred to an available agent with the same skill
Parameters: skill (case-sensitive) with value of skill name (case-sensitive) in Conversational Cloud.
agentId (case-sensitive) with value of agent id in Conversational Cloud.
![]() Figure 2.6 Configuration for transfer to agent
Figure 2.6 Configuration for transfer to agent
Close Conversation
In the bot’s flow, there will be times when it is appropriate to end the conversation without escalating to a live agent. If a query has been answered, or the brand has determined that no escalation is required for a given query, it is best practice having the bot end the conversation.
The method for closing a conversation is similar to the transfer action in that the same "Actions and Parameters" field is utilised in the Dialogflow console.
The action field needs to be set to CLOSE_CONVERSATION to instruct the connector to close the conversation.
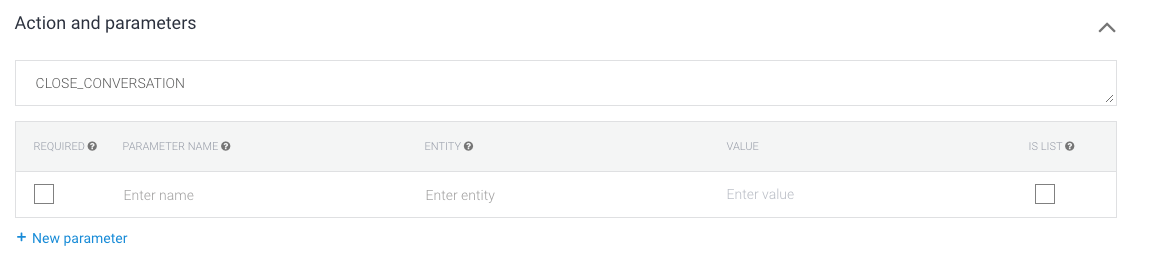 Figure 2.7 Configuration for closing a conversation
To close a conversation without triggering a post conversation survey, please add the parameter with the name withoutPcs and the value true to the action parameters.
Change Time To Response of a Conversation
Change the TTR of a conversation based on the action value in the response object.
LivePerson Messaging uses 3 different types of priorities: "URGENT", “NORMAL” “PRIORITIZED”
The time values of these are defined in the Agent Workspace.
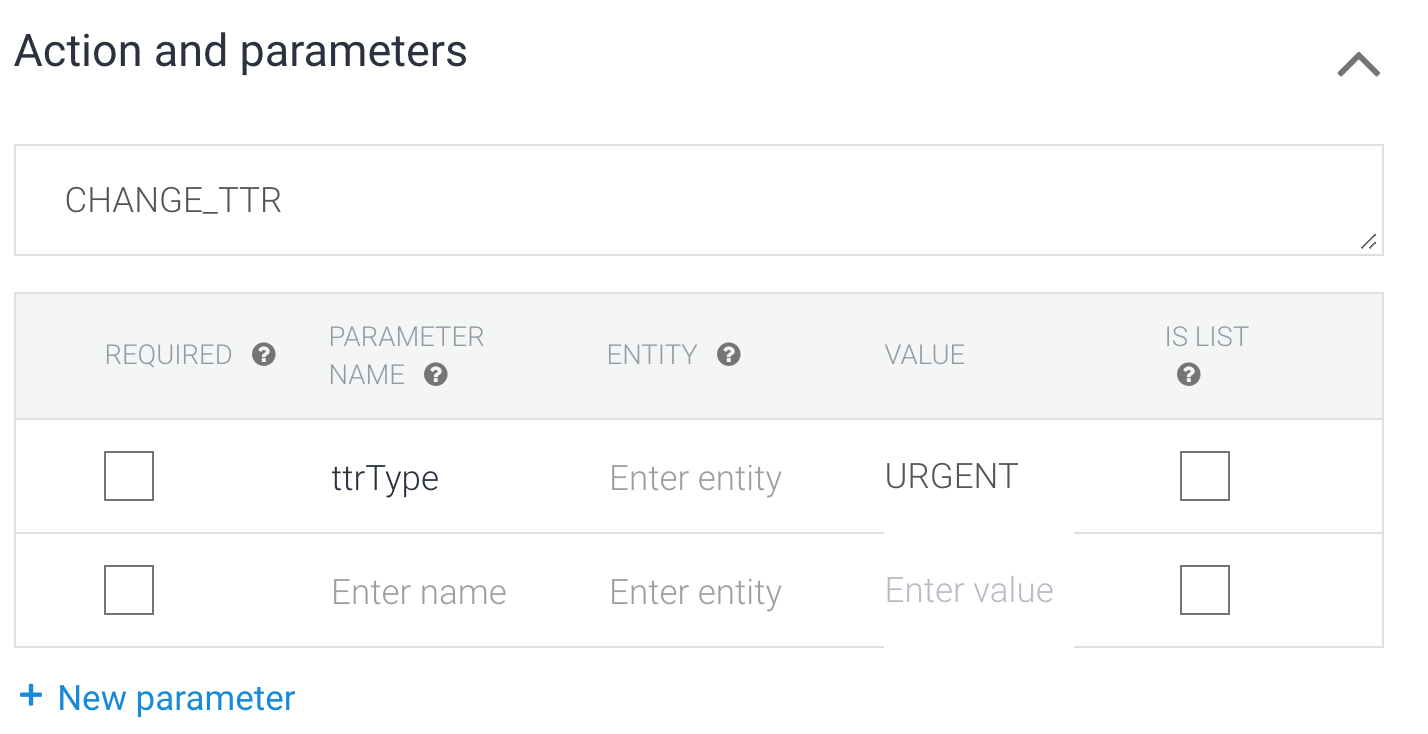 Figure 2.8 Configuration for changing the TTR