
Provisioning your account
To start using LivePerson Functions, you must first enable the environment for your account. This is a one-time, automated setup. For further details on what gets provisionied, please refer to the provisioning page.
When you use the LivePerson Functions platform for the first time please make sure that you are using a Conversational Cloud Admin account to ensure that the provisioning of the account succeeds.
- Start the process When you first navigate to the Functions interface, you will see a prompt indicating your account is not yet set up. Click Start Provisioning to initiate the automation.

- Wait for configuration The screen will change to show a "Provisioning in process…" status with a loading indicator. During this time, the system configures the necessary infrastructure in the background.
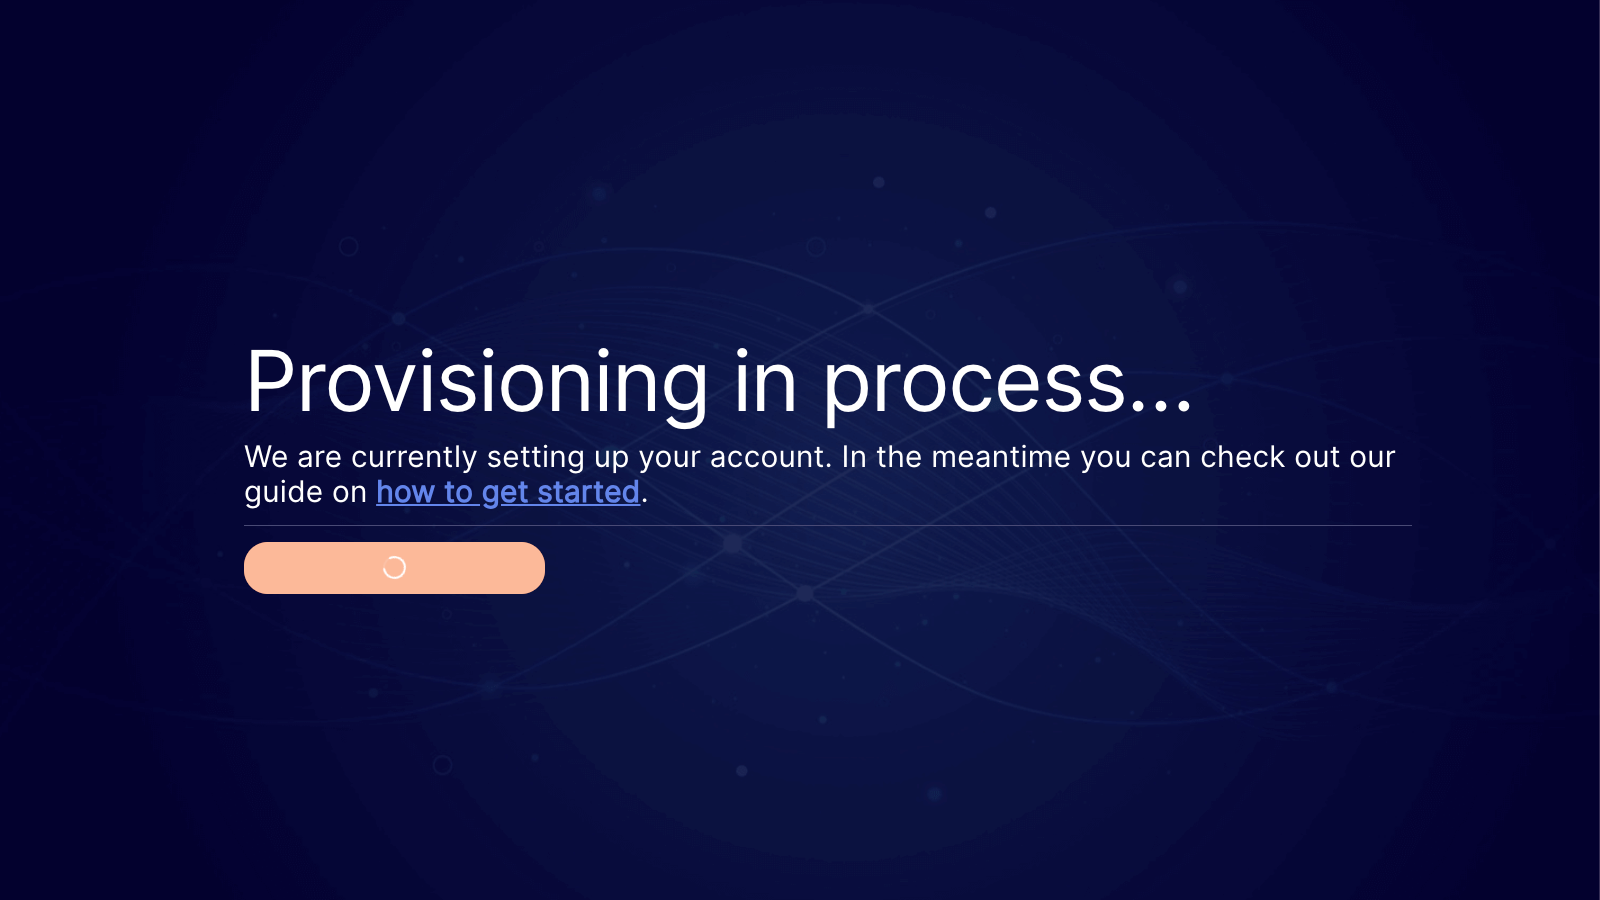
The provisioning process generally takes a few minutes, but it can take up to 10 minutes to complete depending on system load.
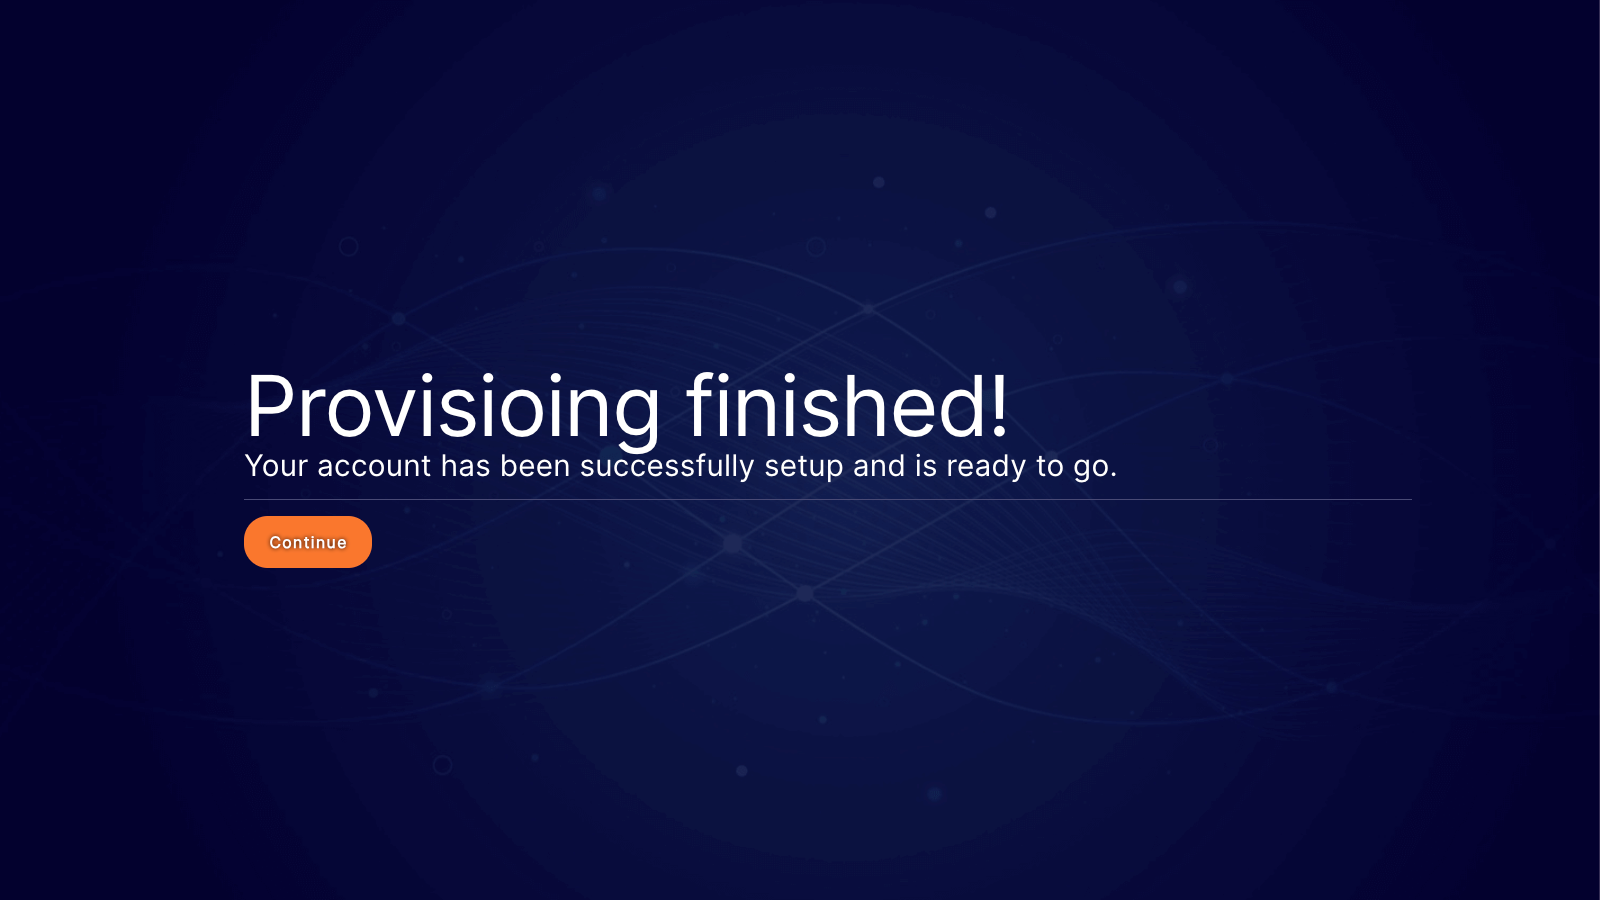
- Complete setup Once the automation finishes, you will see a confirmation message stating your account is ready to go. Click Continue to access the main dashboard.
Create your first function
Ready to build? Let’s walk through the process of setting up a new function from scratch.
To get started, select the Functions tab from the left-hand sidebar. While this dashboard usually displays a table of your existing functions — whether in draft or productive states — you will see a welcome screen if your account currently has no functions deployed.
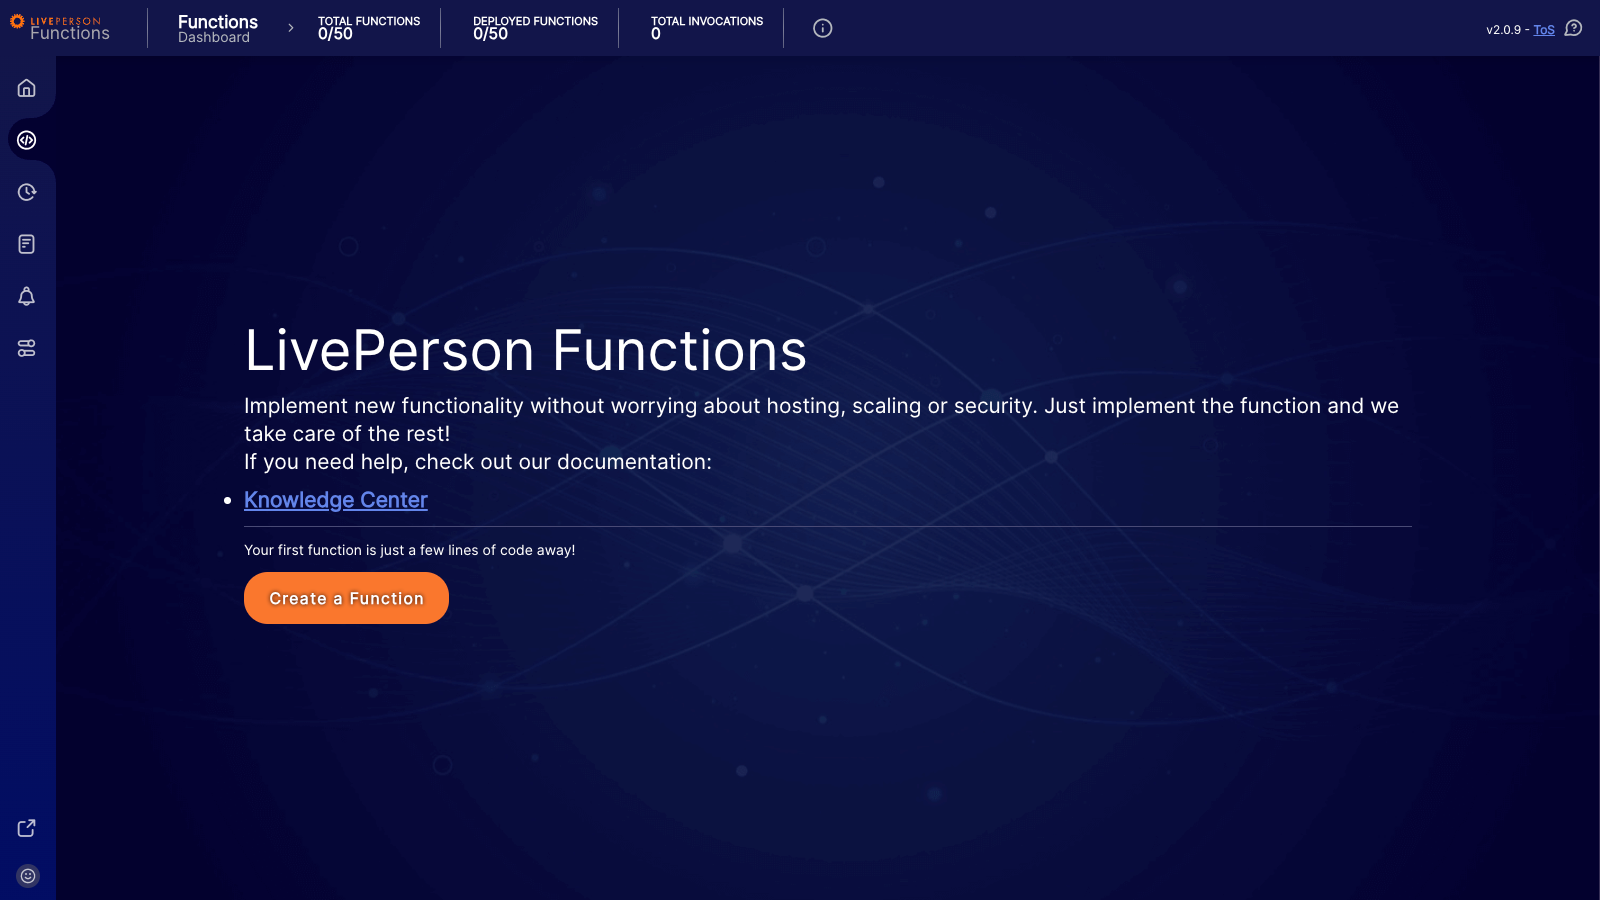
- Click the Create a Function button to open the configuration form.
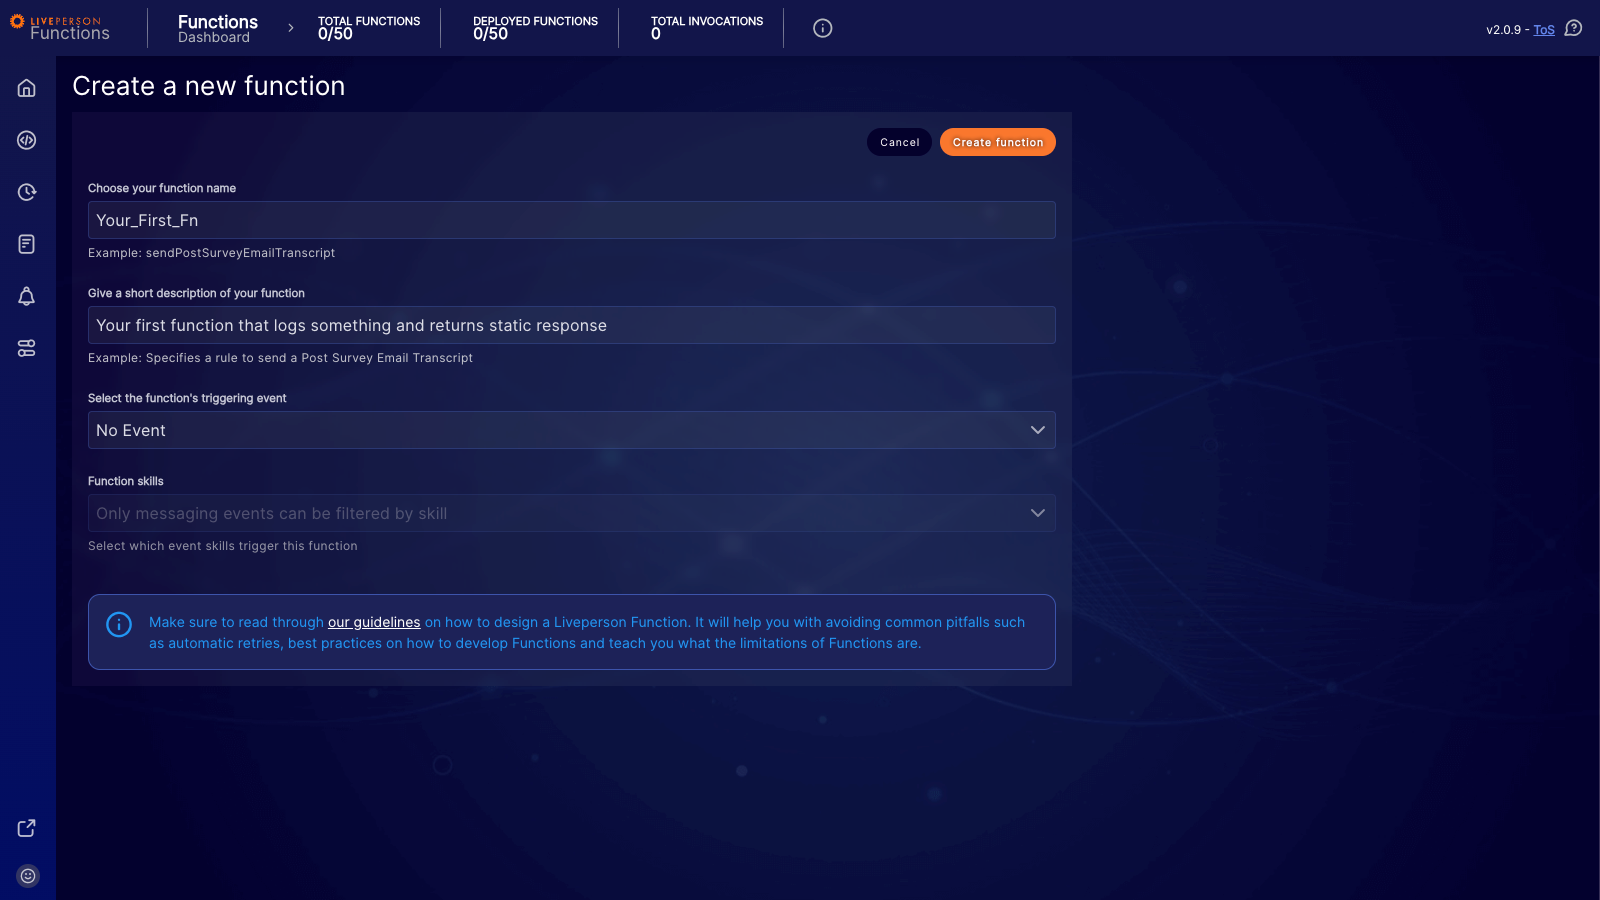
- Function Name: Enter a unique name for your function.
- Description: Write a brief summary of what the function does. This serves as vital context for other developers who might work on this account later.
- Triggering Event: Select the event that should spark this function. For a deep dive into available triggers, check out the event documentation.
For this "getting started" example, please select No Event. To keep things simple.
The name may only contain alphanumeric characters or underscores (e.g., Your_First_Fn).
Adjusting the code of your first function
Once you click Create function, the system will generate the function and automatically open the code editor. You will see a default template ready for modification.
Let’s adjust the code to include a simple info log and a static response. Copy and paste the following snippet into the editor:
async function lambda(input) {
  console.info(`Your very first log checking out the input`, { payload: input });

  return "Hello World";
}
To persist these changes, click the Save button located in the top header.
Here is a little power user trick: you can also use the keyboard shortcut Ctrl + S to save the function.
You have now successfully scaffolded your first function! From here, you can proceed to deploy and test your code.
Deploy your function
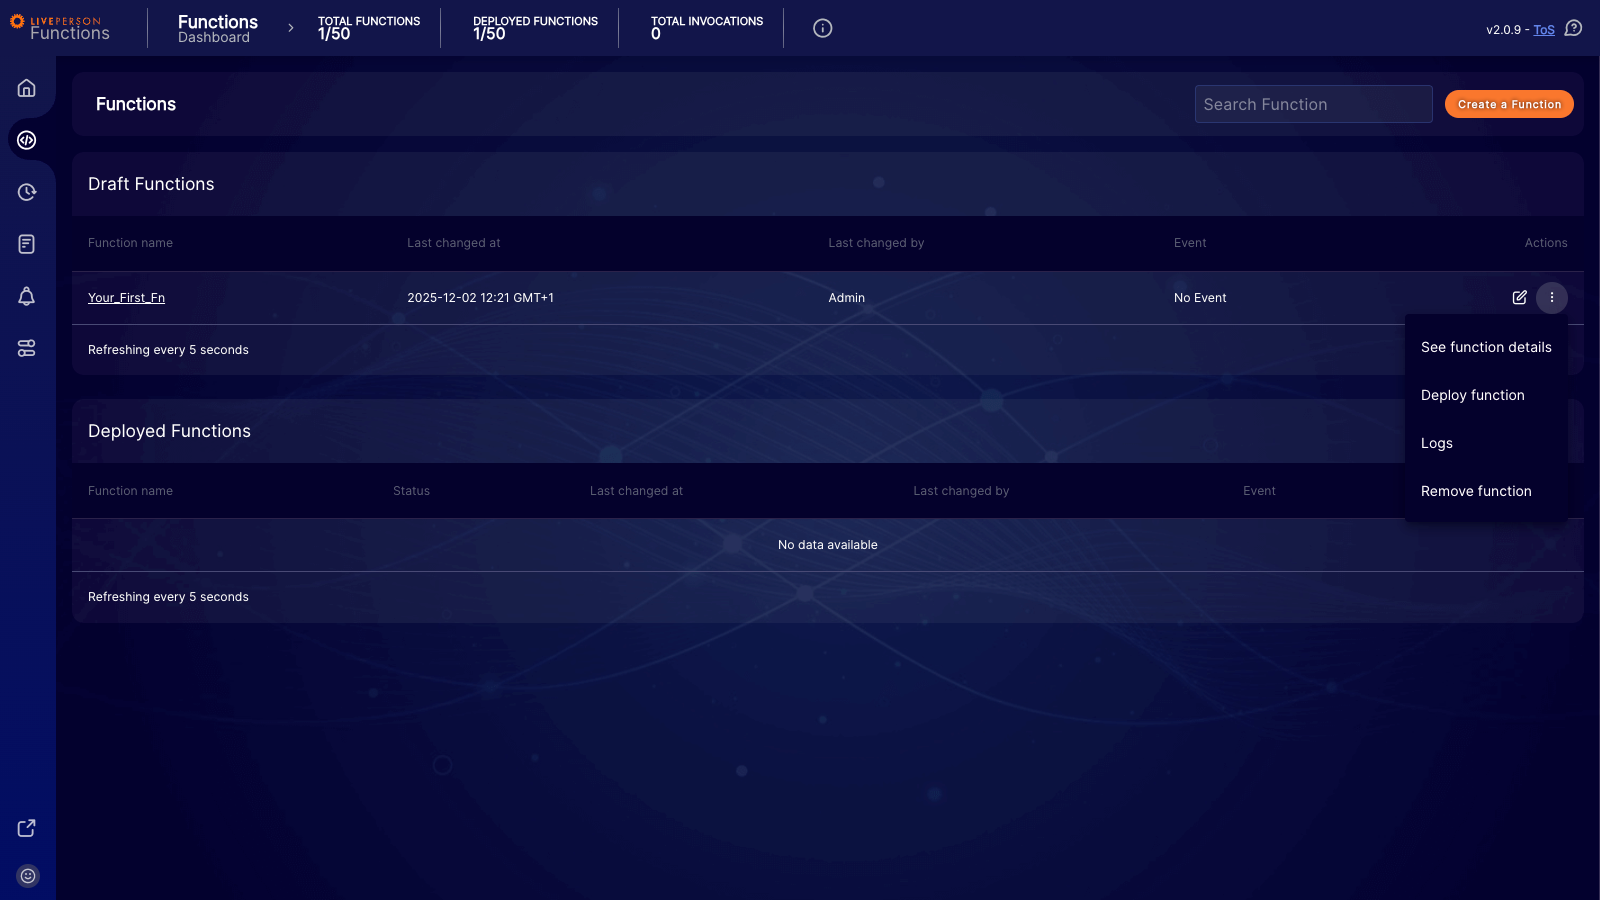
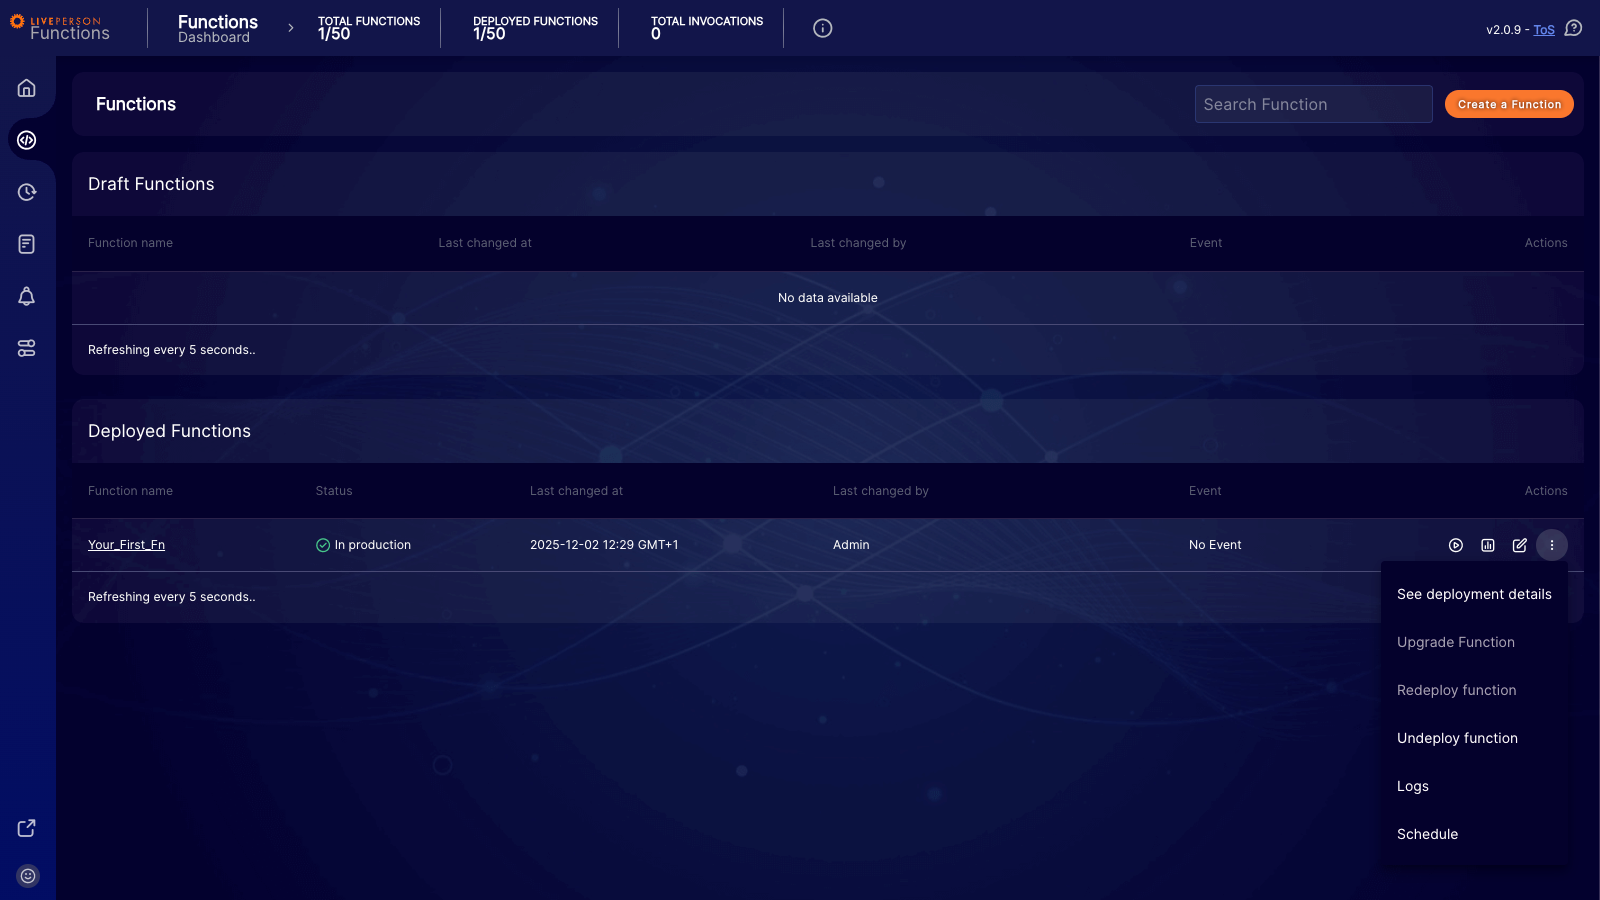
Your new function appears in the Draft Functions section by default, as it isn't deployed to production yet.
- Navigate to the Draft Functions section of the dashboard.
- Click the three-dot action menu on the right side of your function row and select Deploy function.
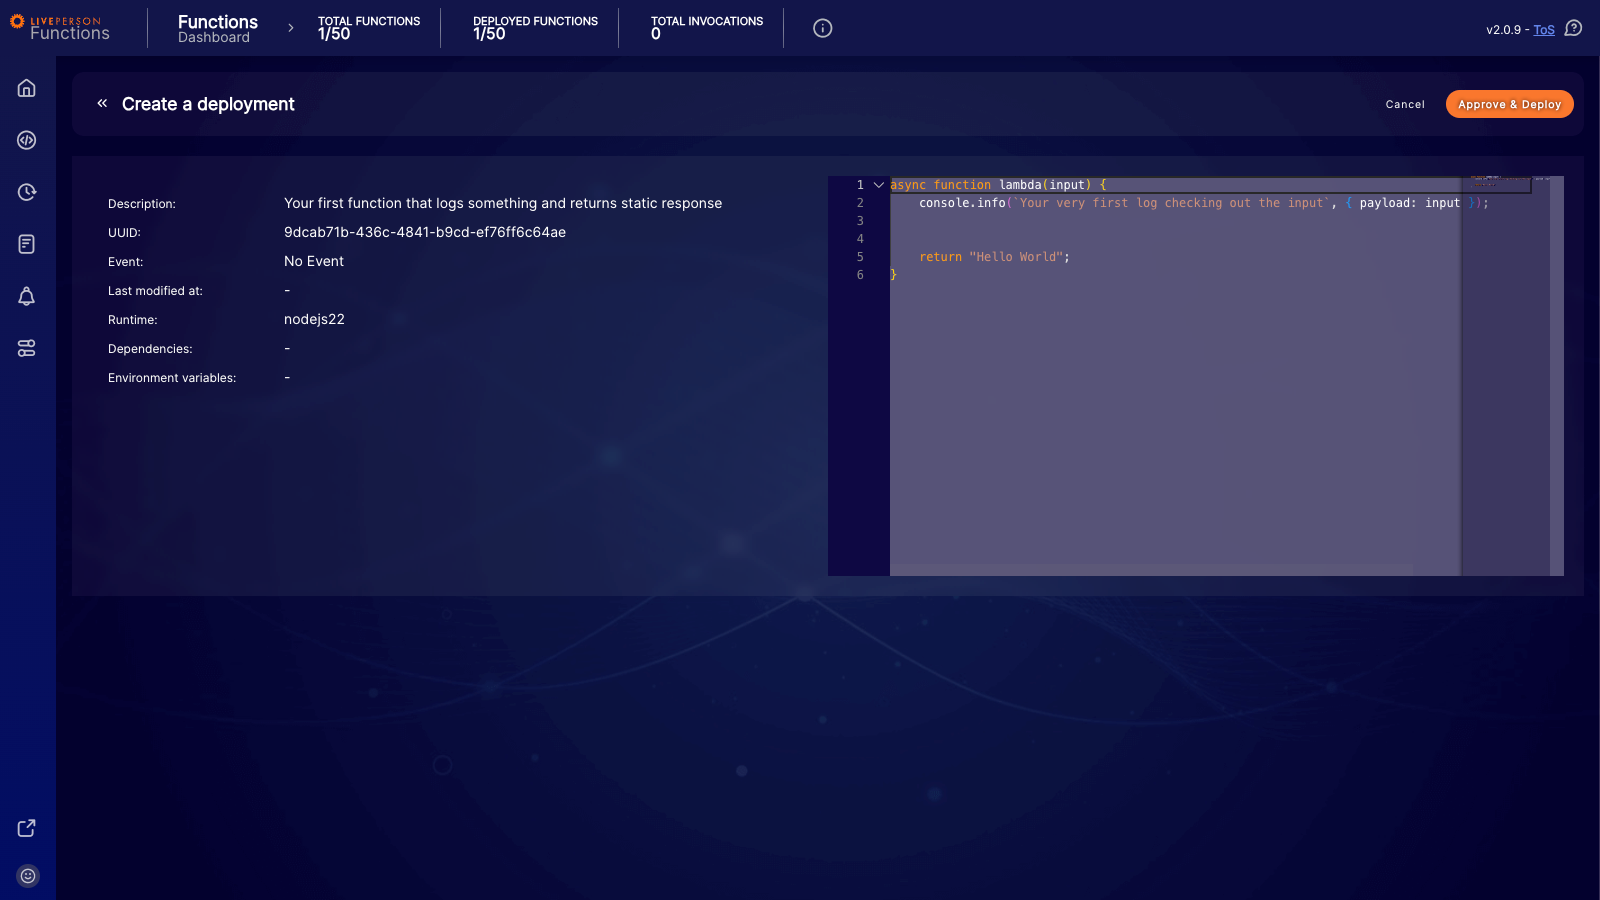
- The Create a deployment screen will appear. Review your function details — including the UUID, runtime environment, and code — to ensure they are correct.
- When you are ready, click the Approve & Deploy button in the top right corner.
A notification will appear to confirm that the deployment has started successfully.
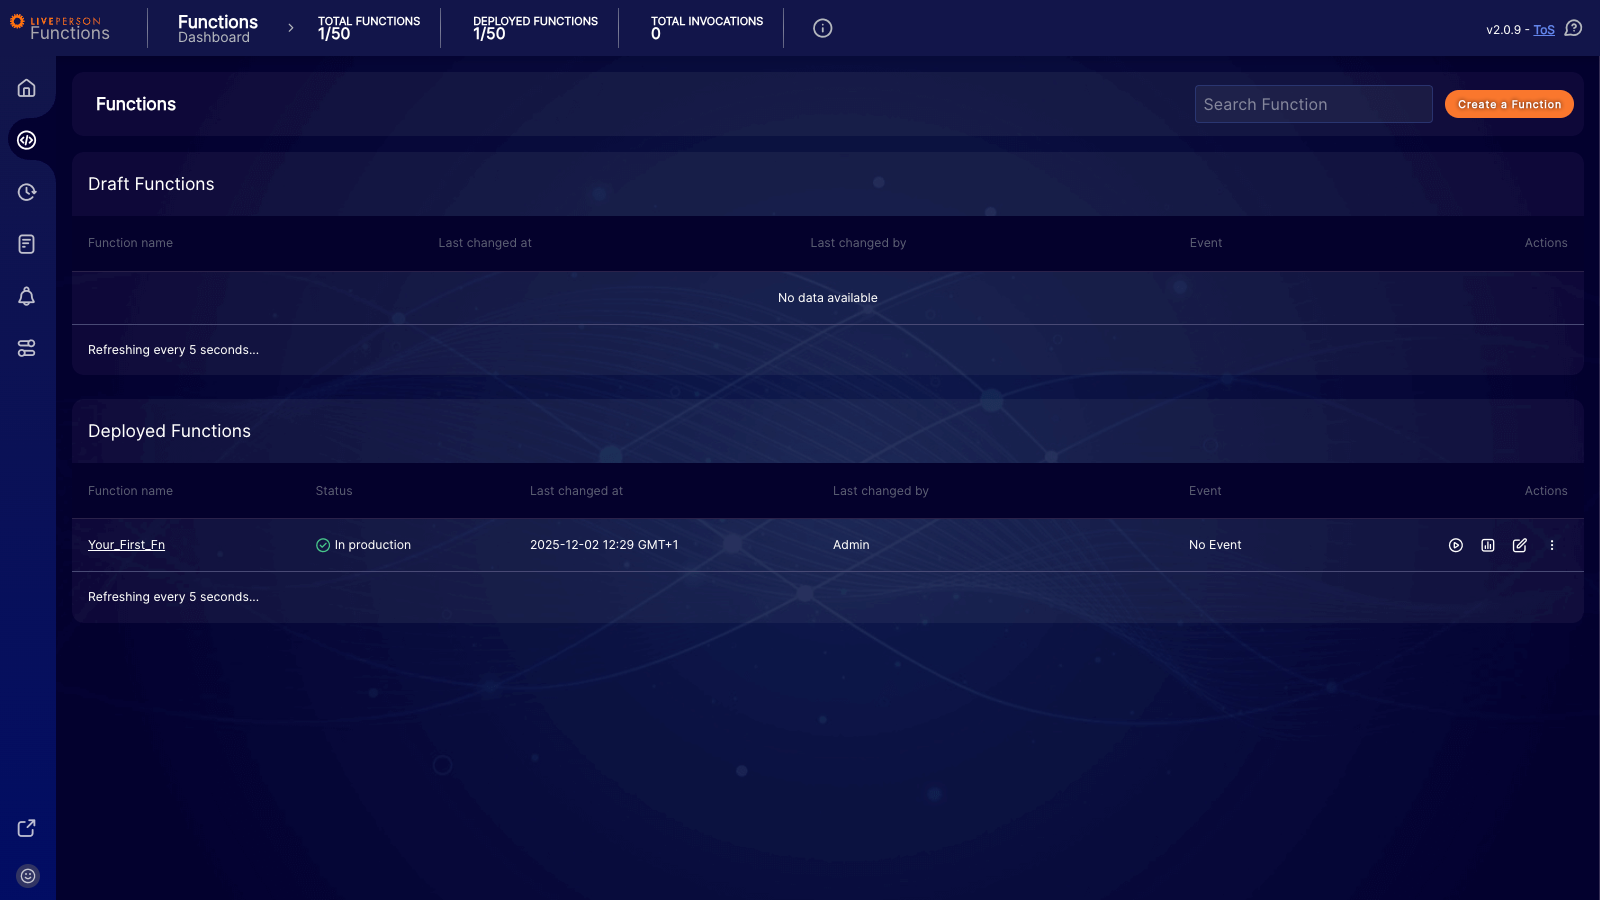
The deployment process usually takes a couple of minutes, though it can take up to 10 minutes. During this time, your function will move to the Deployed Functions section with a status of Deploying
Once the process finishes, the status will update to In production. Your function is now live.
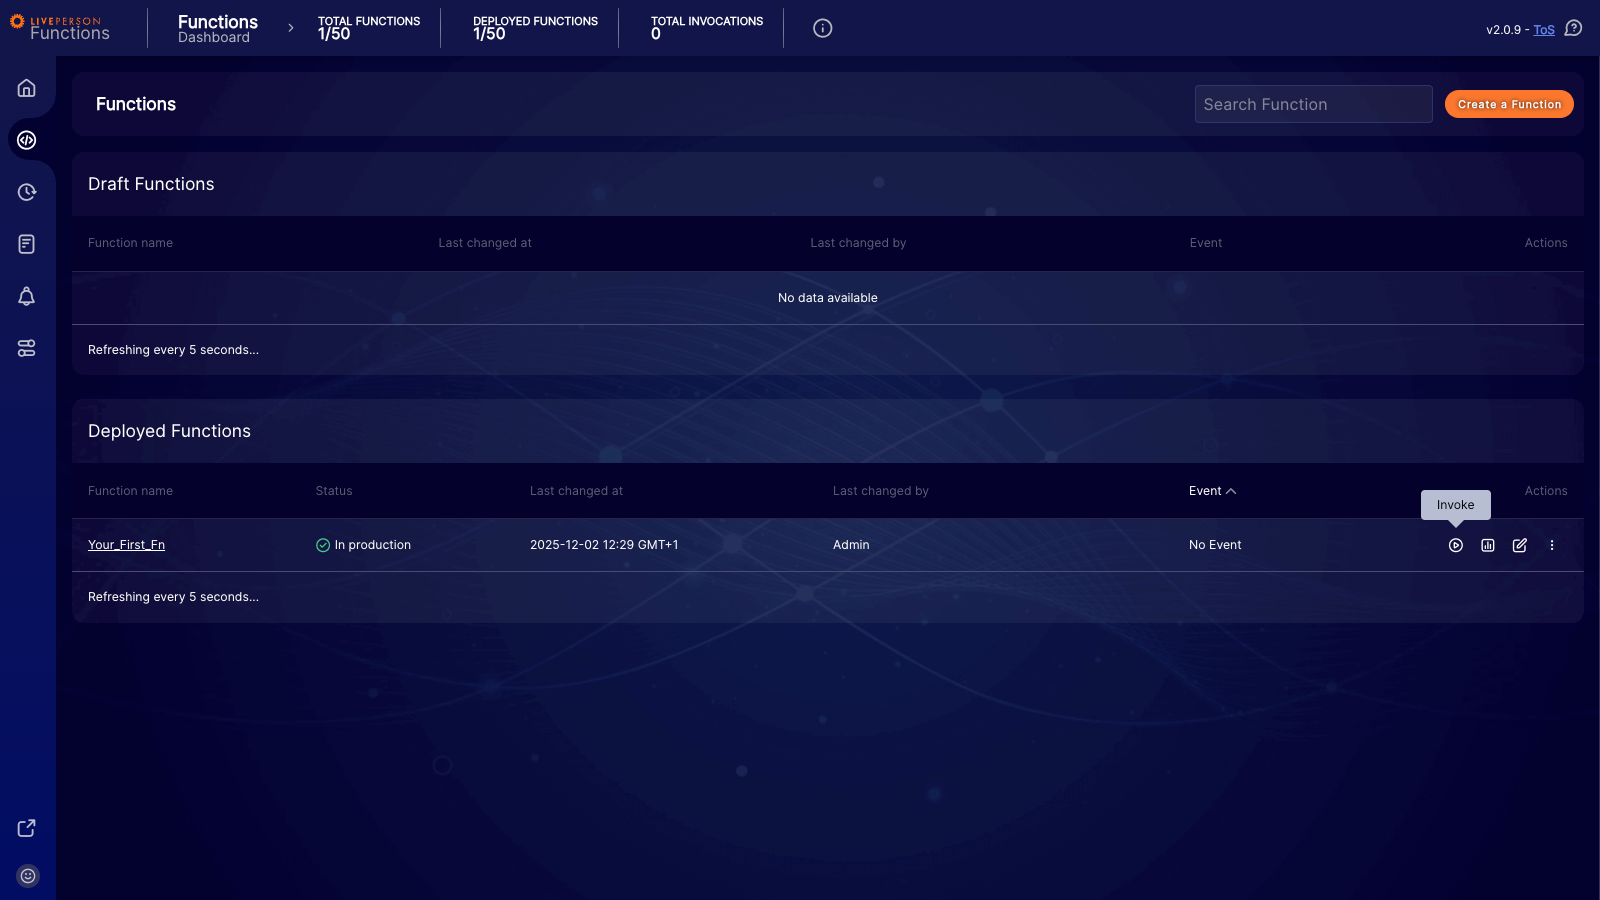
Now that your function is live, you are ready to perform a Test Invocation to verify that your code executes as expected.
Test your function
Now that your function is deployed, you can verify its behavior using the built-in test invocation client.
To get started, locate Your_First_Fn in the Deployed Functions list on your dashboard. Click the Invoke button (the play icon) on the right side of the row.
This action opens the test invocation client, which allows you to send a mock payload to your function and view the results immediately.
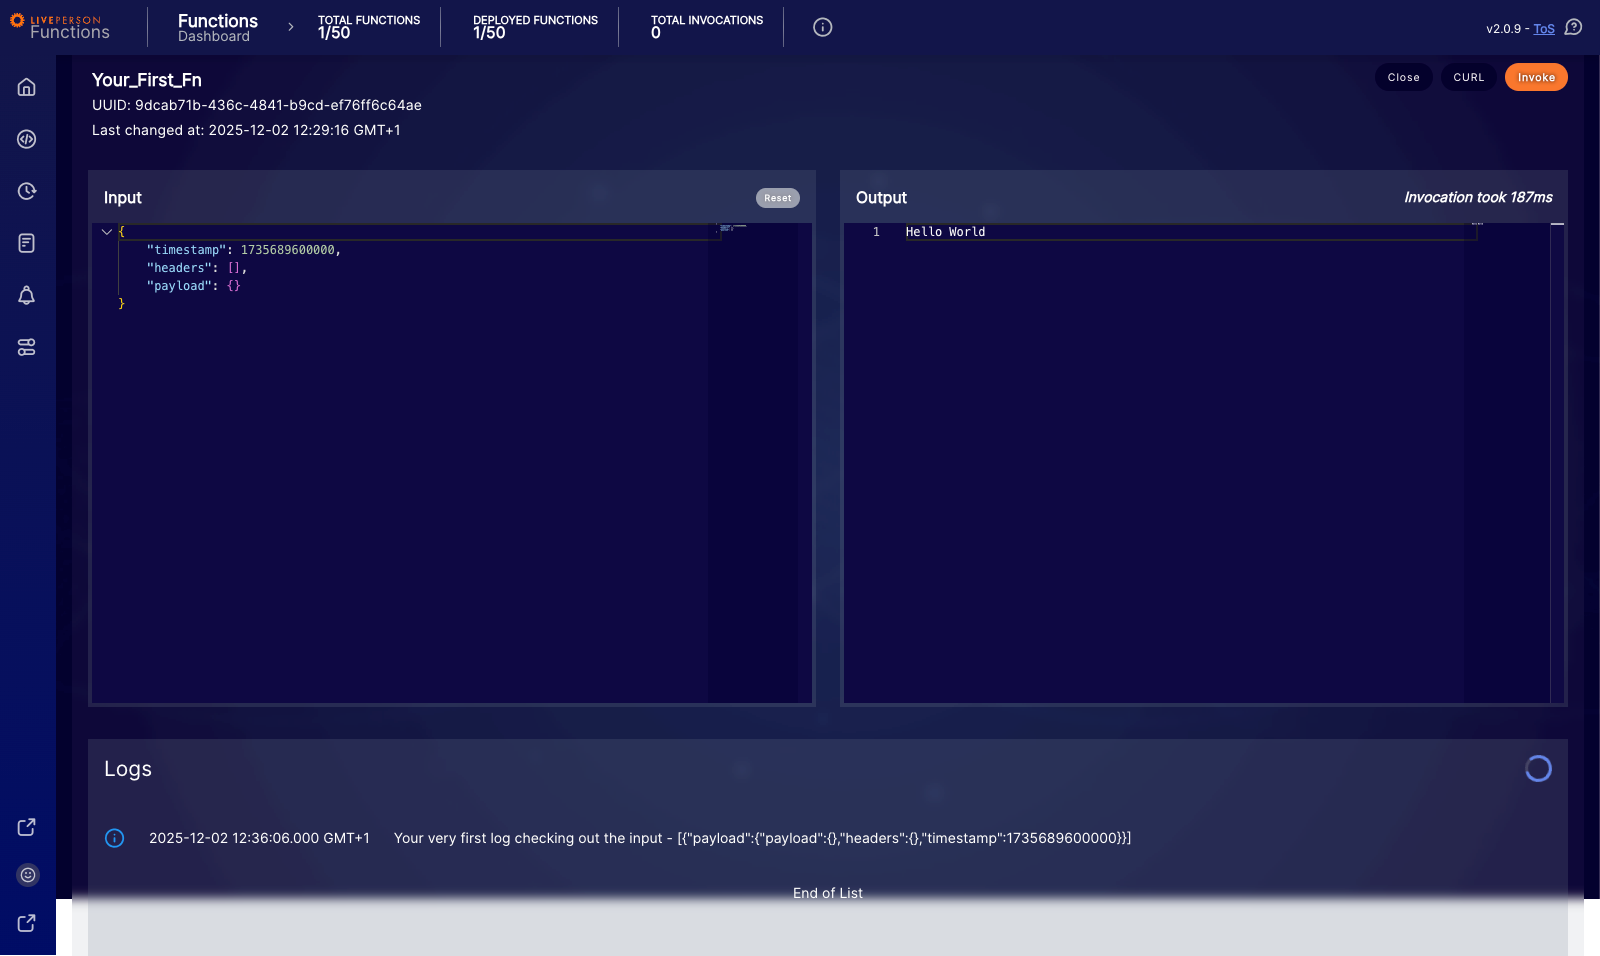
The client consists of three main components:
- Input: This panel allows you to define the JSON payload sent to the function. You can modify the default values to test different scenarios.
- Output: This panel displays the raw response returned by the function after execution.
- Logs: This section lists the log entries generated during the execution.
To execute the test, click the orange Invoke button in the top-right corner of the screen.
Once triggered, the Output panel will update with the function's response — in this case, "Hello World" — and the execution time.
Note on Logs: The logs displayed in the bottom panel are not real-time. They will appear in the list as they become available from the system.
Cleanup
To keep your workspace tidy, you can undeploy and delete the function we just created. This step is optional — if you prefer to keep the function active, you can skip those sections.
Undeploying your function
To undeploy your function:
- In the Deployed Functions table, click the action menu (the three vertical dots) next to your function.
- Select Undeploy function from the dropdown list.
- A modal will appear to confirm the operation. Click Undeploy now to proceed.
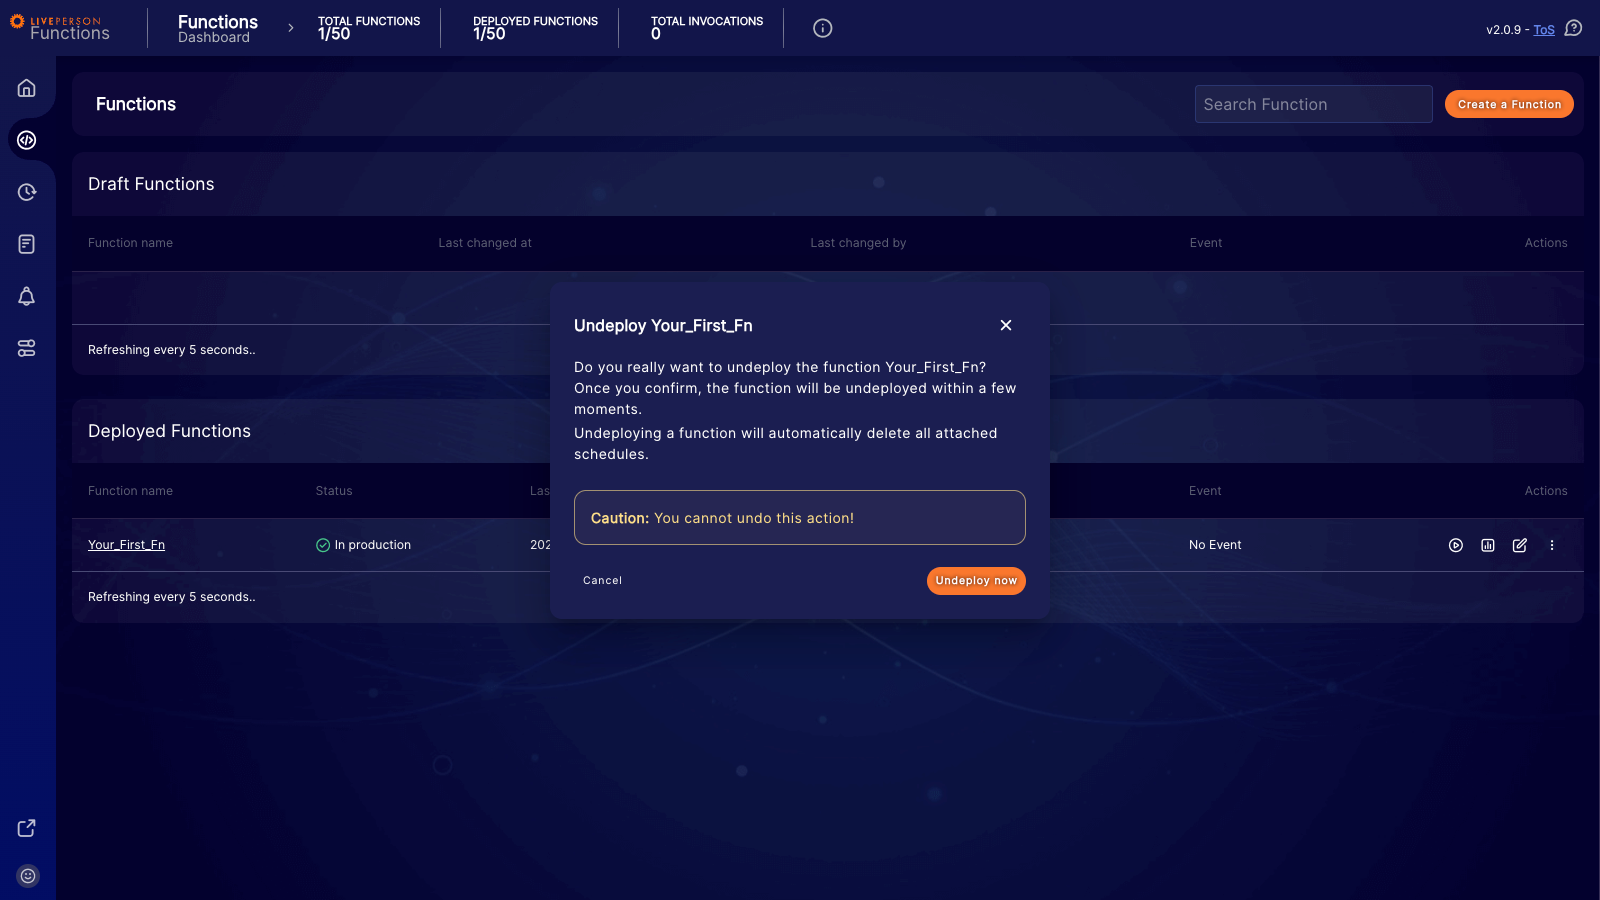
Once confirmed, the system begins the undeployment process. Eventually, the function’s state updates back to Draft, and it moves to the Draft Functions table.
Delete your function
- Locate "Your_First_Fn" in the Draft Functions list. Click the Actions menu (the three vertical dots) next to the function name and select Remove function.
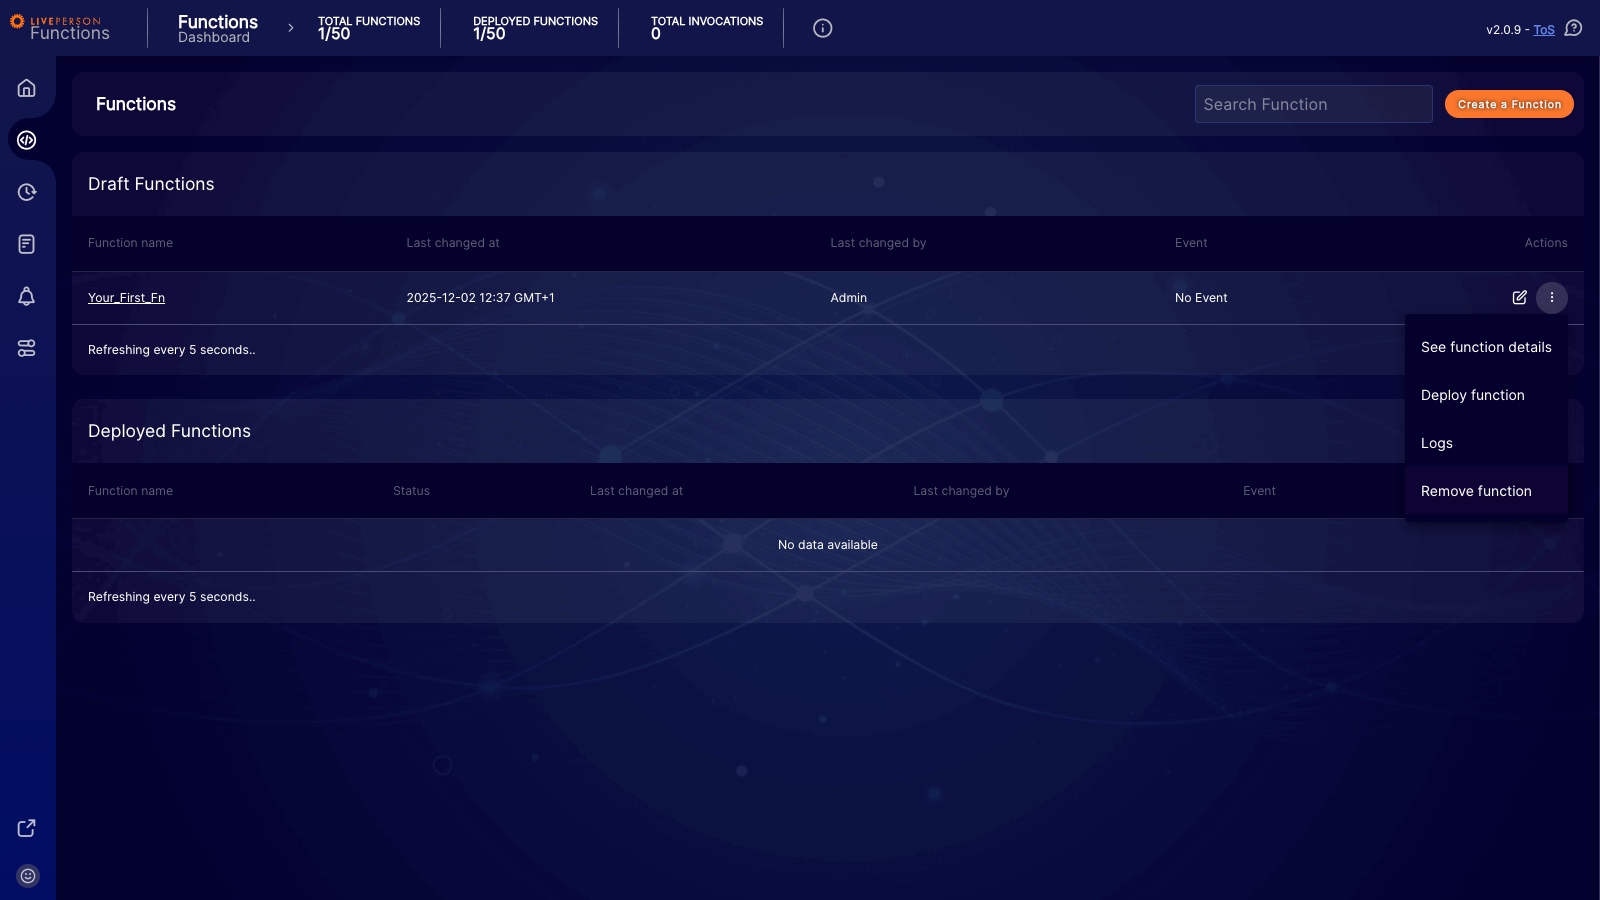
- A confirmation window will appear. Click Remove now to complete the process.
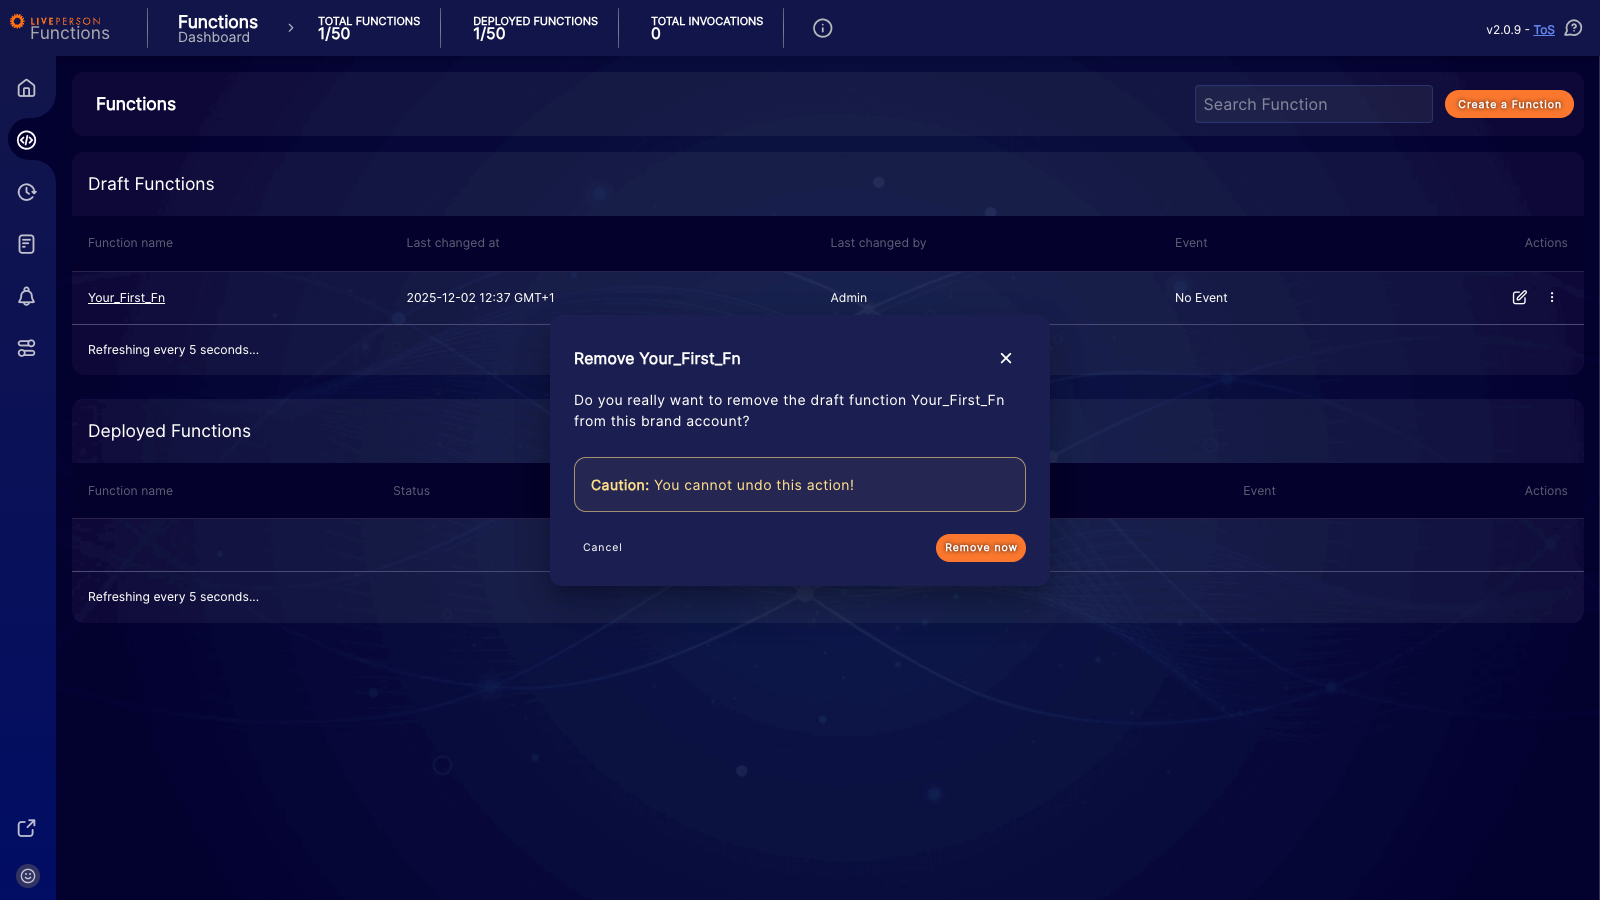
Proceed with caution! Once a function is deleted, it cannot be restored.
What we achieved
Congratulations on completing the quick start guide! You have successfully navigated the core lifecycle of LivePerson Functions. In this tutorial, we:
- Provisioned the environment: We initialized the necessary infrastructure to enable Functions for your account.
-
Created and coded: We scaffolded a new function,
Your_First_Fn, and implemented a basic "Hello World" response with logging. - Deployed: We promoted the code from a draft state to a live production environment.
- Tested: We verified the function's behavior and reviewed logs using the built-in test invocation client.
- Cleaned up: We walked through the process of undeploying and deleting resources to maintain a tidy workspace.