
Learn about scenario best practices.
Create a scenario using AI
- On the left navigation bar, click Synthetic customer builder > Scenarios.
-
Click Add.
-
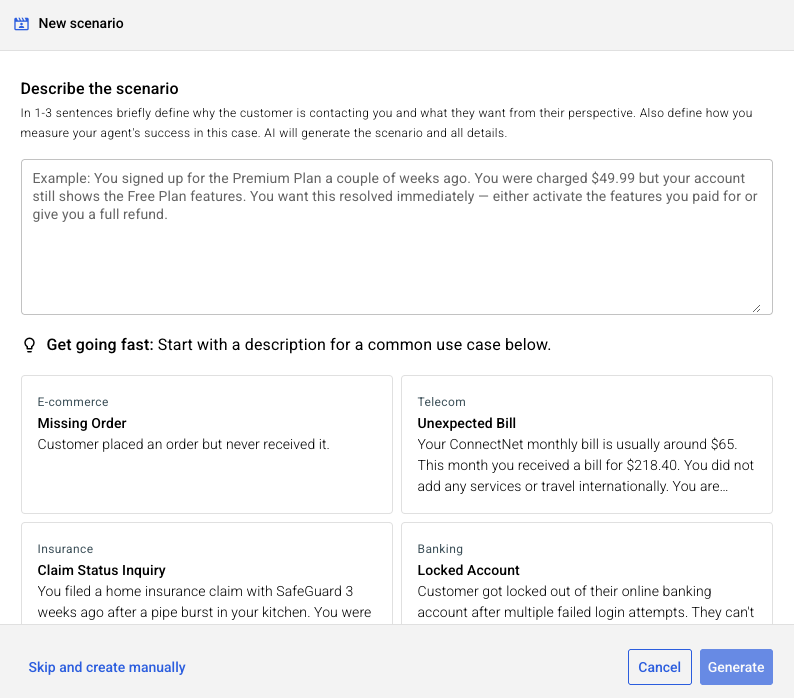
In 1-3 sentences briefly define why the customer is contacting you and what they want from their perspective. Also optionally define how you measure your agent's success in this case. AI will generate the scenario and many details.
Example: You signed up for the Premium Plan a couple of weeks ago. You were charged $49.99 but your account still shows the Free Plan features. You want this resolved immediately — either activate the features you paid for or give you a full refund.
-
Click Generate.
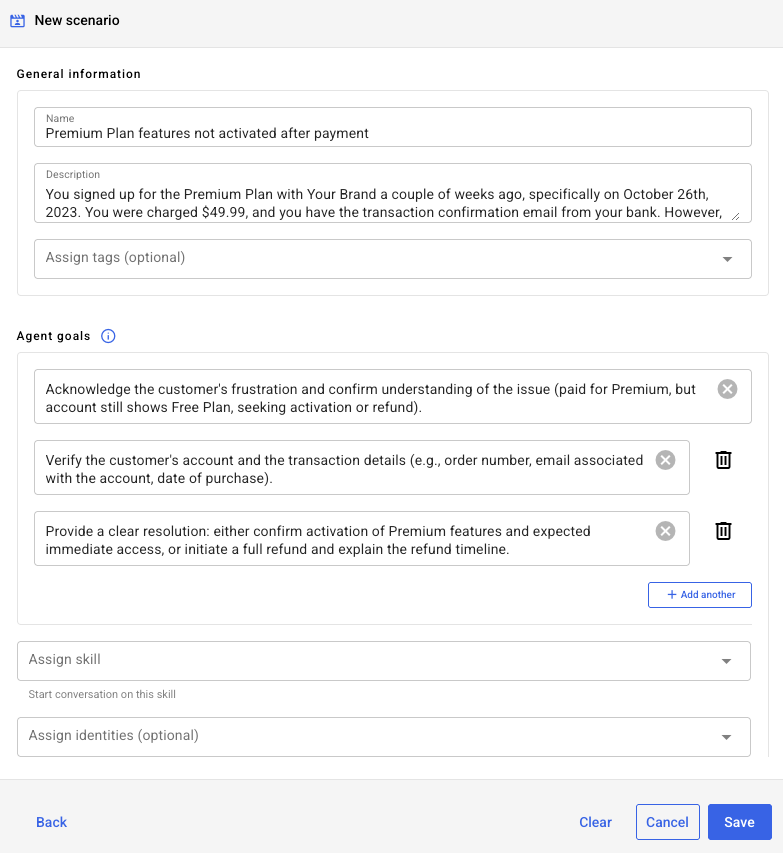
- Review the scenario details to ensure they meet your requirements. Make any desired changes.
- Tags: Beneath the Description, optionally associate tags with the scenario. Tags facilitate rapid filtering and organization, allowing you to quickly identify scenarios based on specific technical topics, difficulty levels, teams or departments, and more.
-
Routing target: Optionally specify the routing target that the agent must be assigned to interact with a synthetic customer about this scenario. Make this selection by first choosing a contact center, and then choosing one of its routing targets. If you have multiple contact centers configured, you can specify one routing target per contact center. (Learn more about routing targets.)
Don't see the routing target that you need in the list? Click Assign unlisted routing target to associate it, but be aware that this doesn't add it to your list of routing targets in the contact center's configuration in Settings. Alternatively, you can add or import the routing target into Syntrix, so it will appear in the list.
If you're assigning an unlisted routing target but don't know how to find its ID in Conversational Cloud, learn here.
Make an accurate routing target selection or entry; the system doesn't perform any validation to ensure the routing target exists.
-
Identities: Optionally select one or more identities to associate them with the scenario. (Learn how identities are distributed across conversations in a simulation.)
You can reuse identities in multiple scenarios.
- Click Save.
Create a scenario manually
- On the left navigation bar, click Synthetic customer builder > Scenarios.
- Click Add.
- In the lower-left corner of the window that appears, click Skip and create manually.
-
Specify the following:
- Name: Briefly describe the main topic or situation.
- Description: Describe in detail the customer’s case and needs, and provide all important context. Put the customer's goals here; don't put them in the scenario's agent goals.
- Tags: Optionally associate tags with the scenario. Tags facilitate rapid filtering and organization, allowing you to quickly identify scenarios based on specific technical topics, difficulty levels, teams or departments, and more.
- Agent goals: Define the benchmarks that determine agent success in this specific scenario. Goals should be scenario-specific, so, for example, "Agent was empathetic" isn't appropriate. Add at least one goal.
- Routing target: Optionally specify the routing target that the agent must be assigned to interact with a synthetic customer about this scenario. Make this selection by first choosing a contact center, and then choosing one of its routing targets. If you have multiple contact centers configured, you can specify one routing target per contact center. (Learn more about routing targets.)
Don't see the routing target that you need in the list? Click Assign unlisted routing target to associate it, but be aware that this doesn't add it to your list of routing targets in Settings. Alternatively, you can add or import the routing target into Syntrix, so it will appear in the list.
If you're assigning an unlisted routing target but don't know how to find its ID in Conversational Cloud, learn here.
Make an accurate routing target selection; the system doesn't perform any validation to ensure the routing target exists.
- Identities: Optionally select one or more identities to associate them with the scenario. (Learn how identities are distributed across conversations in a simulation.)
You can reuse identities in multiple scenarios.
- Click Save.
Delete a scenario
Before deleting a scenario, ensure it isn't being used in a profile. If it is, this will render the profile unusable, so update the profile as needed beforehand.
- On the left navigation bar, click Synthetic customer builder > Scenarios.
- Move the cursor over the row for the scenario that you want to delete, and click the delete icon that appears.
- Click Delete.