Introduction
In a contact center, a "routing target" is a foundational building block that's used to direct an incoming conversation to the most appropriate agent based on area of expertise (Sales, Support, VIP customers, etc.). This destination has different names in different contact center solutions: In LivePerson's Conversational Cloud, it's called a "skill." In other contact centers, it might be referred to as a "routing target" or "queue."
Within Syntrix, this destination is referred to as a "routing target."
Routing targets belong to a specific contact center. If your organization has more than one contact center configured, manage each one's routing targets separately from that contact center's own page.
Important notes
- To perform the tasks discussed on this page, you must have the Admin role.
- If you alter the routing targets that are defined outside of Syntrix (rename, delete, etc.), take care to update Syntrix accordingly. Re-import the routing targets into Syntrix (described below), and update impacted scenarios.
Before importing - Create the CSV file
To import routing targets into Syntrix, you need to use a CSV file. This import file must contain the following required columns:
- Column 1: The unique identifier for the routing target
- Column 2: The display name of the routing target
- Header rows: These can use any labels.

Conversational Cloud users: You can quickly and easily generate the import file by exporting your skills from Conversational Cloud: Click Manage > Users & Skills, and click the Skills tab. In the upper-right corner, select Actions > Export all. This downloads a ZIP containing several CSVs, including a Skills.csv. Extract the Skills.csv to a location of your choice.
Import routing targets
To import routing targets into Syntrix:
- On the left navigation bar, click Settings, and then click Contact centers.
- Click the contact center that you want to import routing targets for.
- Select the Routing targets tab.
- Click Import.
-
Click Select CSV file, navigate to and select the import file that you created. Click Import.
This adds the routing targets to that contact center in Syntrix, so you can use them when creating scenarios.
You'll need to import routing targets whenever you add new ones to your contact center. Learn more below.
Update routing targets via import
Importing routing targets adds them to the current contact center's list in Syntrix; it doesn't remove any existing routing targets. If a row in the CSV file matches the ID of a routing target that's already in Syntrix for that contact center, the row is skipped rather than overwriting the existing one.
To remove a routing target that no longer exists in your contact center application, delete it directly in Syntrix.
If you have any scenarios using a routing target that you delete, the system shows an error for those scenarios: Check Synthetic customer builder > Scenarios. Replace the deleted routing target with another suitable routing target.
Add a routing target
You can add a routing target manually. Typically, this is faster and easier than an import when you're working with just a few routing targets.
- On the left navigation bar, click Settings, and then click Contact centers.
- Click the contact center that you want to add a routing target to.
- Select the Routing targets tab.
- Click Add.
- Enter the ID and display name for the routing target. (Obtain these from the contact center UI.)
- Click Save.
Delete a routing target
Before deleting a routing target, verify it isn't being used in any scenarios.
- On the left navigation bar, click Settings, and then click Contact centers.
- Click the contact center that the routing target belongs to.
- Select the Routing targets tab.
- Select the checkbox for the routing target that you want to delete.
- Click Delete, and click Delete again to confirm the action.
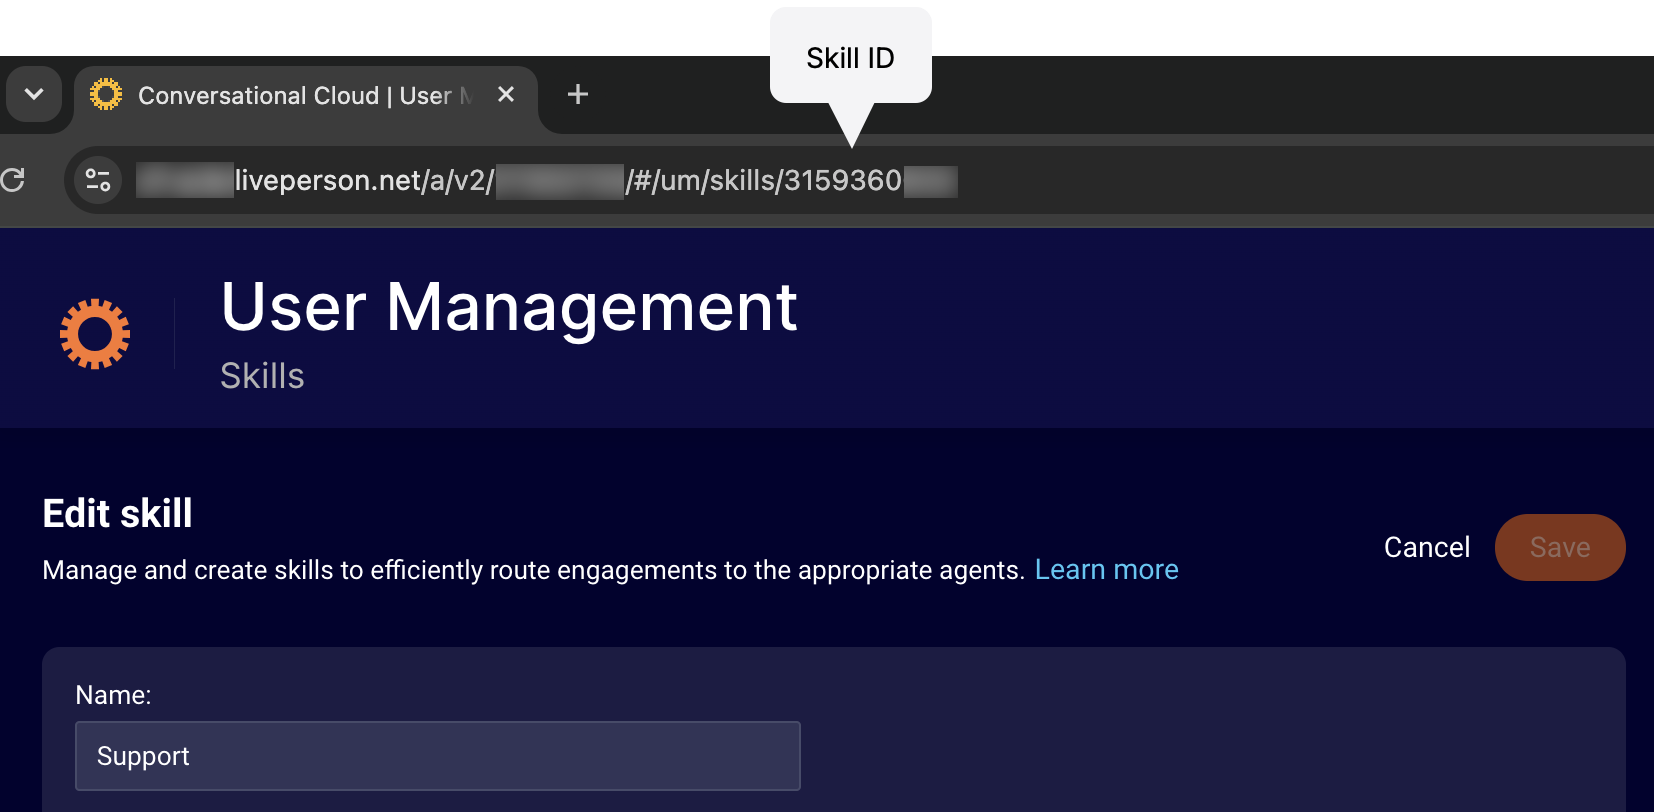
Retrieve a skill's ID in Conversational Cloud
In Conversational Cloud, routing targets are called "skills." You can retrieve a skill's ID by opening it for edit and examining the page's URL in the browser window, like so: