
Introduction
Syntrix is designed to support the configuration of one contact center at a time, although you can delete the existing one and set up a different contact center whenever necessary.
You can create synthetic customer assets in Syntrix at any time. However, you can only run simulations after you add your contact center to Syntrix.
To perform the tasks discussed on this page, you must have the Admin role.
Prerequisites
To request to onboard to Syntrix, contact your LivePerson representative.
In turn, your LivePerson representative will contact the onboarding team. They'll create an account with a single user for your brand. Invite others as needed.
Add a LivePerson Conversational Cloud contact center
- Log into Syntrix.
- On the left navigation bar, click Settings, and then click Contact center.
- From the dropdown, select "LivePerson Conversational Cloud."
-
Specify the following:
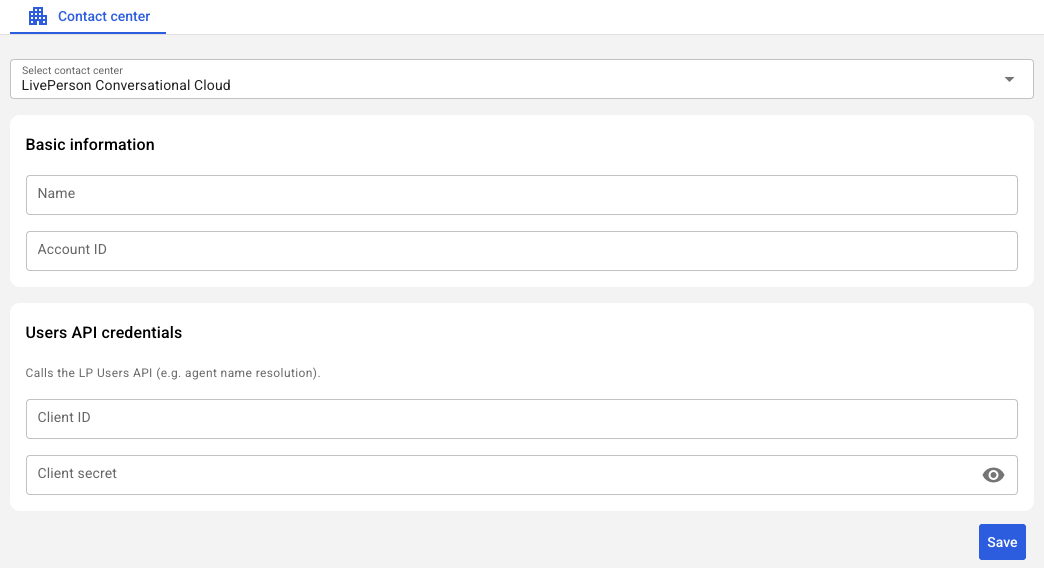
- Name: Enter an arbitrary name to identify the contact center within Syntrix.
- Account ID: The Conversational Cloud account (brand) ID that routes inbound open messages to this contact center.
- Client ID: OAuth2 credentials are used to authenticate Syntrix with Conversational Cloud and generate a bearer token to perform agent name lookups. So, in Conversational Cloud, you need to create an OAuth2 app for Syntrix, specify its scope, and enter here the OAuth2 app's client ID. Need help creating the app and obtaining the client ID? See the subsection that follows for help with this.
- Client secret: The client secret for the client ID that you specified. See the subsection that follows for help with this.
If the client ID and client secret that you specify are invalid, use of Syntrix with Conversational Cloud will work, but the system won't be able to resolve agent names. This will impact all reporting views.
- Click Save.
Obtain the client ID and client secret
- In Conversational Cloud, click Manage > Management Console.
- Search for "Application Management."
- Select App Install Administration from the search results.
- Click Proceed to configure.
- Scroll down to Application Management, and click Create Application.
-
Under General, specify the following:
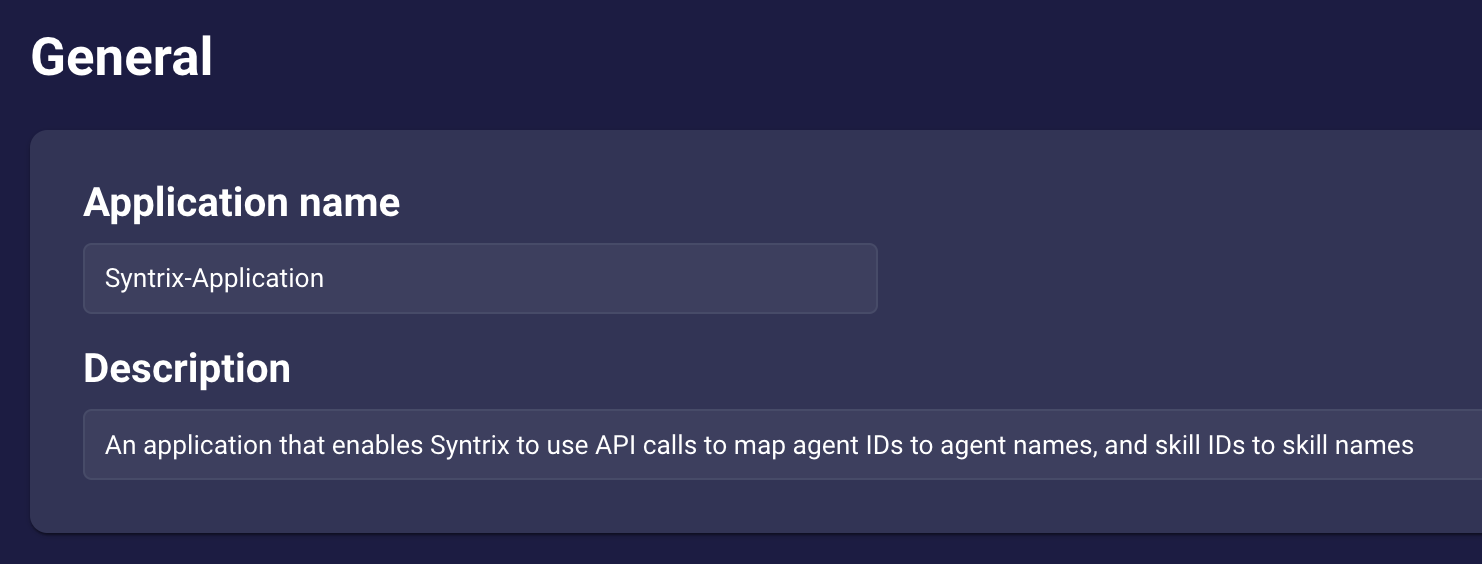
- Application name: Enter a name to identify the application, for example, "Syntrix-Application."
- Description: Enter a description, for example, "An application that enables Syntrix to use API calls to map agent IDs to agent names, and skill IDs to skill names."
-
Under API Permissions > Administration, select the following:
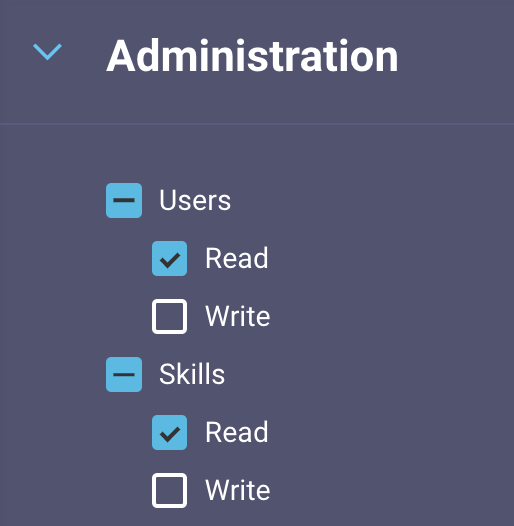
- Users > Read
- Skills > Read
- Click Create.
- In the Application Management table, beside the application name, click the 3-dot icon, and click Edit.
-
Scroll down to Authentication details, and copy both the Client ID and Client secret to a location of your choosing.
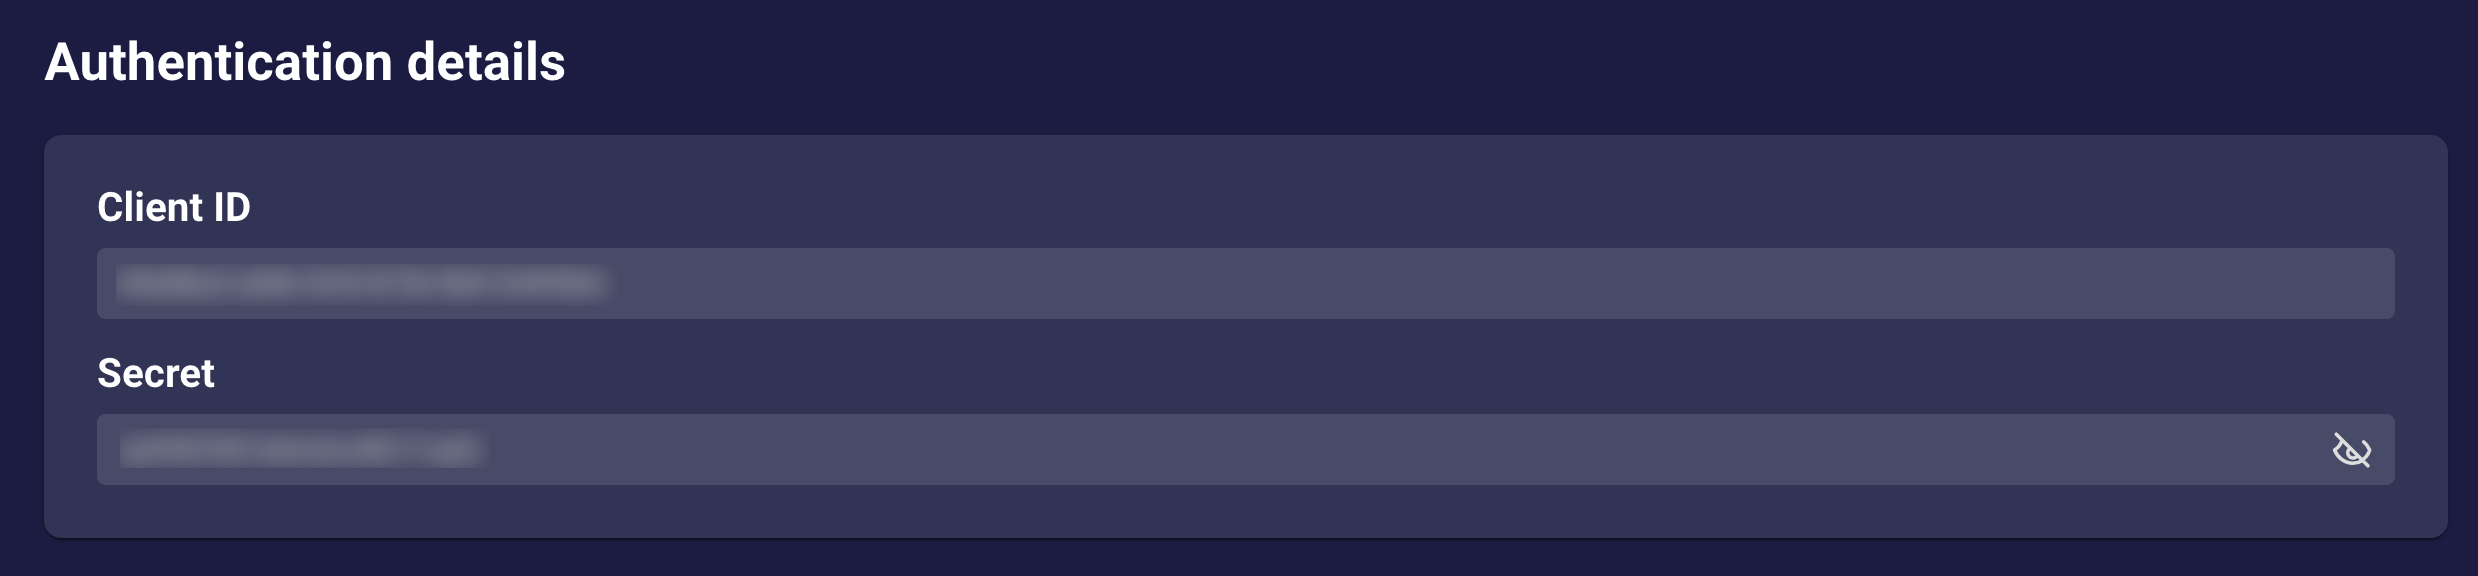
You can now return to the Contact Center configuration form in Syntrix, and paste in these credentials.
Add a Genesys Cloud contact center
Before you begin
The onboarding team will configure your Genesys account to support Syntrix. They'll also communicate with you about related steps and important details, for example, how to share client secrets securely. Once their work is completed, they'll engage your LivePerson representative with the details that you need to add the contact center to Syntrix. This info includes OAuth credentials and a webhook token that are then shared with you.
The onboarding process automatically creates a default routing queue in Genesys, assigning it a name that's prepended with "Syntrix_Default." Its purpose is to handle invalid routing targets from Syntrix. (In Syntrix, you specify a routing target in the Skill field in a scenario.) Once Genesys setup is complete, you can add test users to this fallback queue.
Add the Genesys Cloud contact center
- On the left navigation bar, click Settings, and then click Contact center.
- From the dropdown, select "Genesys Cloud."
-
Specify the following:
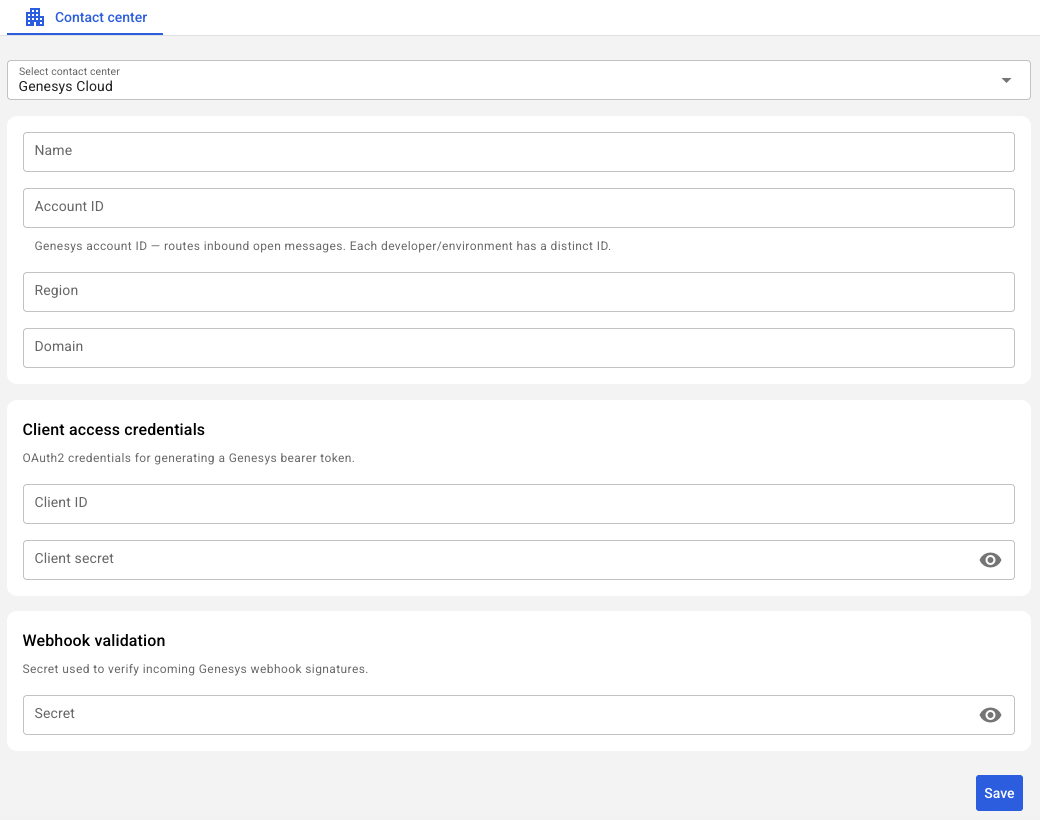
- Name: Enter an arbitrary name to identify the contact center within Syntrix.
- Account ID: The Genesys integration ID that routes inbound open messages to this contact center.
- Region: The AWS region where your Genesys Cloud organization is hosted, for example, "ap-southeast-2," "us-east-1," and so on.
- Domain: The Genesys Cloud domain for the region, for example, "mypurecloud.com.au," "mypurecloud.com," and so on.
- Client ID, Client secret, and Webhook secret: These will be shared with you by the onboarding team.
-
Click Test connection to send a real authentication request to Genesys using the client ID and client secret. If the credentials are valid, the test returns a success message. Otherwise, you'll see an error. Check the credentials, and update them if needed; then try again.
If the client ID, client secret, or webhook secret that you specify is invalid, simulations won't work.
- Click Save.
Delete a contact center
You can delete a contact center as long as there isn't a simulation that's in progress.
- On the left navigation bar, click Settings, and then click Contact center.
- In the lower-left corner, click Delete.
- In the confirmation dialog, click Delete to confirm the action.